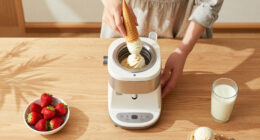
To craft an ice cream cake, start by choosing complementary flavors and softening the ice cream slightly. Line your pan with plastic wrap for easy removal, then layer your base—cookie crust, brownie, or cake—followed by spreading the ice cream evenly. Add cake or cookie layers and mix-ins for texture, then freeze the cake until firm. For more tips on perfecting your creation, keep exploring the process step by step.

Get baking supplies delivered free — and shop member deals
- Fast, free delivery on millions of items
- Access to Prime Big Deal Days deals on October 6–7
- Prime Video, Amazon Music and more included
Key Takeaways
- Select and soften ice cream flavors, then line your cake pan with plastic wrap or parchment paper.
- Build layers starting with the base, alternating ice cream and cake or cookie layers, pressing gently.
- Incorporate complementary flavors and mix-ins like candies or fruit to add texture and visual appeal.
- Finish with a smooth layer of ice cream, then freeze for at least four hours or overnight to set.
- Before serving, unwrap, soften slightly, and cut with a warm knife for clean slices.

Have you ever wondered how to make a perfect ice cream cake at home? It’s easier than you might think, especially when you understand the art of cake layering and flavor combinations. The key to a stunning ice cream cake lies in carefully stacking layers of different flavors and textures to create a delicious, eye-catching dessert. Start by choosing your flavors thoughtfully—classic combinations like chocolate and vanilla, or more adventurous pairings like strawberry and lemon—are great options. Once you’ve decided, soften your ice cream slightly so it’s easy to spread without melting too fast.
Next, prepare your cake pan by lining it with plastic wrap or parchment paper. This makes removing the finished cake a breeze. To build your cake, place a layer of your chosen base—whether it’s a cookie crust, brownie, or cake layer—at the bottom of the pan. This layer provides structure and a contrasting texture. Spread a generous scoop of softened ice cream over this layer, smoothing it out evenly with a spatula. Then, add another cake or cookie layer on top of the ice cream, pressing down gently to ensure stability. Repeat this process, alternating layers of cake and ice cream, until you reach the top of your pan.
Line your pan with plastic wrap for easy removal, then layer cake, ice cream, and repeat.
When selecting flavor combinations, think about how they’ll complement each other. Mixing rich chocolate with invigorating mint, or tangy raspberry with creamy vanilla, can elevate your dessert. You can also incorporate mix-ins like crushed cookies, candies, or fruit into each layer for added texture and flavor. Once all layers are stacked, finish with a final layer of ice cream, smoothing the top with a spatula. For a professional touch, wrap the pan with plastic wrap and freeze the cake for at least four hours, or overnight, to allow the flavors to meld and the cake to firm up.
Additionally, understanding shelf life of ice cream can help you plan your dessert and ensure it stays fresh and delicious during serving. When it’s time to serve, remove the cake from the freezer, unwrap, and let it sit at room temperature for a few minutes to soften slightly. To cut clean slices, use a warm knife, wiping it clean between cuts. The success of your homemade ice cream cake relies on thoughtful cake layering and flavor combinations that excite the palate and impress your guests. With a little planning and patience, you’ll craft a show-stopping dessert that’s perfect for any celebration or just a sweet treat to enjoy at home.
ice cream cake pan with plastic wrap
As an affiliate, we earn on qualifying purchases.
As an affiliate, we earn on qualifying purchases.
Frequently Asked Questions
How Long Can Ice Cream Cakes Be Stored in the Freezer?
You can store ice cream cakes in the freezer for about 1 to 2 months, but for the best taste and texture, aim for shorter storage times. To maximize the freezer lifespan, wrap your cake tightly in plastic wrap and aluminum foil, or use an airtight container. Follow these storage tips to prevent freezer burn and maintain the cake’s quality, ensuring it stays delicious until you’re ready to enjoy it.
Can I Use Homemade Ice Cream Instead of Store-Bought?
Yes, you can definitely use homemade ice cream instead of store-bought for your cake. Homemade ice cream offers better flavor customization, letting you choose your favorite ingredients and mix-ins. It also tends to be creamier and fresher, enhancing your cake’s taste. Just make sure it’s firm enough to layer easily in your cake, and you’ll enjoy a personalized, delicious treat with your preferred flavors.
What Are Some Popular Flavor Combinations for Ice Cream Cakes?
Think of ice cream cake flavor combinations as a vibrant painting—bright, inviting, and harmonious. Popular pairings include chocolate and vanilla with fruit swirls, cookies and cream with caramel, or mint and chocolate. You can also match color themes like pink and white for a strawberry-themed cake or blue and yellow for a lemon vibe. Mix and match your favorite flavors and colors to create a stunning, delicious masterpiece.
How Do I Prevent Ice Crystals From Forming on the Cake?
To prevent ice crystals from forming on your ice cream cake, focus on ice crystal prevention with proper freezing techniques. Keep the cake tightly wrapped in plastic wrap or foil, and store it in an airtight container. Regularly check that your freezer stays at a consistent, cold temperature. When serving, let the cake sit at room temperature for a few minutes to reduce surface ice, ensuring a smooth, creamy texture.
Can I Make an Ice Cream Cake Ahead of Time?
Imagine a perfectly layered ice cream cake, ready to impress. You can definitely make it ahead of time, giving you a head start on your celebration. Use make ahead planning by assembling the cake early and wrapping it tightly with plastic wrap. Store it in the freezer, ensuring it’s well covered to prevent ice crystals and flavor transfer. Follow these storage tips for a fresh, delicious dessert when you’re ready to serve.
Conclusion
Now that you’ve mastered the art of crafting ice cream cakes, you’re practically a dessert wizard! With these simple steps, you can create a show-stopping treat that’ll impress everyone and make your kitchen the envy of all bakeries. Remember, your ice cream cake will be so delicious it could cause happy tears—seriously, your friends might think you’ve discovered the secret to happiness itself. Go ahead, indulge and enjoy your masterpiece!
Fall Picks
fall essentials
As an affiliate, we earn on qualifying purchases.