
To make delicious raspberry ice cream at home, blend 2 cups of fresh raspberries with ¾ cup of sugar. Chill the mixture, then churn it with 1 cup of heavy cream and 1 cup of whole milk until creamy. Transfer to an airtight container and freeze for at least 4 hours. This simple recipe lets you enjoy vibrant flavors and the joy of creating a special treat. Keep going to discover more steps and tips for your homemade ice cream!
Key Takeaways
- Combine 2 cups fresh raspberries with ¾ cup granulated sugar to create a sweet puree for the ice cream base.
- Incorporate 1 cup heavy cream, 1 cup whole milk, 1 teaspoon vanilla extract, ¼ teaspoon salt, and 1 tablespoon lemon juice into the mixture.
- Chill the raspberry mixture in the freezer for 1 to 2 hours before churning.
- Use an ice cream maker to churn the chilled mixture until creamy and smooth.
- Transfer to an airtight container and freeze for at least 4 hours before serving.
History
Raspberry ice cream has a delightful history that dates back to the 16th century, when ice cream-like desserts began to emerge in Europe.
You might be surprised to learn that the first versions were often made with fruit purees, sugar, and ice. As techniques improved, people started experimenting with different flavors and textures.
By the 18th century, the concept of ice cream became more refined, and raspberry became a popular choice due to its vibrant color and invigorating taste.
In the 18th century, raspberry emerged as a favored ice cream flavor, celebrated for its vibrant color and refreshing taste.
When the ice cream machine was invented in the 19th century, it opened the door for countless variations, including the beloved raspberry ice cream you enjoy today.
It’s fascinating to think about how this treat has evolved over centuries!
Recipe
Indulging in homemade raspberry ice cream is a delightful way to enjoy the sweet and tangy flavor of fresh raspberries. This creamy dessert isn’t only a treat for your taste buds but also a wonderful way to cool down on a hot day. With just a few simple ingredients, you can create a luxurious ice cream that rivals any shop-bought version.
Plus, making ice cream at home allows you to control the sweetness and creaminess to suit your personal preferences.
To make raspberry ice cream, you’ll need to gather fresh raspberries, cream, and a few pantry staples. The vibrant color and natural sweetness of the raspberries shine through in this recipe, making it a perfect dessert for summer picnics, family gatherings, or simply as a sweet treat for yourself.
This recipe is easy to follow and requires minimal effort, making it an ideal choice for both novice and experienced home cooks.
Ingredients:
- 2 cups fresh raspberries
- 1 cup heavy cream
- 1 cup whole milk
- ¾ cup granulated sugar
- 1 teaspoon vanilla extract
- ¼ teaspoon salt
- 1 tablespoon lemon juice
Instructions:
In a blender, puree the fresh raspberries until smooth, then strain the mixture through a fine mesh sieve to remove the seeds, collecting the raspberry juice in a bowl.
In a separate mixing bowl, whisk together the heavy cream, whole milk, granulated sugar, vanilla extract, salt, and lemon juice until the sugar is fully dissolved.
Gently fold the raspberry puree into the cream mixture until well combined. Pour the mixture into an ice cream maker and churn according to the manufacturer’s instructions until it reaches a soft-serve consistency.
Transfer the ice cream to an airtight container and freeze for at least 4 hours or until firm.
Extra Tips:
For an added depth of flavor, consider mixing in some crushed graham crackers or chocolate chips during the last few minutes of churning.
If you don’t have an ice cream maker, you can pour the mixture into a shallow dish and freeze it, stirring every 30 minutes for the first few hours to break up ice crystals until it reaches a smooth consistency.
Additionally, using ripe raspberries will enhance the sweetness of your ice cream, so look for plump, vibrant berries at the market.
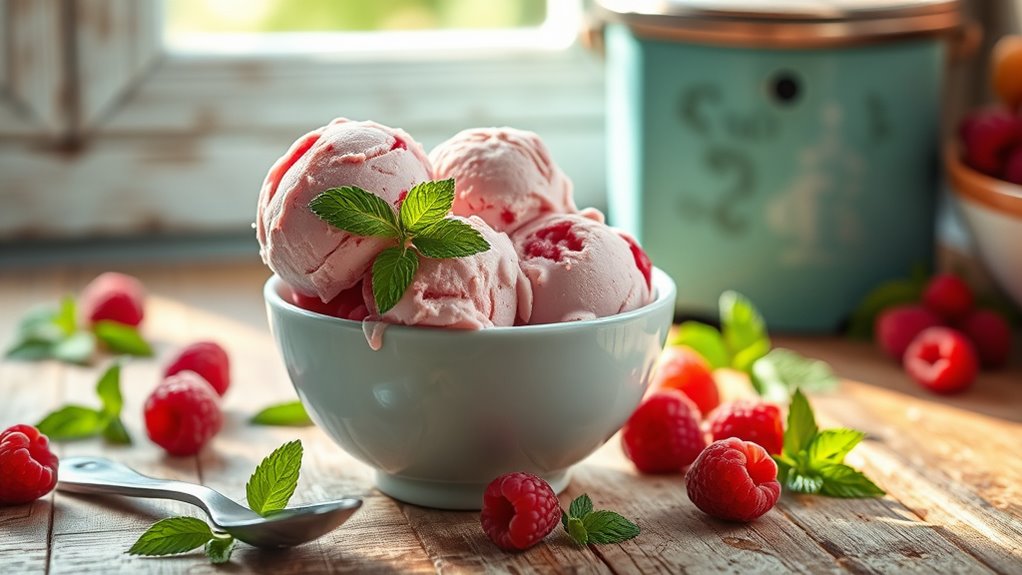
Enjoy your homemade raspberry ice cream as a revitalizing dessert or a creamy topping for your favorite pie!
Cooking Steps
To make your raspberry ice cream, you’ll start by preparing fresh raspberries.
Next, blend them with sugar to create a sweet mixture.
After that, you’ll chill it in the freezer before churning until it’s nice and smooth.
Step 1. Prepare Fresh Raspberries
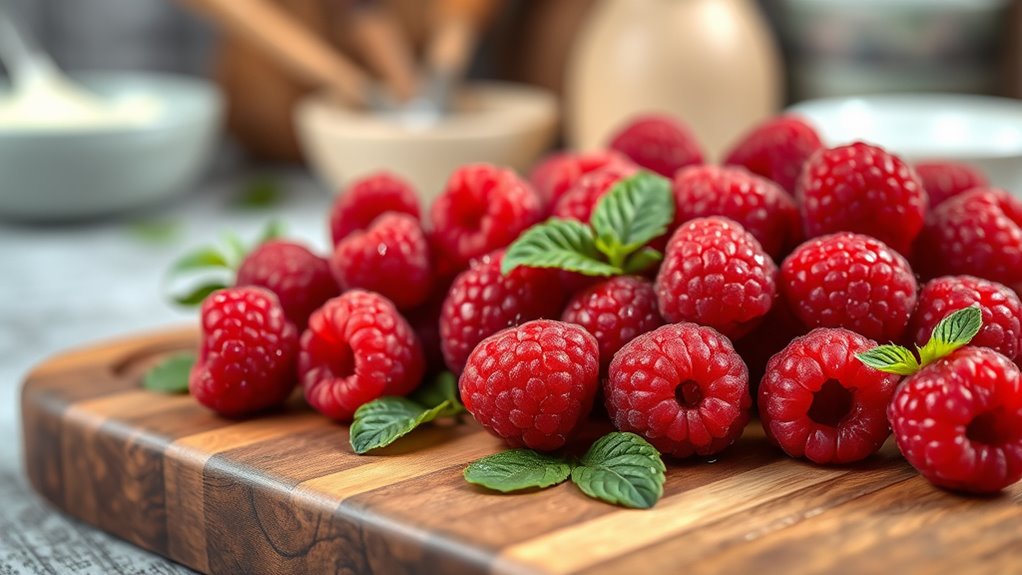
Before diving into the ice cream-making process, you’ll want to prepare your fresh raspberries properly. Start by selecting ripe, plump raspberries, as they’ll provide the best flavor for your ice cream.
Gently rinse them under cool running water to remove any dirt or residue, being careful not to crush them. After rinsing, lay the raspberries out on a clean kitchen towel or paper towels to dry. This step is essential, as excess moisture can affect the texture of your ice cream.
Once they’re dry, inspect each raspberry for any that are overripe or spoiled, and discard those. Now your fresh raspberries are ready for the next step in creating that delightful raspberry ice cream!
Step 2. Blend Raspberries With Sugar

Start by placing your dried raspberries in a blender or food processor.
Next, add the sugar to the raspberries. You’ll want to use about half a cup of sugar, but feel free to adjust according to your taste.
Secure the lid tightly and blend the mixture until it’s smooth and well combined. Scrape down the sides of the blender or processor as needed to guarantee everything’s evenly mixed.
The goal is to break down the raspberries completely while incorporating the sugar, creating a vibrant, sweet raspberry puree.
Once you’ve achieved a smooth consistency, give it a quick taste. If it needs a little more sweetness, add a touch more sugar and blend again.
You’re now ready for the next step!
Step 3. Chill Mixture in Freezer
Once your raspberry puree is ready, pour it into a shallow dish or a freezer-safe container. This will help the mixture chill evenly.
Place the dish in the freezer for about 1 to 2 hours, allowing it to firm up slightly. Make sure to check on it periodically; you want it to be cold but not completely frozen solid.
If you notice it’s becoming too hard, just give it a good stir to break up any ice crystals that may form. This step is essential for achieving a creamy texture later.
Once chilled, you’ll be ready to move on to the next steps in creating your delicious raspberry ice cream. Enjoy the anticipation of your sweet treat!
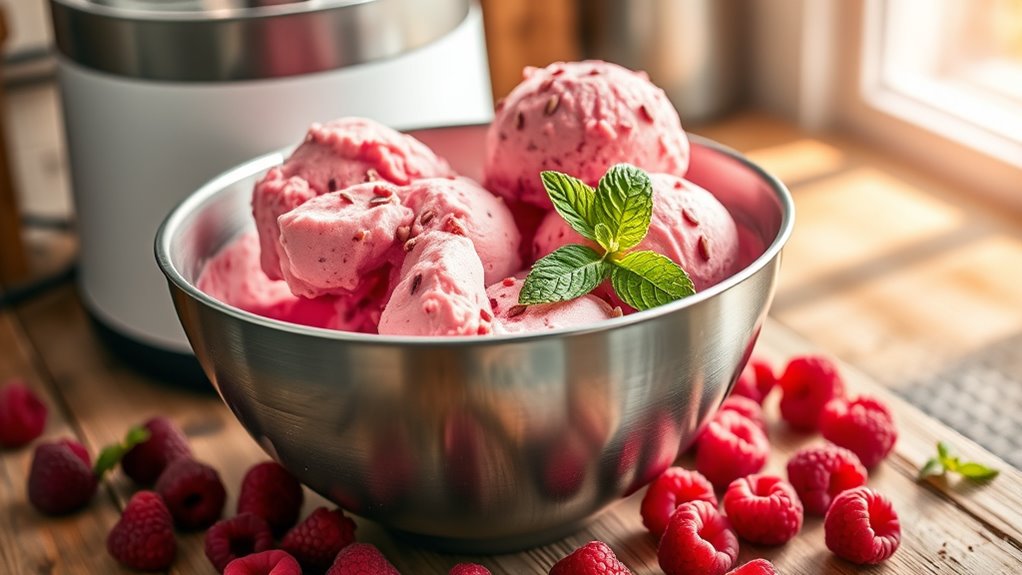
Step 4. Churn Until Smooth
Churn the chilled raspberry mixture in your ice cream maker according to the manufacturer’s instructions.
As the mixture churns, keep an eye on its texture. You’ll notice it gradually thickening and becoming creamier. This process usually takes about 20 to 30 minutes, but it can vary based on your machine.
Make certain to scrape down the sides of the bowl occasionally to guarantee even mixing. If your ice cream maker has a clear lid, you can watch as the vibrant color deepens and the mixture transforms into a luscious, smooth consistency.
You’re looking for a soft-serve-like texture—smooth and velvety, not overly frozen. Once you reach that perfect creaminess, stop the machine and prepare for the next step.
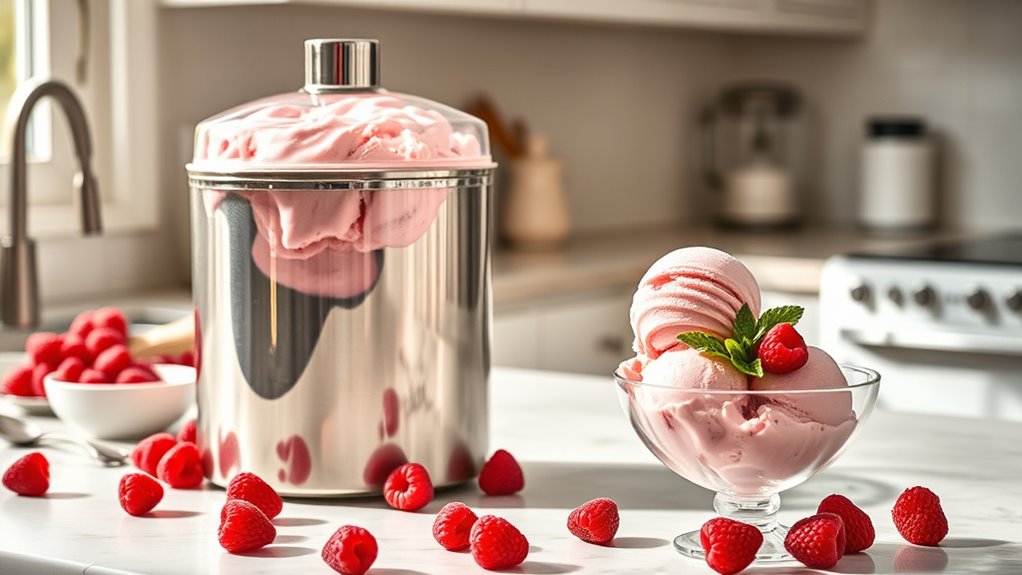
Step 5. Transfer to Serving Container
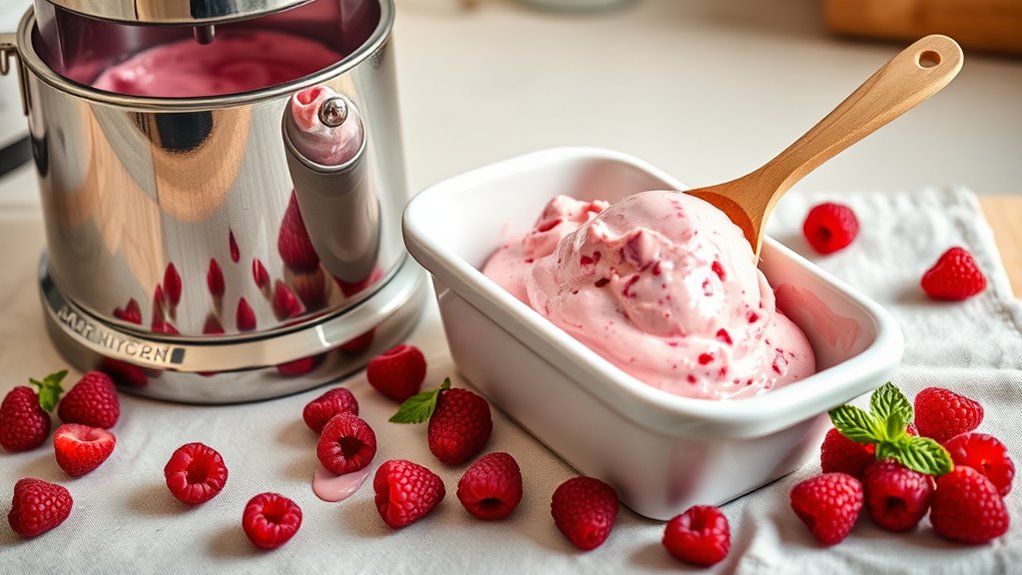
With the raspberry mixture now achieving that perfect soft-serve texture, it’s time to move forward.
Grab an airtight container, preferably one with a lid, to store your delicious creation. Using a spatula, gently scoop the mixture from the churner, ensuring you capture every bit of that vibrant raspberry goodness.
Spread it evenly in the container, pressing down lightly to eliminate any air pockets. This helps create a smoother texture as it sets.
Once you’ve transferred all the mixture, cover the container with its lid or plastic wrap to keep it fresh.
Pop it into the freezer for at least four hours or until it firms up to your desired consistency. Enjoy knowing you’re just a scoop away from a delightful treat!
Final Thoughts
As you savor your homemade raspberry ice cream, you’ll likely appreciate the vibrant flavors and creamy texture that make it a delightful treat.
This recipe isn’t just about enjoying a fantastic dessert; it’s about the joy of creating something special. You’ve combined fresh ingredients with a touch of love, resulting in a rejuvenating indulgence perfect for any occasion.
Don’t hesitate to experiment with the recipe. Try adding different fruits or mix-ins to suit your taste. Remember, the beauty of homemade ice cream lies in its versatility.
Share your creation with friends and family, and watch as they relish every spoonful. So, scoop out a bowl, sit back, and enjoy the fruits of your labor. You’ve earned this moment of bliss!
Frequently Asked Questions
Can I Use Frozen Raspberries Instead of Fresh Ones?
Absolutely, you can use frozen raspberries instead of fresh ones! They’re often picked at peak ripeness and can give your dish a vibrant flavor.
Just remember to thaw them first, as this will help release their juices and enhance their taste. If you’re looking for a smoother texture, consider blending them before adding to your mix.
It’s a great way to enjoy raspberries year-round without compromising on flavor!
How Long Does Raspberry Ice Cream Last in the Freezer?
You’d think raspberry ice cream could last forever, but even the most delicious treats have their limits!
In the freezer, your homemade raspberry ice cream will stay fresh for about two to three weeks. After that, it might lose its creamy texture or develop freezer burn, turning your indulgence into a sad, icy mess.
To savor its delightful flavor, try to enjoy it within that timeframe for the best experience!
Is There a Dairy-Free Version of Raspberry Ice Cream?
Yes, you can definitely make a dairy-free version of raspberry ice cream!
By using coconut milk, almond milk, or cashew cream as a base, you’ll create a creamy texture without any dairy.
Mix in fresh or frozen raspberries, a sweetener of your choice, and a splash of vanilla extract for flavor.
Blend everything together, freeze it, and you’ll have a delicious dairy-free treat that’s just as satisfying as the traditional version!
Can I Add Other Flavors or Ingredients to the Recipe?
Imagine a blank canvas waiting for your artistic touch. You can absolutely add other flavors or ingredients to your recipe!
Think about swirling in some chocolate, adding fresh mint, or even tossing in crushed cookies for a delightful crunch. Each addition transforms your creation, just like colors on that canvas.
Just be mindful of balance; too many ingredients can overwhelm the original flavor.
Get creative and make it uniquely yours!
What Equipment Do I Need to Make Raspberry Ice Cream?
To make delicious ice cream, you’ll need a few key pieces of equipment. First, grab an ice cream maker, which can be manual or electric.
You’ll also want a mixing bowl for combining ingredients and a whisk for blending. Don’t forget measuring cups and spoons for accuracy!
If you’re using fresh fruit, a blender or food processor will help puree it. Finally, have an airtight container ready for storing your finished treat.