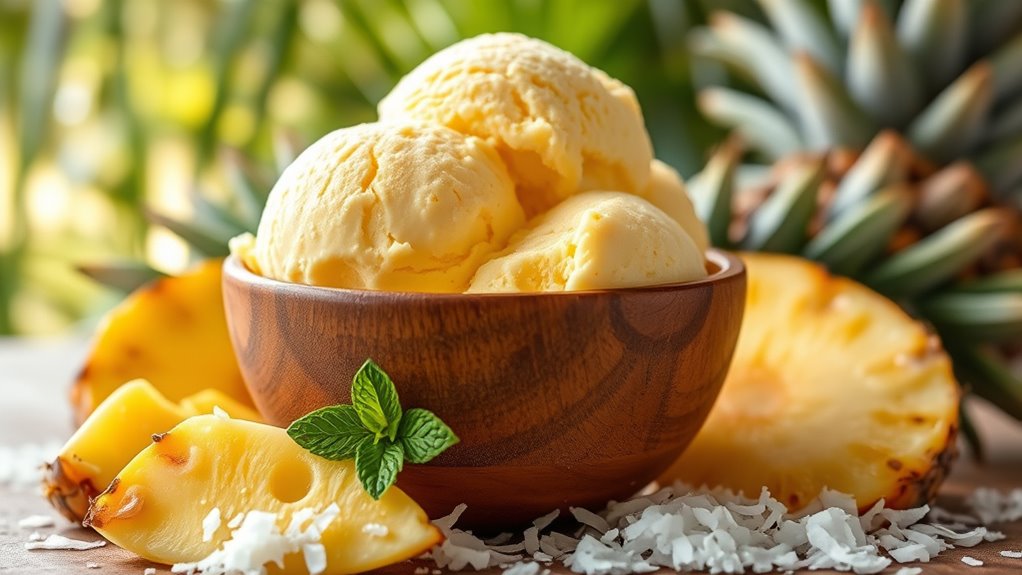

To make delicious pineapple ice cream, blend 2 cups of diced fresh pineapple with a mix of 1 cup heavy cream, 1 cup whole milk, 3/4 cup sugar, 1 teaspoon vanilla, 1 tablespoon lemon juice, and a pinch of salt. Chill the mixture, then churn it in an ice cream maker until creamy. Freeze it afterward for a few hours. You’ll impress friends and family with this sweet treat—stick around to discover helpful tips and serving suggestions!
Key Takeaways
- Combine 2 cups of diced fresh pineapple with 1 cup of heavy cream, 1 cup of whole milk, and sugar for a creamy base.
- Blend the pineapple and cream mixture until smooth, adding 1 teaspoon of vanilla extract and 1 tablespoon of fresh lemon juice for flavor.
- Pour the blended mixture into a freezer-safe container, cover tightly, and freeze for 2 to 4 hours until firm.
- If using an ice cream maker, churn the chilled mixture according to the manufacturer’s instructions until creamy.
- Serve the pineapple ice cream with optional toppings like toasted coconut, fresh fruit, or chocolate sauce for added flavor.
History
When you think about pineapple ice cream, you mightn’t realize its rich history. This delicious treat traces back to the 18th century when Europeans first encountered pineapple in the Caribbean. The fruit quickly became a symbol of luxury and hospitality.
Pineapple ice cream’s origins date back to the 18th century, symbolizing luxury and hospitality after its discovery in the Caribbean.
As ice cream gained popularity in the 1700s, creative cooks started experimenting with fruits, including pineapple. By the 19th century, recipes for pineapple ice cream began circulating, often featuring hand-churned techniques.
Canned pineapple also played a crucial role, making the fruit accessible year-round. As tropical flavors became trendy, pineapple ice cream solidified its place in dessert menus worldwide.
Today, you can enjoy this sweet, tangy treat, celebrating centuries of culinary innovation and cultural exchange.
Recipe
Pineapple ice cream is a revitalizing and tropical dessert that captures the essence of summer in every creamy bite. This delightful treat combines the sweetness of ripe pineapples with the smooth texture of ice cream, making it a perfect choice for warm days or special occasions.
Whether you’re hosting a barbecue or simply indulging in a sweet snack, homemade pineapple ice cream is sure to impress your family and friends.
Making pineapple ice cream from scratch is easier than you might think! With just a few simple ingredients and a bit of patience, you can create a delicious frozen dessert that’s both satisfying and full of flavor. This recipe uses fresh pineapple to enhance the taste, but you can also use canned pineapple if necessary.
So gather your ingredients, and let’s get started on this delightful frozen treat!
Ingredients:
- 2 cups fresh pineapple, diced
- 1 cup heavy cream
- 1 cup whole milk
- 3/4 cup granulated sugar
- 1 teaspoon vanilla extract
- 1 tablespoon fresh lemon juice
- Pinch of salt
Instructions:
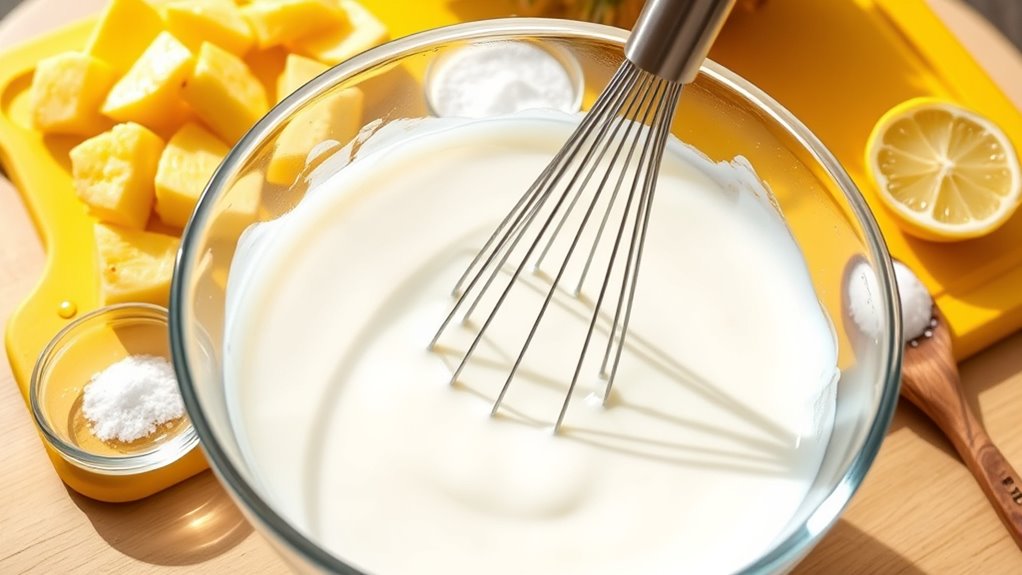
In a blender, combine the diced pineapple, sugar, and lemon juice, and blend until smooth.
In a separate bowl, whisk together the heavy cream, whole milk, vanilla extract, and salt until well combined.
Gently fold the pineapple puree into the cream mixture until fully incorporated.
Pour the mixture into an ice cream maker and churn according to the manufacturer’s instructions until it reaches a soft-serve consistency.
Transfer the ice cream to an airtight container and freeze for at least 4 hours or until firm.
Extra Tips:
For a creamier texture, consider chilling the mixture in the refrigerator for a couple of hours before churning it in the ice cream maker.
If you don’t have an ice cream maker, you can pour the mixture into a shallow dish and freeze it, stirring every 30 minutes until it reaches the desired consistency.
Feel free to add mix-ins like shredded coconut or crushed macadamia nuts for an extra tropical twist!
Cooking Steps
To make your pineapple ice cream, start by chopping fresh pineapple chunks.
Then, blend them with coconut milk for a creamy base.
After that, chill the mixture in the freezer until it’s ready to whip smooth.
Step 1. Chop Fresh Pineapple Chunks
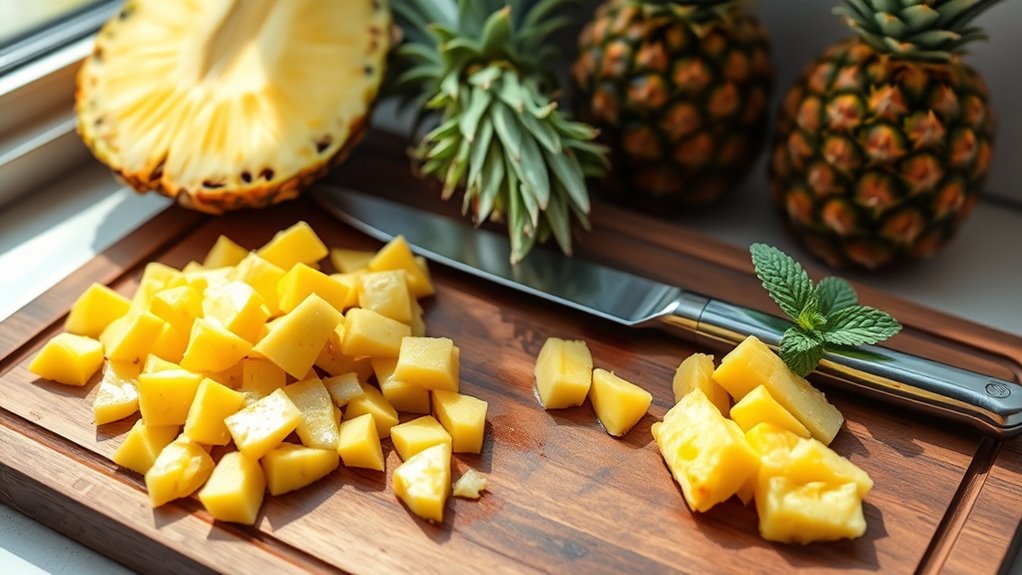
As you prepare to chop fresh pineapple chunks, make certain you’ve got a sharp knife and a sturdy cutting board ready.
Start by cutting off the top and bottom of the pineapple to create a flat base. Stand it upright and carefully slice off the skin, following the natural curve of the fruit. Remove any remaining eyes by making small, diagonal cuts.
Once the pineapple is peeled, cut it into quarters lengthwise. Remove the tough core from each quarter, then slice the pineapple into bite-sized chunks. Aim for uniform pieces to guarantee even blending later.
As you chop, keep your fingers tucked in to avoid accidents. Transfer the chunks to a bowl, and you’re all set for the next step!
Step 2. Blend With Coconut Milk

Start by adding your fresh pineapple chunks to a blender.
Next, pour in one can of creamy coconut milk. This combination will create a delightful tropical flavor that pairs perfectly with the pineapple.
Blend the mixture on high until smooth and creamy, ensuring there are no pineapple chunks left. If you like a sweeter ice cream, consider adding a tablespoon or two of honey or maple syrup at this stage, then blend again to incorporate.
Scrape down the sides of the blender as needed to mix everything evenly. Once you achieve a silky texture, taste the mixture to adjust sweetness if necessary.
Now your pineapple and coconut blend is ready for the next step in making your delicious ice cream!
Step 3. Chill Mixture in Freezer

Once your pineapple and coconut blend is smooth, pour the mixture into a freezer-safe container.
Make certain to leave some space at the top, as the mixture will expand as it freezes.
Cover the container tightly with a lid or plastic wrap to prevent ice crystals from forming.
Place it in the freezer and allow it to chill for about 2 to 4 hours, or until it’s firm enough to scoop.
Keep an eye on it during this time; you want it to be solid but not rock-hard.
After the initial freeze, you can move on to the next step to guarantee your ice cream reaches that perfect creamy consistency.
Enjoy the anticipation of delicious flavors to come!
Step 4. Whip Until Smooth
After letting your mixture chill in the freezer, it’s time to whip it until smooth.
Take your chilled mixture out and transfer it to a large mixing bowl. Using an electric mixer, beat the mixture on medium speed for about 2-3 minutes. You want to incorporate air to achieve a light and fluffy texture, so don’t rush this step.
As you whip, keep an eye on the consistency; it should become creamy and homogeneous without any lumps. If you notice any ice crystals forming, keep going until everything blends perfectly.
Once it’s smooth, stop mixing and give it a taste. Adjust sweetness if needed before you move on to the next steps in your delicious pineapple ice cream journey.
Step 5. Serve With Toasted Coconut
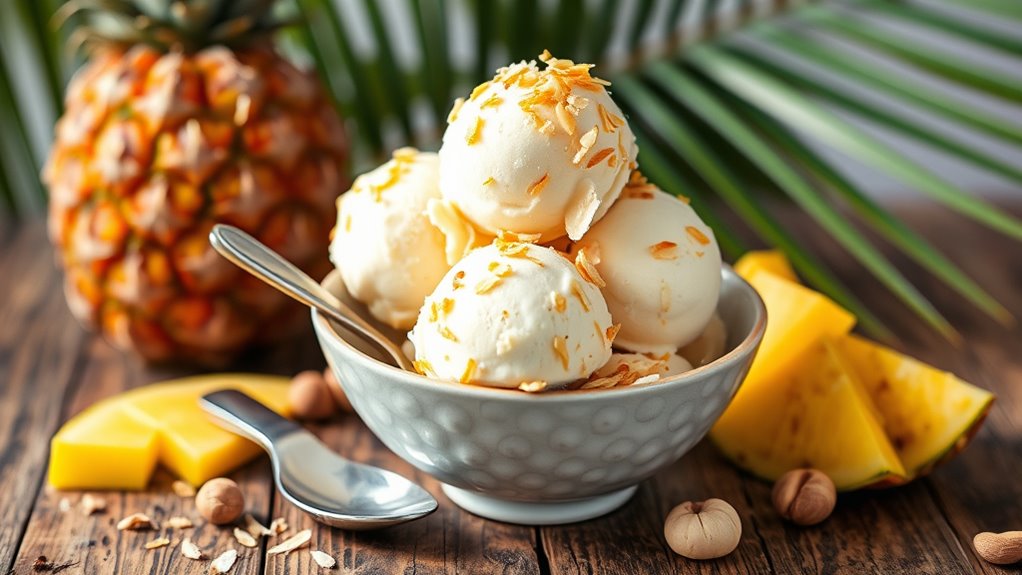
To elevate your pineapple ice cream experience, serve it with toasted coconut.
Start by preheating your oven to 350°F (175°C). Spread unsweetened shredded coconut evenly on a baking sheet. Bake for about 5-10 minutes, stirring occasionally, until the coconut turns golden brown and fragrant. Keep a close eye on it, as it can burn quickly!
Once toasted, remove it from the oven and let it cool slightly.
Scoop your creamy pineapple ice cream into bowls or cones, and generously sprinkle the toasted coconut on top. This adds a delightful crunch and enhances the tropical flavor.
You can also mix some toasted coconut into the ice cream for an extra layer of texture. Enjoy this delicious pairing!
Final Thoughts
While you might be tempted to stick with traditional ice cream flavors, making pineapple ice cream at home opens up a world of tropical delight. This invigorating treat not only tantalizes your taste buds but also brings a taste of summer into your kitchen year-round.
Making pineapple ice cream at home offers a refreshing twist, bringing a taste of summer to your kitchen all year round.
You’ll love the creamy texture and the perfect balance of sweetness and tartness. Plus, it’s a fun way to impress friends and family at gatherings or simply enjoy a scoop on a quiet afternoon.
Experiment with your favorite toppings, like toasted coconut or fresh fruit, to elevate the experience. So, grab your ingredients and start blending! You won’t regret diving into this homemade pineapple ice cream adventure.
Enjoy every delicious bite!
Frequently Asked Questions
Can I Use Frozen Pineapple Instead of Fresh?
Absolutely, you can use frozen pineapple instead of fresh!
In fact, frozen pineapple can add a creamy texture and make your dish colder, enhancing the overall flavor. Just make sure to thaw it slightly before using, as this will help it blend better.
If you’re worried about sweetness, taste a piece first; frozen fruit is often picked at peak ripeness, so it may be just as sweet as fresh.
Enjoy your creation!
How Long Does Homemade Pineapple Ice Cream Last?
Ah, the eternal question of culinary preservation!
Homemade pineapple ice cream typically lasts about two weeks in the freezer when stored properly in an airtight container. After that, it may start to lose its creamy texture and flavor.
You’ll want to label it with the date you made it to keep track. Just remember, the sooner you enjoy it, the fresher and tastier it’ll be!
Is This Recipe Suitable for Vegans?
Yes, this recipe can be suitable for vegans if you use plant-based ingredients.
Instead of dairy, you can opt for coconut milk or almond milk, which provides a creamy texture.
Check that any sweeteners or additional flavors are also vegan-friendly.
By making these simple substitutions, you’ll create a delicious treat that aligns with a vegan diet.
Just remember to double-check all ingredients to verify they meet your dietary preferences.
Enjoy!
Can I Add Other Fruits to the Recipe?
Absolutely, you can add other fruits to the recipe!
Try mixing in berries, mangoes, or bananas for a burst of flavor. Just remember to adjust the sweetness, depending on the fruit you choose.
If you want a smoother texture, blend the fruits into the mixture before freezing.
Experimenting with different combinations can lead to delicious results, so don’t hesitate to get creative with your fruit choices!
Enjoy your fruity creation!
What Is the Best Way to Store Leftovers?
Storing leftovers is like wrapping a cherished memory in a cozy blanket.
To keep your treats fresh, scoop them into an airtight container, sealing in the flavor like a treasure chest.
Place the container in the freezer, where it can hibernate until you’re ready to enjoy it again.
Remember to label it with the date, so you don’t lose track of your delightful creation.
With this method, your leftovers will stay delicious and ready for another day!