TL;DR

Get baking supplies delivered free with Prime
- Fast, free delivery on millions of items
- Prime Video, Amazon Music and more included
- Member-only deals all year
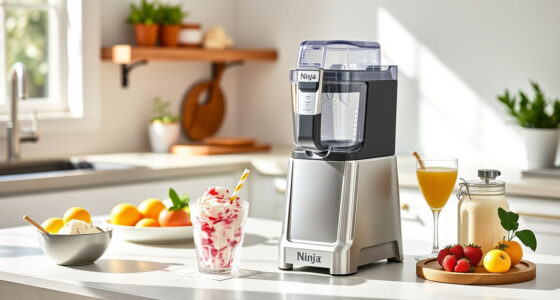
Ice cream maker machines come in three main types: freezer-bowl, compressor, and salt-and-ice. Each offers unique benefits, but choosing depends on your baking style, space, and budget. The right machine makes homemade ice cream easier, faster, and more delicious.
Imagine the rich, creamy swirl of homemade ice cream, just waiting to be scooped. It’s easier than you think—if you pick the right machine. Whether you want a quick treat on a hot day or a weekend project, understanding the different types of ice cream makers is your first step to perfect desserts.
In this guide, you’ll learn how each machine works, their advantages and drawbacks, and how to choose one that fits your kitchen and lifestyle. No more guesswork—just smooth, scoopable ice cream whenever you crave it.
Choose a freezer-bowl for occasional use and tight budgets; compressor machines suit frequent, instant batches.
Proper recipe formulation and ingredient temperature are just as important as your machine in making smooth ice cream.
Pre-freezing bowls and cleaning removable parts save time and effort, extending your machine’s lifespan.
Recent innovations like self-refrigerating models and smart controls make home ice cream making easier and more customizable.
Always measure your space, read reviews, and compare features before buying to avoid costly mistakes.
3 Types of Ice Cream Makers and Which Fits Your Lifestyle
The first step? Know what kind of machine matches your needs. The three main types are freezer-bowl, compressor, and salt-and-ice. Each has its quirks, and your choice shapes how much time, effort, and space you’ll need.
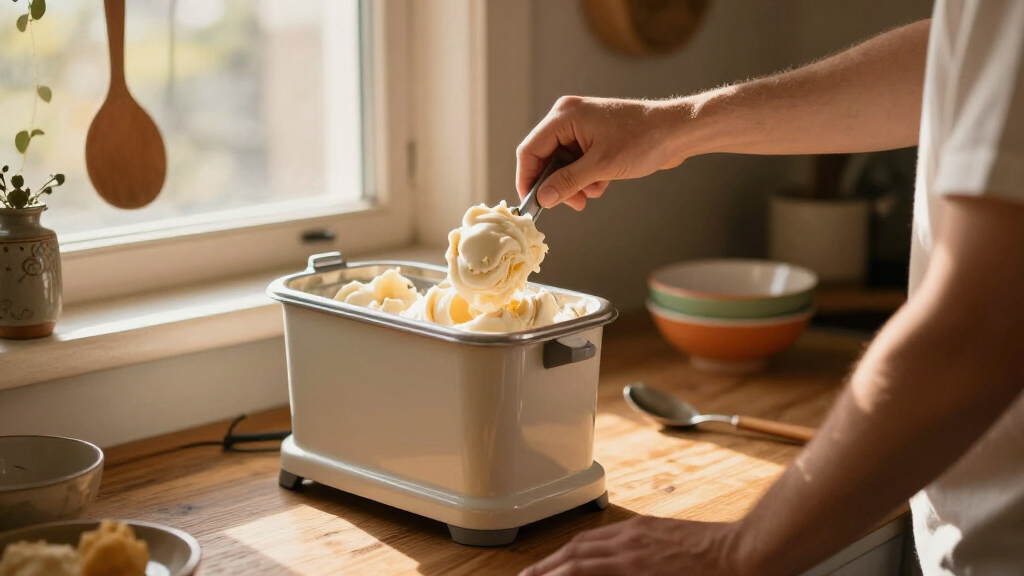
Freezer-bowl machines are simple, affordable, and compact. They use a removable bowl that must be frozen 12–24 hours beforehand. This requirement means planning ahead, but it also allows you to store multiple bowls for quick swaps, enabling more frequent batches without the need for a bulky machine. However, they are limited in capacity and require you to wait between batches, which can interrupt your creative flow or party plans.
Compressor machines are the premium choice, offering the convenience of instant operation. They contain their own refrigeration system, so there’s no need to pre-freeze bowls. This allows for continuous, multiple batches, making them ideal for regular use or large gatherings. The tradeoff? They are heavier, take up more space, and cost significantly more upfront. But for those who value speed and flexibility, they can turn your home into a mini ice cream parlor without the hassle of prep work.
Salt-and-ice machines harken back to traditional homemade ice cream methods. They chill the mixture through a combination of ice and rock salt surrounding an inner canister. This method often handles larger quantities, making it suitable for parties or family gatherings. The downside? They require manual labor—either hand-cranking or managing a motor—and more prep time. Additionally, they can be messier and less precise in temperature control, which affects consistency. Choosing this type means balancing nostalgia and capacity against convenience and effort.
Here’s a quick comparison:
| Type | Pre-freezing? | Batch Capacity | Best For |
|---|---|---|---|
| Freezer-bowl | Yes | 1–2 quarts | Occasional use, small batches |
| Compressor | No | Up to 2 quarts | Frequent use, multiple batches |
| Salt-and-ice | No | Larger, party-sized | Traditional style, large groups |
As an affiliate, we earn on qualifying purchases.
How Does an Ice Cream Maker Turn Liquid Into Creamy Perfection?
Think of an ice cream maker as a magic wand that transforms a simple liquid mixture into a silky, spoonable treat. It works by freezing the base while continuously stirring. This process is essential because it prevents the formation of large ice crystals, which would otherwise give your ice cream a gritty, icy texture. Instead, churning keeps the ice crystals small and evenly distributed, resulting in that smooth, velvety consistency you love.
Most home machines churn for about 20–45 minutes. During this time, the paddle rotates, scraping the sides and incorporating air—known as “overrun.” This aeration is vital because it lightens the texture, making the ice cream more enjoyable and scoopable. Once the churning is complete, the mixture is often at a soft-serve stage, but a few hours in the freezer hardens it further into the perfect scoopable form.
Imagine pouring your favorite vanilla custard into the bowl, turning on the machine, and listening to a gentle whir. Within minutes, you get a luscious, creamy mixture that’s just soft enough to spoon. This transformation hinges on the combination of freezing and constant movement—without it, the mixture would freeze into a hard, icy block.
This process is crucial because it directly impacts the final texture. Without proper churning, large ice crystals form, making the ice cream icy and grainy. Proper agitation ensures a smooth, consistent, and enjoyable dessert—just like in professional ice cream shops. Understanding this helps you appreciate why some homemade batches turn out better than others and guides you in troubleshooting or optimizing your recipes.
Features That Make or Break Your Home Ice Cream Experience
When shopping for an ice cream maker, some features matter more than others. Capacity, freezing method, and controls are the big players. Here’s what you should look for and why they matter:
- Capacity: Most home machines churn 1–2 quarts. Choosing the right size depends on your typical batch size and storage space. Larger capacity means more dessert at once but also more space and potentially higher cost.
- Freezing method: Pre-frozen bowls require planning but are usually more affordable and compact. Built-in refrigeration (compressor) offers convenience and continuous use but increases the size and price of the machine. Your choice affects how quickly and often you can make ice cream without interruption.
- Churning performance: A powerful motor and well-designed paddle ensure smooth, consistent texture. If the motor is too weak, the mixture may not churn evenly, leading to icy patches or incomplete freezing. Conversely, too much power might cause over-agitation, affecting creaminess. Balance is key.
- Controls: Basic on/off switches are straightforward, but advanced controls—like timers, texture settings, or pre-cooling—allow for more precise results and less manual intervention. These features can help produce the ideal consistency every time.
- Cleaning: Removable paddles and bowls simplify cleanup, especially if you add mix-ins or use sticky ingredients. Fixed bowls in compressor models often require wiping, which can be easier but less thorough. Ease of cleaning extends machine lifespan and ensures hygiene.
- Size and noise: Compressor units tend to be larger and louder. Consider your kitchen space and tolerance for noise, especially if you plan frequent use or have open-concept layouts.
- Ingredient openings: Wide openings near the top of some machines allow you to add mix-ins like chocolate chips or fruit chunks during churning without stopping the machine, which can improve texture and flavor integration.
The key is to select a machine that balances these features based on your typical usage—whether you prioritize convenience, capacity, or ease of cleaning. Understanding how these features influence your experience helps you choose a model that fits your lifestyle and results in consistently delicious ice cream.
What Really Affects Your Ice Cream’s Texture and Flavor?
The machine itself is just part of the story. The quality of your ingredients, your recipe choices, and your handling of the mixture play equally vital roles in achieving that perfect scoop. Let’s explore why:
- Fat, sugar, and solids: Fat from cream and milk creates richness and a smooth mouthfeel. Sugar not only sweetens but also lowers the freezing point, preventing the mixture from becoming too hard or icy. Proper balance of these ingredients ensures a creamy, scoopable texture. Additionally, milk proteins and stabilizers help control ice crystal growth, maintaining smoothness over storage.
- Base temperature: Starting with a cold base—ideally chilled overnight—ensures rapid freezing and smaller ice crystals. This reduces the risk of iciness and results in a more velvety product. Warm or room-temperature bases take longer to freeze, increasing the likelihood of large crystals forming.
- Churning and overrun: The amount of air incorporated during churning (overrun) influences texture. More air creates a lighter, fluffier ice cream; less air results in a denser, richer dessert. Commercial brands often have 30–50% overrun, while home machines typically produce denser textures. Adjusting overrun by controlling churning time or recipe ingredients can tailor the final product.
- Storage: Proper storage prevents ice crystals from growing larger over time. Using shallow, airtight containers and keeping the ice cream consistently cold minimizes ice crystal formation. Repeated thawing and refreezing compromise texture, making it grainy and icy. Understanding these factors helps you maintain quality even after initial preparation.
For example, a strawberry sorbet with the right balance of fruit, sugar, and stabilizers, churned at the correct temperature, will be smooth and vibrant. Conversely, neglecting ingredient quality or storage can turn an otherwise perfect recipe into a hard, icy mess. Recognizing how these elements interact empowers you to troubleshoot and optimize your homemade ice cream for the best possible texture and flavor.
Different Desserts Need Different Techniques—Here’s How to Nail Each One
Not all frozen treats are created equal, and each requires specific techniques to achieve the desired texture and flavor. Understanding these nuances allows you to tailor your approach and get professional-quality results at home. Here’s a breakdown of common frozen desserts and what makes each special:
- Custard ice cream: Made with cooked egg yolks, this variety offers a rich, smooth, and stable texture. The eggs act as natural stabilizers and emulsifiers, preventing ice crystal growth and creating a dense, creamy mouthfeel. Proper cooking and cooling are essential to avoid curdling and ensure a silky finish.
- Philadelphia-style: No eggs, lighter, with more dairy flavor. It’s easier to make but may lack the stability of custard-based ice creams. Achieving a good texture relies on churning at the right temperature and balance of ingredients to prevent iciness.
- Gelato: Contains less fat and air (less overrun) than traditional ice cream, served at slightly warmer temperatures. This results in a dense, intensely flavored, and silky texture. Precise temperature control during churning is critical; too cold and it becomes hard and icy, too warm and it loses creaminess.
- Sorbet: Made primarily from fruit purée, sugar, and water, with no dairy. The balance of fruit and sugar is vital; too much water or sugar can cause iciness, while too little can make it overly hard. Proper freezing and churning create a smooth, vibrant dessert that showcases the fruit’s flavor.
- Frozen yogurt: Lower in fat and higher in water content, it’s prone to ice crystal formation. Using stabilizers or gums can help improve creaminess. The technique involves controlling fermentation and freezing to balance tanginess with smoothness.
- Vegan ice cream: Uses plant-based fats (like coconut or avocado) and thickeners to mimic dairy’s creaminess. Formulation is key because plant fats and stabilizers behave differently during freezing, affecting texture and flavor.
- Soft serve: Slightly different formulation and serving immediately give it a softer, creamier texture. Some home machines mimic soft serve by incorporating specific settings or serving at warmer temperatures. Proper handling and quick serving preserve this characteristic.
Each type demands attention to ingredient quality, temperature control, and churning technique. Recognizing these differences ensures you can adapt your recipes and process to produce the ideal dessert—whether you want a dense gelato or a light sorbet. Your machine is just the tool; mastering technique and ingredients is what elevates your homemade frozen treats to professional levels.
Latest Trends Making Your Ice Cream Even Better
Market innovation is all about convenience, customization, and healthier options. Some exciting trends include:
- Compact self-refrigerating machines: No pre-freezing needed, saving space and time. They utilize built-in cooling systems, allowing you to churn fresh ice cream whenever you like without planning ahead—perfect for spontaneous cravings or busy households.
- Automated settings: Texture, hardness, and temperature controls at the push of a button. These features help achieve consistent results with minimal effort, making home ice cream making more accessible for beginners and perfectionists alike.
- Single-serve and personalized options: Machines designed for individual portions or custom flavors promote variety and reduce waste. They cater to dietary restrictions and flavor preferences, giving everyone a tailored treat.
- Reprocessing devices: Fully frozen mixtures shaved or processed into soft-serve or gelato textures. These innovations allow you to enjoy a variety of textures from a single base, expanding your repertoire.
- Vegan and allergen-conscious designs: Catering to dietary needs with plant-based ingredients and special stabilizers. These machines emphasize inclusivity, allowing more people to enjoy homemade frozen desserts.
- Enhanced features: Quieter motors, easier cleaning, and integrated recipe apps. These improvements make the process more user-friendly and enjoyable, encouraging experimentation and frequent use.
For example, new self-refrigerating models can churn out a batch in just 30 minutes, perfect for spontaneous cravings or last-minute gatherings. The trend points toward smarter, quicker, and more versatile machines—making your homemade ice cream experience richer than ever. Embracing these innovations means you can enjoy consistently high-quality desserts with less hassle and more creativity, transforming your kitchen into a full-fledged ice cream lab.
Limitations and Myths That Might Trick You
Not every claim about home ice cream makers holds up under scrutiny. Many misconceptions can lead to frustration or misguided expectations. For instance, a compressor machine doesn’t automatically guarantee superior ice cream quality; it simply offers greater convenience and consistent temperature control, which can help but doesn’t compensate for poor ingredients or technique. Understanding this helps you set realistic goals and avoid unnecessary expenses.
“Ready in 20 minutes” often refers only to the churning process. Achieving optimal results involves preparing the base, which may take hours, especially if you need to chill it thoroughly. Additionally, recipes with low sugar content tend to freeze harder, making scooping difficult, while adding excessive alcohol can prevent freezing altogether. Recognizing these tradeoffs allows you to adjust recipes and expectations accordingly.
Big mix-ins like chocolate chips or fruit chunks should be added near the end of churning to prevent jamming or uneven distribution. Most home ice creams are soft immediately out of the machine—hardening in the freezer improves texture and scoopability. Also, incorporating eggs or stabilizers can significantly enhance creaminess and stability, but overdoing them can lead to undesirable textures. Being aware of these nuances helps you troubleshoot common issues and produce consistent results.
Knowing these limitations and myths prevents disappointment and guides you toward more effective techniques and realistic expectations, ultimately making your homemade ice cream experience more successful and satisfying.
Safety, Maintenance, and Keeping Your Machine Alive
Every great ice cream maker needs some TLC to ensure longevity and consistent performance. Follow the manufacturer’s instructions carefully—removable parts are usually dishwasher safe, but fixed bowls and internal components benefit from gentle wiping rather than soaking or abrasive scrubbing. Compressor units should stay upright for a few hours after transport to allow the refrigerant to settle, preventing damage and ensuring optimal cooling performance.
Never use sharp or metal utensils on the bowl or paddle, as they can scratch or damage the surface, leading to leaks or inefficient freezing. Always cook and cool dairy or egg bases thoroughly to avoid food safety issues, especially when using raw ingredients. Clean your machine promptly after each use to prevent residue buildup, which can harbor bacteria or cause flavor transfer, particularly when working with allergens like nuts or dairy.
Ensure good ventilation around compressor models, as they generate heat and noise during operation. If the paddle jams or the motor stalls, stop the machine immediately to prevent damage. Regular maintenance—such as checking seals, replacing worn parts, and lubricating moving components—extends your machine’s lifespan and maintains high-quality results. Treat your ice cream maker as a valued kitchen partner, and it will reward you with countless delicious desserts for years to come.
Choosing the Perfect Machine for Your Kitchen and Budget
Deciding on the right ice cream maker depends on your habits, space, and budget. If you only occasionally indulge, a freezer-bowl model offers affordability, compactness, and ease of storage. But if you’re a frequent maker or want to experiment with multiple flavors and larger batches, investing in a compressor model provides instant access, higher capacity, and greater flexibility—saving time and effort in the long run.
Consider your kitchen space carefully. Compressor units are larger and noisier, so measure your counter and check for adequate ventilation. Budget-wise, freezer-bowl models are less expensive upfront but require planning ahead, while compressor machines cost more initially but offer ongoing convenience. For traditionalists or those hosting big gatherings, salt-and-ice machines remain an option, though they demand more manual labor and cleanup.
Use this checklist to compare options effectively:
- Type and pre-freezing needs
- Batch capacity and frequency of use
- Size, weight, and noise considerations
- Ease of cleaning and maintenance
- Price and warranty coverage
- Additional features like timers, mix-in openings, or digital controls
Matching these factors to your specific needs ensures a satisfying purchase that enhances your home dessert repertoire without unnecessary expense or hassle.
Your Quick-Start Buying Checklist
Before clicking “buy,” consider this practical checklist to ensure you select the best fit:
- Decide on the machine type (freezer-bowl, compressor, or salt-and-ice) based on your usage habits and space.
- Check batch capacity and whether pre-freezing is required, aligning with your typical serving size and schedule.
- Measure your available counter space and consider weight limits, especially for larger models.
- Look for removable, dishwasher-safe parts to simplify cleaning and maintenance.
- Compare noise levels, especially if your kitchen is open-concept or if noise is a concern.
- Verify if the machine supports mix-ins or has automatic programs for convenience.
- Review warranty coverage and availability of replacement parts for long-term peace of mind.
- Set a realistic budget based on how often you plan to use the machine and the features you desire.
This quick checklist helps you avoid buyer’s remorse and ensures you find a machine that makes homemade ice cream a delightful, effortless experience.
Most Common Questions About Home Ice Cream Machines, Answered
Do I need to freeze the bowl first? Only freezer-bowl models require pre-freezing. Compressor and frozen-container units incorporate their own cooling systems, allowing immediate use—saving time and effort, especially if you’re making ice cream frequently or spontaneously.
How long does it take to make homemade ice cream? Churning typically takes 20–45 minutes, depending on the recipe and machine. However, base preparation and chilling can add hours, and hardening in the freezer might require an additional 2–4 hours. Planning for these steps ensures your ice cream reaches the ideal consistency.
Why is my ice cream icy? Icy texture often results from an insufficiently cold base, excess water, or improper freezing temperature. Slow freezing or storing the mixture at room temperature before churning can cause large ice crystals. Ensuring your ingredients are cold and your freezer is set appropriately helps produce a smooth, velvety dessert.
Why is my ice cream too soft or too hard? Softness immediately after churning is normal; it’s at a soft-serve stage. Hardness usually indicates overfreezing or storing in a very cold freezer. Letting the ice cream soften slightly at room temperature before serving can improve scoopability. Adjusting freezer temperature and timing can help you achieve the perfect firmness.
Can I make vegan or low-sugar ice cream? Yes. Using plant-based fats (like coconut milk or avocado), stabilizers, and sweeteners designed for lower sugar content can produce delicious options. However, reducing sugar can cause ice crystals to grow larger, so formulation adjustments—like adding gums or stabilizers—are essential for maintaining creaminess and preventing iciness.
Matching your recipe modifications with your machine’s capabilities ensures you get the best texture and flavor, regardless of dietary needs.
Conclusion
Remember, the best ice cream maker is the one that fits your lifestyle, space, and flavor cravings. It’s not just about churning—quality ingredients, proper technique, and understanding your machine make all the difference. Now, get scooping and turn your kitchen into a mini ice cream parlor.
With the right tools and a little practice, your homemade ice cream can rival any shop. So, which machine will you choose to start your frozen adventure?
Halloween Picks
halloween
As an affiliate, we earn on qualifying purchases.