
Warm mix-ins melt and streak your ice cream because their heat quickly transfers to the cold dessert, causing uneven melting and streaks. The larger the temperature difference, the faster the heat moves, disrupting the ice cream’s structure. Ingredients with high fat or chunky textures melt faster, making streaks more noticeable. To prevent this, proper temperature control and timing are key. Keep exploring for expert tips on adding warm mix-ins flawlessly every time.
Key Takeaways
- Warm mix-ins transfer heat rapidly to cold ice cream, causing uneven melting and streaks.
- Larger temperature differences between the mix-in and ice cream accelerate heat transfer, increasing streaking.
- Composition and texture of mix-ins, like fat content, influence melting speed and streak formation.
- Adding warm ingredients too early or at incorrect temperatures leads to melting and streaks.
- Proper timing, cooling, and gradual addition help prevent streaks and ensure uniform melting.

Lightbeam Digital Candy Thermometer, Instant Read Kitchen Cooking & Spatula Thermometer Temperature Reader & Stirrer in One BPA Free Food Grade Material
Essential Kitchen Tool: This candy spatula thermometer is a versatile and indispensable tool for cooking, baking, and candy-making…
As an affiliate, we earn on qualifying purchases.
As an affiliate, we earn on qualifying purchases.
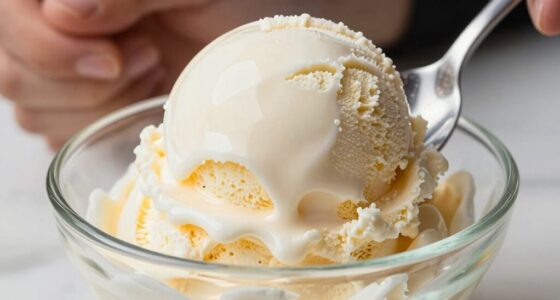
Why Does Warm Mix-Ins Cause Ice Cream to Melt Faster?
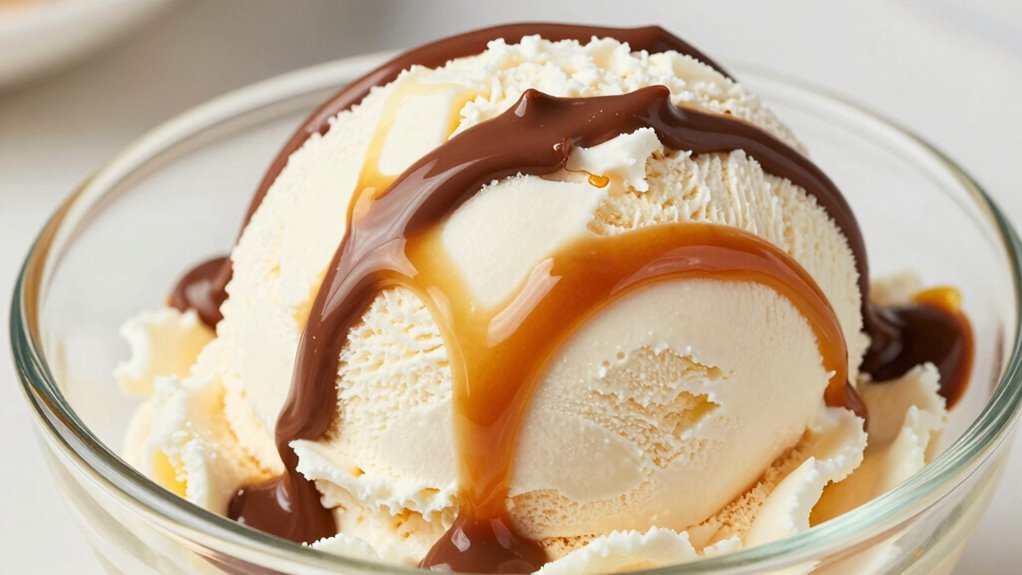
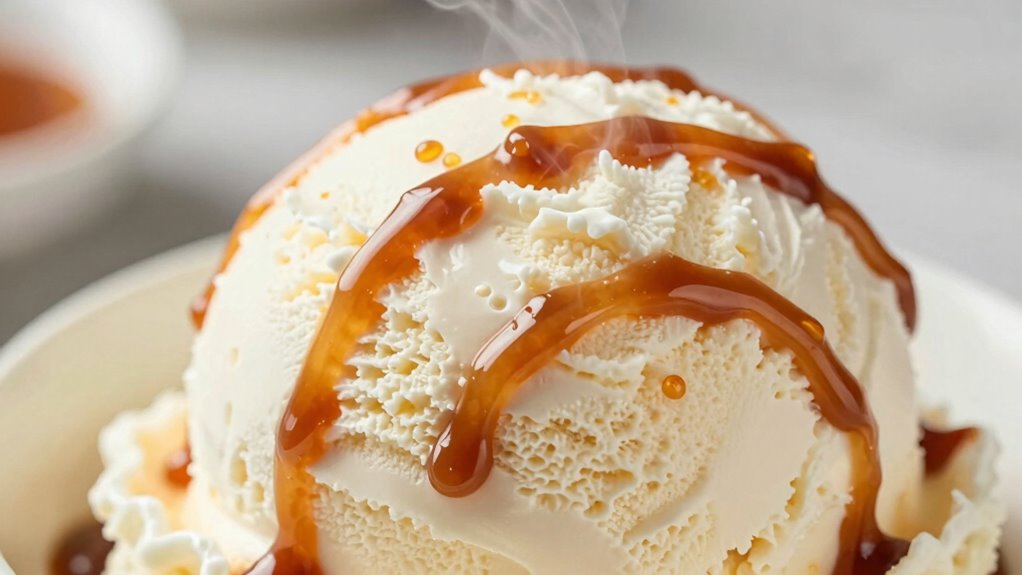
When you add warm mix-ins to ice cream, they cause it to melt faster because the heat from the warm ingredients transfers directly to the cold dessert. The temperature contrast between the warm item and the ice cream creates an immediate heat transfer, increasing the melt speed. The greater the difference in temperature, the quicker the ice cream absorbs heat and begins to melt. Warm mix-ins like hot fudge or freshly baked cookies introduce a significant thermal difference, which accelerates melting. This rapid heat transfer shortens the time it takes for your ice cream to lose its solid form. Additionally, thermal conductivity of the mix-in materials influences how quickly heat is transferred, further impacting the melting rate. Understanding heat transfer and the role of temperature contrast helps predict how quickly your ice cream will melt when warm ingredients are added, leading to a faster, more pronounced melting process. Recognizing the thermal properties of different ingredients can help you manage melting times better and optimize your dessert preparation. Moreover, the specific heat capacity of the ingredients also plays a role in how much energy is required to change their temperature, affecting the rate of melting.

Host Freeze Ice Cream Bowls with Comfort Silicone Grip, Double Walled Insulated Bowl for Cereal, Fruit, Acai, Desserts, Outdoor Party, Kitchen Accessories, 18 oz Set of 2, Grey
INNOVATIVE ICE-COLD TECHNOLOGY – This ice cream bowl can be used as cereal bowl. It features a double…
As an affiliate, we earn on qualifying purchases.
As an affiliate, we earn on qualifying purchases.
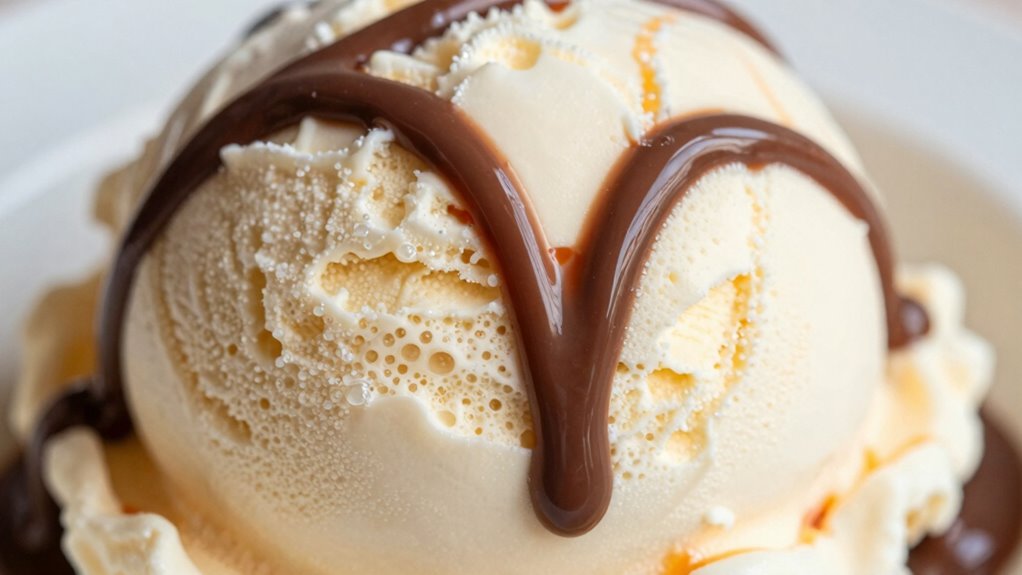
How Do Temperature Differences Accelerate Melting and Streaking?

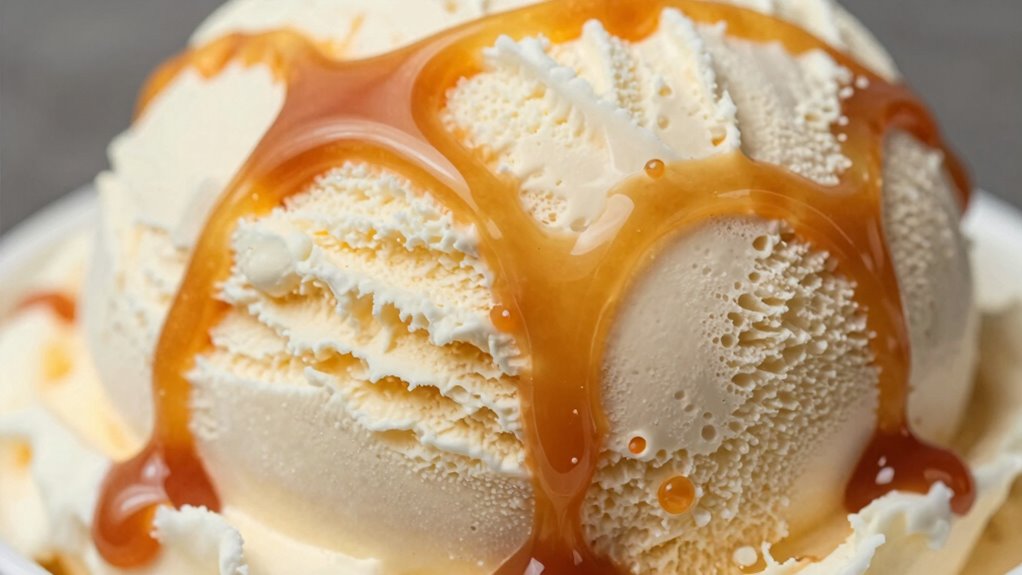
Temperature differences between warm mix-ins and ice cream directly influence how quickly melting occurs and how streaks form. When there’s a temperature mismatch, heat transfer happens rapidly from the warm mix-in to the colder ice cream surface. This quick heat transfer causes localized melting, creating streaks and uneven textures. The greater the temperature gap, the faster the heat moves into the ice cream, accelerating melting in specific spots. As heat flows unevenly, streaks develop along the areas where the warm mix-in contacts the cold ice cream. This process underscores how critical temperature control; even slight differences can markedly impact the texture and appearance of your ice cream. Proper temperature management minimizes streaking and helps you achieve a smoother, more uniform treat. Additionally, understanding heat transfer mechanisms can assist in developing better techniques for mixing and serving ice cream to prevent unwanted streaks. Recognizing the role of thermal conductivity in the materials used for mix-ins can further improve consistency and quality.

【2 Pack】Kunovo Small Spatula for Nonstick Cookware Mini Spatulas for kitchen Use,Heat-Resistant Silicone Thin Spatula Cooking Baking (Black-2)
Perfect for Nonstick Cookware: This small spatula is specifically designed for use with nonstick cookware, ensuring that your…
As an affiliate, we earn on qualifying purchases.
As an affiliate, we earn on qualifying purchases.
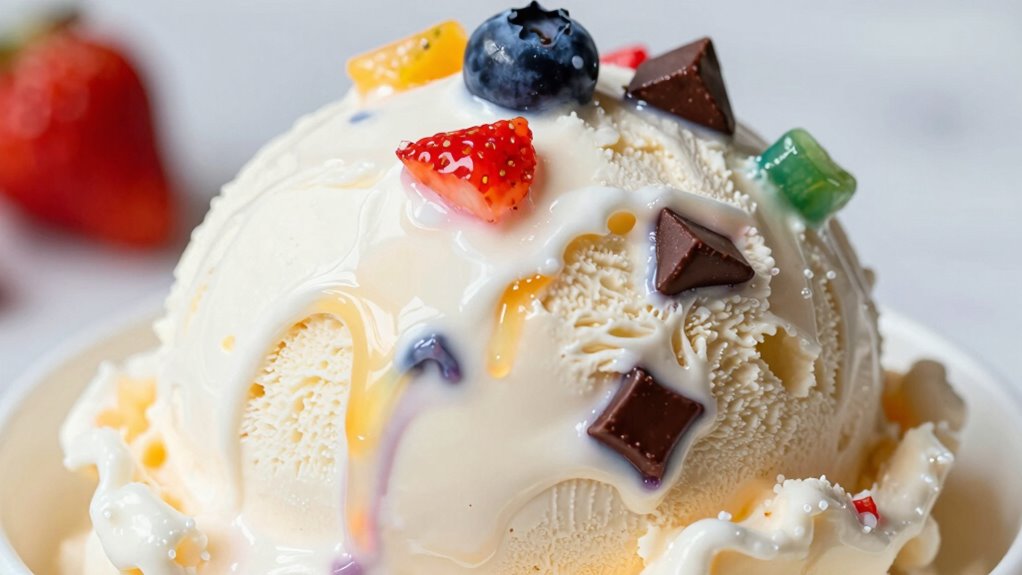
What Role Do Mix-In Composition and Texture Play in Melting?
The composition and texture of mix-ins directly influence how ice cream melts. Higher fat content in mix-ins can slow down melting, while crunchier textures tend to melt faster. Understanding these factors helps you choose mix-ins that maintain your ice cream’s ideal consistency longer. Incorporating ingredient effects about ingredient effects can further enhance your knowledge of optimal mix-in choices, especially since different components can alter melting behavior in various ways.
Mix-In Fat Content
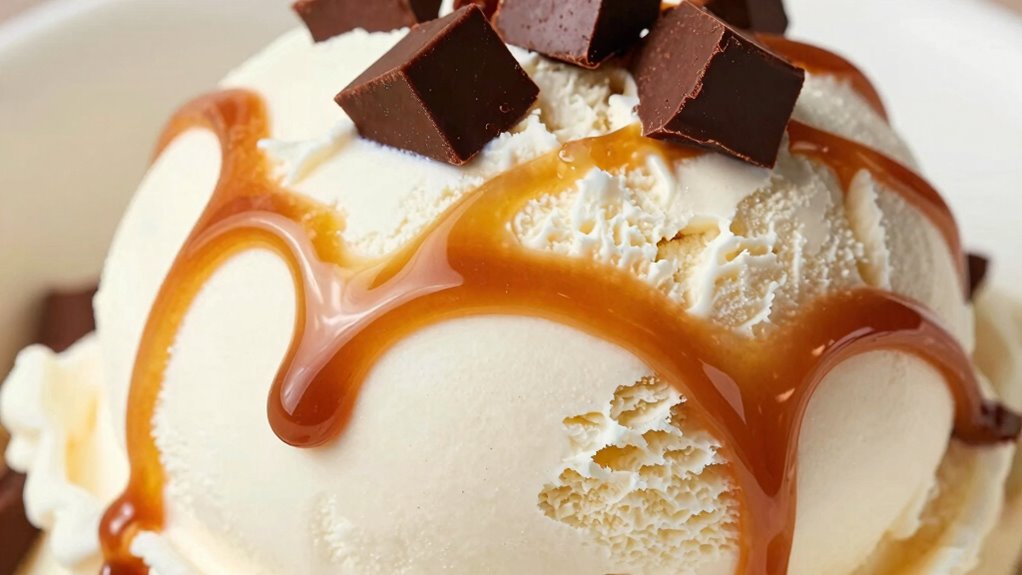
Mix-in fat content plays a crucial role in how quickly and smoothly ice cream melts. Higher fat levels tend to slow melting and create a creamier texture because fat acts as an insulator, delaying heat transfer. When considering dairy ratios, more cream and butterfat increase the overall fat content, influencing melting behavior. Additionally, the cookie categories impact how different mix-ins interact with the ice cream matrix, affecting melting patterns and streaking. To understand this better, consider: 1. fat content: Increased fat slows melting by reducing water exposure to heat. 2. dairy ratios: Higher cream-to-milk ratios raise the fat percentage, affecting melting speed. 3. Texture Stability: Richer mix-ins with higher fat levels resist streaking and uneven melting. The composition of mix-ins can also influence how heat is distributed during melting, impacting overall texture. Furthermore, heat transfer mechanisms within the ice cream determine how quickly the product melts and streaks, emphasizing the importance of balanced ingredients. Recognizing how ingredient interactions influence melting behavior helps in crafting ice creams that maintain their texture longer and melt more evenly, providing a better sensory experience. Balancing these factors ensures your mix-ins contribute to a smooth, uniformly melting ice cream experience.
Texture Impact on Melting
Since the composition and texture of mix-ins directly influence how ice cream melts, understanding their role is essential for achieving the desired consistency. Texture impacts melting behavior; smoother, softer mix-ins tend to melt more evenly, enhancing flavor and maintaining the ice cream’s integrity. Chunky or dense textures can cause uneven melting, leading to streaks and a less appealing visual. Well-chosen textures contribute to flavor enhancement by releasing their taste gradually, enriching each bite. Additionally, the visual appeal depends on how the mix-ins hold up during melting—crisp or firm textures retain their shape longer, creating attractive streaks and contrasts. Proper selection of mix-ins also involves considering texture durability, which affects how well they withstand melting without losing their shape or texture. Understanding the melting properties of different textures can help in designing ice cream that remains visually appealing and flavorful throughout consumption. Selecting appropriate ingredients with the right textures is crucial for controlling melting rates, optimizing flavor release, and improving overall presentation. Incorporating knowledge of material composition can further refine choices to achieve the ideal melting behavior and visual effect. The halal status of ingredients also plays a role in ensuring safe and compliant additions to ice cream recipes. By selecting mix-ins with appropriate textures, you control melting rates, optimize flavor release, and improve overall presentation.
Useful Co. 5QT Salad Bowl Set on Ice – Large Salad Bowl with Lid & 2 Servers – Chilled Tray for Cold Food, Party Buffet – Serving Bowl with Ice Tray Base for Gatherings
5QT EXTRA-LARGE CAPACITY FOR BIG EVENTS Serve more with this 5QT extra-large salad bowl – ideal for buffets,…
As an affiliate, we earn on qualifying purchases.
As an affiliate, we earn on qualifying purchases.
How Can You Add Warm Mix-Ins Without Causing Melting or Streaks?
To add warm mix-ins without melting or streaks, timing is key—you want to introduce them at just the right moment. Keep an eye on the temperature of both the ice cream and the mix-ins, making adjustments as needed. Using proper temperature control tips helps make certain your mix-ins blend smoothly without compromising texture. maintaining proper temperature is essential to prevent unwanted melting or streaking. Additionally, understanding the texture of ice cream can help you better gauge the ideal moment for adding warm ingredients without disrupting its consistency. Being aware of the correct use of small appliances can also assist in maintaining consistent temperatures during the process. Investing in a reliable thermometer or temperature control device can further enhance your ability to achieve perfect results every time.
Timing of Mix-Ins
Adding warm mix-ins to ice cream requires careful timing to prevent melting or streaks. To do this effectively, consider these strategies:
- Allow your ice cream to firm up slightly after initial freezing, creating a stable base for mix-ins.
- Use flavor pairing insights to select complementary warm ingredients that won’t overwhelm the ice cream’s texture.
- Employ proper storage techniques, like returning the ice cream to the freezer immediately after adding warm mix-ins, to keep everything at the right temperature.
- Temperature control is essential, as maintaining the correct environment helps prevent unintended melting or streaking during the process.
Timing is vital—adding warm ingredients too early can cause melting, while waiting too long might result in uneven distribution. By mastering these techniques, you ensure your mix-ins enhance rather than ruin your ice cream’s appearance and texture.
Temperature Control Tips
Maintaining the right temperature is key to adding warm mix-ins without causing melting or streaks. Before mixing, ensure your ice cream is at the ideal serving temperature, typically around 6-10°F (-14 to -12°C). This helps prevent quick melting when warm ingredients are introduced. For better flavor pairing, consider slightly cooling the warm mix-ins if they’re too hot—aim for just above room temperature—so they won’t distort the ice cream’s texture. Use a thermometer to monitor both the mix-ins and ice cream temperature, adjusting as needed. Gentle, rapid mixing can also help distribute warm ingredients evenly without causing streaks. With proper temperature control, your warm mix-ins will enhance flavor without compromising the ice cream’s consistency.
How to Keep Your Ice Cream Creamy and Beautiful When Using Warm Mix-Ins
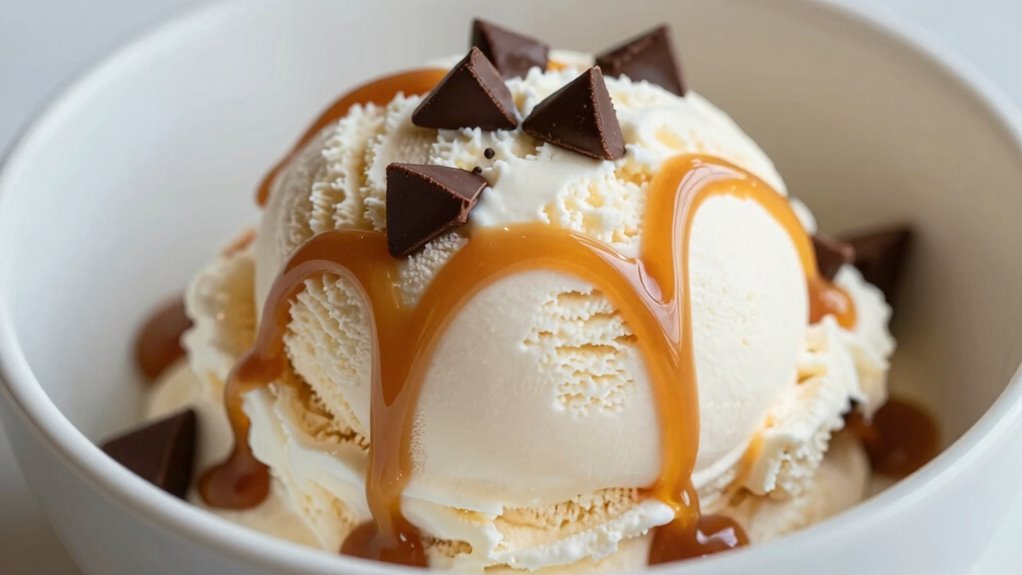
Warm mix-ins can create a delicious contrast with cold ice cream, but they also pose a risk of melting or streaking if not handled carefully. To keep your dessert looking beautiful and tasting perfect, focus on these key strategies:
- Choose complementary flavors: Pair warm mix-ins with your ice cream’s flavor profile to enhance the taste without overwhelming it.
- Control the temperature: Slightly cool your mix-ins before adding them—this slows melting and maintains texture.
- Use proper storage techniques: Keep your ice cream frozen until just before serving, and serve quickly after adding warm ingredients to prevent streaking.
Common Mistakes That Lead to Melting and Streaking: And How to Avoid Them
One common mistake that causes melting and streaking is not paying attention to the temperature of your mix-ins. If your warm mix-ins are too hot, they’ll quickly melt the ice cream, causing streaks and uneven flavor pairing. To avoid this, let your mix-ins cool slightly before adding them to the ice cream. Also, rushing the process can ruin presentation techniques, making your dessert look sloppy. Instead, aim for a balance: warm enough to melt smoothly but not so hot that it melts the ice cream instantly. Proper temperature control guarantees your mix-ins integrate seamlessly, enhancing flavor pairing without streaks. Keep an eye on timing and temperature, and your ice cream will stay creamy and visually appealing.
Quick Tips for Perfectly Incorporating Warm Mix-Ins Every Time
To guarantee your warm mix-ins blend perfectly with your ice cream, timing and technique are key. First, wait until your ice cream is slightly softened but not melted; this ensures better flavor pairing and easier integration. Second, drizzle warm mix-ins slowly and evenly, using a spoon or squeeze bottle to control the flow. Finally, consider how the mix-ins will enhance serving presentation—pouring over the top just before serving creates an appealing visual and preserves texture.
- Slightly soften ice cream before adding mix-ins for smooth incorporation.
- Drizzle warm additions gradually to prevent streaking.
- Coordinate flavor pairing and presentation for a delightful, professional look.
Frequently Asked Questions
Can Certain Ingredients in Mix-Ins Prevent Melting?
Certain ingredients in mix-ins can prevent melting by enhancing ingredient stability and helping them withstand temperature control. For example, fats and stabilizers like guar gum or xanthan gum slow down melting by creating a barrier that retains moisture and maintains texture. Using ingredients with high stability ensures your mix-ins stay intact longer, even as the ice cream warms slightly. Proper temperature control also plays a vital role in keeping your mix-ins from melting too quickly.
What Is the Ideal Temperature for Adding Warm Mix-Ins?
You should add warm mix-ins at around 120°F (49°C) to maintain ideal temperature control and ingredient stability. For example, if you poured caramel at this temperature onto cold ice cream, it would blend smoothly without melting or streaking. Keeping your mix-ins at this perfect temperature prevents melting, guarantees even distribution, and preserves flavor integrity, resulting in a more visually appealing and delicious treat.
How Does the Size of Mix-In Pieces Affect Melting?
You’ll notice that smaller mix-in particles tend to melt faster because they have a larger surface area relative to their size, leading to quicker heat transfer. Larger pieces, on the other hand, have higher melting point variations and resist melting longer, creating a more varied texture. To control melting and streaking, consider the mix-in particle size; smaller ones melt quickly, while larger ones stay intact longer.
Are There Alternative Methods to Add Warm Mix-Ins Safely?
Yes, you can add warm mix-ins safely by first chilling the toppings or mix-ins to prevent melting. Use frozen toppings or chilled mix-ins, which help maintain their shape and texture when combined with ice cream. Alternatively, pour the warm mix-ins over slightly softened ice cream, then quickly serve to minimize melting. These methods guarantee your ice cream stays visually appealing and delicious without streaks or melting issues.
How Long Should I Wait Before Serving After Adding Warm Mix-Ins?
You should wait about 2 to 3 minutes after adding warm mix-ins before serving. This mix in timing allows the heat to disperse evenly, preventing streaks and melt streaks in your ice cream. Rushing to serve immediately can cause streaking or melting, so give it a brief wait to ensure a smooth, well-blended treat. Patience here improves your overall ice cream experience.
Conclusion
Think of your ice cream as a delicate dance partner—warm mix-ins are like a sudden burst of sunlight. When added too quickly or at the wrong temperature, they melt away your creation’s beauty and balance. But with mindful steps, like tempering and timing, you can keep your dessert as stunning as a perfectly choreographed performance. Master these tricks, and your ice cream will stay smooth, streak-free, and irresistible every time.