
Creating an ice cream drawing is a fun way to express your artistic flair and bring joy to others. Start with basic shapes like cones and circles, then add cute faces and whimsical toppings to make your art pop. Use vibrant colors and blending techniques to give your creations depth, and don't forget to enhance them with shadows for a three-dimensional look. Finally, add fun background elements to set the scene. These sweet art ideas are sure to melt hearts and spark your creativity. Want to discover more tips and techniques to elevate your ice cream art? If you’re feeling adventurous, you can even try incorporating the ice cream haircut trend into your drawings, adding a fun and trendy twist to your artwork. By staying playful and experimenting with different styles, you can create a unique and eye-catching piece that will surely stand out. Whether it’s a classic vanilla cone or a modern, colorful sundae, let your imagination run wild and embrace the ice cream haircut trend in your art.
Key Takeaways
- Start with basic shapes like cones and circles to create a fun ice cream design, ensuring balanced proportions for visual appeal.
- Add cute facial expressions and whimsical toppings, such as sprinkles and cherries, to bring your ice cream character to life.
- Use vibrant, trend-inspired colors and playful background elements like clouds and balloons to enhance the overall charm of your artwork.
- Employ color blending techniques, layering from light to dark shades to achieve depth and dimension in your ice cream scoops.
- Finalize your artwork with fine-tip pens for crisp outlines and incorporate background details for context, making your creation pop.

Amazon Basics Non-Stick Silicone Baking Mat, Food Safe, Dishwasher Safe, Heat Resistant, 16.5" x 11.6", Beige/Gray, Rectangular, 4-Pack
- Pack Size: 4 baking mats
- Food Safety: Food-safe silicone material
- Reusable: Reusable and durable
As an affiliate, we earn on qualifying purchases.
Essential Art Supplies
When you're ready to plunge into your ice cream drawing, having the right art supplies makes all the difference. Start with sketching paper to capture your initial ideas; it provides a smooth surface that encourages creativity.
You'll also need a good set of pencils for shaping your design, allowing you to outline and refine your vision before adding color. To enhance your creative process, consider incorporating essential oils for relaxation in your workspace, as they can help reduce stress and inspire your artistic flow.
Speaking of color, colored pencils or markers are crucial for adding vibrant hues that bring your ice cream to life. They let you experiment with various shades and textures, making your artwork pop.
Don't forget an eraser—it's important for correcting any mistakes during the sketching process. A clean final product is key to showcasing your artistic skills.
Once you've perfected your ice cream design, fine-tip pens come into play. They're perfect for outlining your finished piece, providing definition and enhancing visual appeal.
Sketching Basic Shapes

Creating a solid foundation is essential for any ice cream drawing, and sketching basic shapes is the perfect starting point. Begin by drawing a cone shape, wider at the bottom for stability. This cone will serve as the base for your ice cream.
To guarantee your drawing captures the deliciousness of your treat, remember to take into account factors like maintaining consistent proportions and balance in your shapes.
Next, place a circle or oval on top of the cone for the ice cream scoop. You can modify this shape to create a scoop or a swirl, depending on your vision. To add a touch of love, contemplate incorporating a heart shape either atop the ice cream or alongside the cone.
Using simple geometric shapes keeps your drawing cute and approachable. Triangles work well for the cone, while circles can represent the scoops. As you combine these shapes, pay attention to their positioning to enhance the overall design. Aim for balanced proportions to create a visually appealing drawing.
Don't worry about perfection at this stage; focus on capturing the essence of your ice cream treat. Once you have your basic shapes down, you'll have a solid foundation to build upon as you progress to adding fun details in later steps.
Happy sketching!
Adding Fun Details

To make your ice cream drawing pop, think about adding cute facial expressions that bring your scoop to life.
Incorporating whimsical toppings like sprinkles or cherries can add a fun twist, while adorable background elements can enhance the overall vibe.
You might also consider using colors inspired by the latest trends in food, like those seen in functional beverages, to create a playful and vibrant scene.
These details not only boost the charm but also create a delightful scene that viewers will love!
Cute Facial Expressions
Cute facial expressions can bring your ice cream drawings to life, adding a delightful charm that instantly draws attention. Start by sketching large, round eyes filled with highlights to convey joy and innocence. These expressive eyes are the windows to your ice cream character's soul, making them relatable and cheerful.
Research shows that cats can recognize their owner's voice, which highlights the importance of emotional connections, even in art! Next, draw a small, curved line for a smiling mouth, which evokes happiness and invites viewers to share in the delight.
To enhance the cuteness factor, incorporate soft pink or peach colors around the eyes for blushing cheeks. This adds an extra layer of warmth and charm. Don't forget to experiment with different eyebrow shapes! Raised arches can express surprise, while little curves can evoke excitement, giving your character a range of emotions.
Lastly, consider adding fun accessories like sunglasses or a tiny hat. These details not only give your ice cream character personality but also make your artwork more engaging.
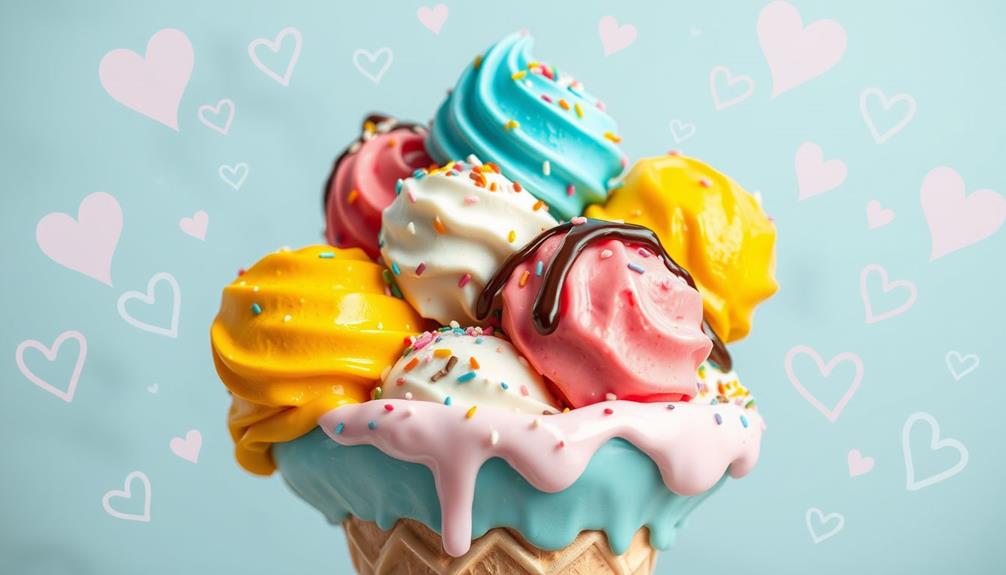
Whimsical Toppings Choices
Whimsical toppings can transform your ice cream drawings into vibrant masterpieces that catch the eye. To add vibrancy and fun, incorporate colorful sprinkles, chocolate chips, or fruit slices. Think about using playful shapes, like star-shaped sprinkles or heart-shaped candies, to enhance the cuteness factor of your artwork. Adding a touch of butter-based flavors can also inspire unique topping ideas that complement your ice cream.
Experimenting with different textures can also elevate your drawing. Add whipped cream and a cherry on top to create an appealing contrast against the smooth ice cream surface. This not only adds depth to your piece but also brings a delightful sense of indulgence.
Don't shy away from using a variety of colors for your toppings. Pastel shades lend a whimsical look, while bright colors make your design stand out boldly. This is your chance to let your creativity shine!
Lastly, sprinkle in some playful elements like a drizzle of syrup or a candy cane sticking out. These small additions can bring an extra layer of charm and creativity to your ice cream drawing. So grab your colors and let your imagination run wild with whimsical toppings that truly make your artwork pop!
Adorable Background Elements
Creating a delightful ice cream drawing doesn't stop at the toppings; the background plays a significant role in enhancing your artwork. To give your piece that whimsical touch, consider incorporating fluffy clouds or colorful balloons. These elements create a light-hearted atmosphere that complements your sweet treat. To add an extra element of fun to your ice cream drawing, you can also include cute ice cream clipart scattered throughout the background. These small illustrations can add a playful and whimsical touch to your artwork. Consider incorporating smiling ice cream cones, popsicles, or sundaes to bring even more joy to your creation.
Drawing inspiration from astrological compatibility may also spark ideas for unique themes that resonate with different zodiac signs, adding an extra layer of charm to your piece.
You can also add playful stars or sparkles to evoke a sense of magic and joy, making your drawing even more charming. Think about including a sun or a rainbow to convey a warm, cheerful vibe that enhances the sweetness of the ice cream.
Using soft gradients of blue or pink can add depth to your background, allowing your ice cream to pop visually. Don't shy away from experimenting with simple shapes like hearts or musical notes scattered around. These details reinforce the theme of love and fun, drawing viewers into your artwork.
Color Blending Techniques

To create smooth changes in your ice cream drawing, focus on layering colors effectively.
Incorporating techniques similar to those used in aromatherapy practices can enhance the overall effect by adding depth and complexity.
Start with lighter shades and gradually add darker ones to build depth.
You'll find that blending techniques can transform your artwork, making those ice cream scoops pop with dimension and life.
Layering Colors Effectively
Achieving a smooth color blend in your ice cream drawing can transform a basic scoop into a mouthwatering masterpiece. Start with a light base color and gradually layer darker shades using circular motions with your colored pencils or markers. This technique helps create a seamless shift between hues.
To enhance your artistic experience, consider utilizing natural waxes like soy or beeswax for eco-friendly options while crafting candle-themed art, as candle properties can inspire your color choices.
When blending, focus on small sections at a time. Use a blending tool, like a colorless blender pencil or a cotton swab, to soften the edges. For a pastel effect, opt for less saturated colors, applying them lightly and building up the intensity gradually for that delicate finish.
Don't shy away from experimenting with complementary colors next to each other. This approach creates vibrant contrasts, making your ice cream toppings, like sprinkles or cherries, pop.
Additionally, to enhance the three-dimensional look of your scoop, incorporate shading techniques. Apply a darker version of your base color on one side to simulate light and depth.
Layering colors effectively can elevate your drawing, making it not just visually appealing but also enticing enough to evoke the joy of enjoying a delicious ice cream cone.
Smooth Transitions Techniques
Master smooth shifts in your ice cream drawings by focusing on the way colors interact. Begin with lighter hues, gradually layering darker shades to create soft blends. This approach allows colors to blend seamlessly at their edges.
| Technique | Description |
|---|---|
| Start Light | Use lighter colors first to set the foundation. |
| Blending Tools | Utilize a blending stump or tortillon for smudging. |
| Circular Motions | Apply colors in small circular motions for softness. |
| Highlight with White | Add a light-colored pencil for glossy highlights. |
To enhance depth, apply lighter pressure for initial layers, then increase pressure with darker colors. This technique builds dimension and prevents harsh lines. Don't forget to incorporate a white or light-colored pencil to emphasize glossy textures, giving your ice cream that irresistible look. Experiment with these techniques, and watch your drawings transform into delightful, mouth-watering creations that truly capture the essence of ice cream!
Enhancing With Shading

Shading can bring a remarkable depth and realism to your ice cream drawing, transforming a flat image into a delightful treat that almost seems to leap off the page. To achieve this effect, start by identifying your light source. Shadows should fall on the opposite side, creating a natural look.
Incorporating techniques from advanced mixing techniques can help you understand how to layer colors effectively.
- Blend darker shades gradually into lighter areas for a smooth shift, enhancing that three-dimensional appearance.
- Apply shading to the cone using diagonal lines to mimic texture and depth, especially at the base, where shadows naturally occur.
- Highlight the edges of the ice cream scoop with a lighter color to create a glossy, melting effect that captures the warmth of a sunny day.
- Experiment with colored pencils or markers, layering different shades to discover unique color combinations that will make your drawing pop.
Finalizing Your Artwork

To finalize your artwork effectively, start by outlining your drawing with fine-tip pens, which adds crisp definition and makes your ice cream creation pop. Carefully trace over your pencil lines, ensuring you maintain smooth, consistent strokes.
Once the ink has dried, erase any unnecessary pencil marks to achieve a clean and polished finish. Consider incorporating some vibrant colors to mimic the delightful hues of real ice cream, as this can greatly enhance the visual appeal of your piece. You might also explore using textured fabrics for a unique presentation, similar to the way cozy teenage girl room colors can create warmth in a space.
Next, think about enhancing your piece with background elements. Consider adding playful clouds, twinkling stars, or even a whimsical sun to provide context and elevate the overall aesthetic of your drawing. These details can draw the viewer's eye and create a more immersive experience.
Don't forget to sign your artwork in a discreet area. This establishes your personal branding and ownership of the creation, adding a professional touch.
Sharing Your Creations

Sharing your ice cream drawings can be a rewarding way to connect with others who appreciate your artistic flair. By showcasing your creations, you not only gain recognition but also create opportunities for interaction and feedback.
Here are some effective ways to share your artwork:
- Social Media: Use platforms like Instagram or Pinterest to reach a wider audience. Share your ice cream drawings using relevant hashtags to attract art enthusiasts.
- Online Communities: Join forums or art groups where you can showcase your work. Engaging with peers provides valuable constructive feedback and support.
- Portfolio Website: Create a dedicated site for your artwork, including your ice cream pieces. This makes it easier for potential clients or fans to view and appreciate your style.
- Local Exhibitions: Participate in community art shows or contests. Sharing your art in person not only builds your confidence but also connects you with local art lovers.
Each of these avenues allows you to celebrate your passion for ice cream art while building a network of like-minded individuals.
Frequently Asked Questions
How Do You Draw a Cute Heart?
To draw a cute heart, sketch two circles for the lobes, connect them with a pointed bottom, and guarantee smooth curves. Add facial features or patterns, then use vibrant colors for depth and charm.
How Do You Draw Yummy Ice Cream?
To draw yummy ice cream, you start with a cone shape, add a rounded scoop on top, decorate with sprinkles or a cherry, and then use colors to bring your creation to life. Enjoy!
How Do You Draw Melting Popsicles?
To draw melting popsicles, start with a rectangle shape and add wavy drips. Use vibrant colors and blending for a gradient effect, then outline with a fine pen to highlight the details. Enjoy your creation!
How to Draw Banana Split Ice Cream?
Drawing a banana split is like crafting a delicious dream. Start with the banana base, layer three scoops, add toppings, and finish with vibrant colors. Your artwork will tantalize eyes just like the treat itself!
Conclusion
Now that you've mastered the delightful art of ice cream drawing, why not share your sweet creations with friends and family? As you explore new techniques and let your imagination run wild, remember that art is about joy and expression. Each scoop, swirl, and sprinkle reflects your unique style. So grab your supplies and keep creating—who knows, your next masterpiece might just melt someone's heart! Keep spreading the happiness that comes with every colorful stroke!