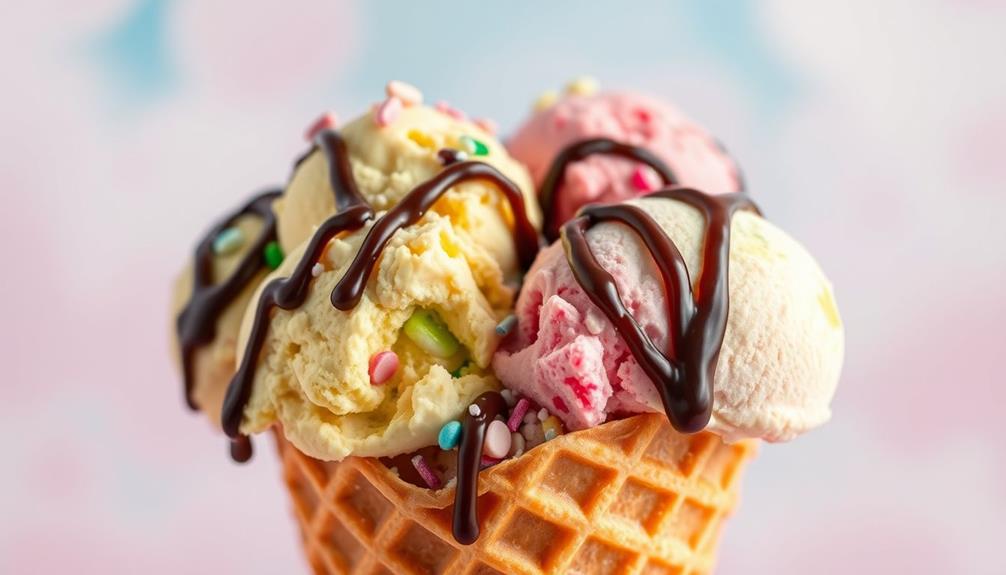
You can easily make a delicious low-sugar ice cream that satisfies your sweet cravings while staying healthy. Combine 2 cups of unsweetened almond milk, 1 cup heavy cream, 1/2 cup erythritol, 1 teaspoon vanilla, and 1/2 teaspoon sea salt. Chill the mixture, churn it in an ice cream maker, and then freeze until firm. This simple recipe lets you enjoy creamy goodness without the guilt. Stick around to discover serving suggestions and storage tips for your homemade treat!
Key Takeaways
- Combine 2 cups unsweetened almond milk, 1 cup heavy cream, and 1/2 cup erythritol for a low-sugar base.
- Mix in 1 teaspoon vanilla extract and 1/2 teaspoon sea salt for enhanced flavor.
- Chill the mixture for at least 2 hours before churning for a better texture.
- Use an ice cream maker to churn until smooth, then freeze for 4 to 6 hours.
- Serve in bowls or cones, garnished with fresh fruits or nuts for added taste.
History
The history of ice cream is as sweet as the treat itself, tracing back thousands of years to ancient civilizations.
You’d be surprised to learn that even the Romans and Chinese enjoyed frozen desserts, mixing ice with milk and flavorings.
By the 16th century, ice cream began to take on a more recognizable form in Europe, where it became a fashionable delicacy among the elite.
In the 18th century, recipes started circulating, allowing more people to indulge in this creamy delight.
The invention of ice cream makers in the 19th century revolutionized the treat, making it accessible to the masses.
Today, you can enjoy a scoop while knowing you’re part of a long, delicious history that continues to evolve. Additionally, the diverse cultural influences in Brazilian cuisine, including African Influence, have led to unique interpretations of frozen desserts.
Recipe
Making a delicious low-sugar ice cream at home is an excellent way to satisfy your sweet tooth without the guilt. This creamy treat is perfect for hot summer days or as a delightful dessert anytime. Using natural sweeteners and wholesome ingredients, this recipe not only caters to those watching their sugar intake but also guarantees that everyone can enjoy a rich and satisfying ice cream experience.
To start, you’ll want to gather your ingredients and verify you have an ice cream maker handy, as it will help achieve that smooth and creamy texture. The beauty of this recipe lies in its simplicity and the flexibility to customize flavors. You can incorporate your favorite fruits, nuts, or even a little bit of chocolate to make it your own.
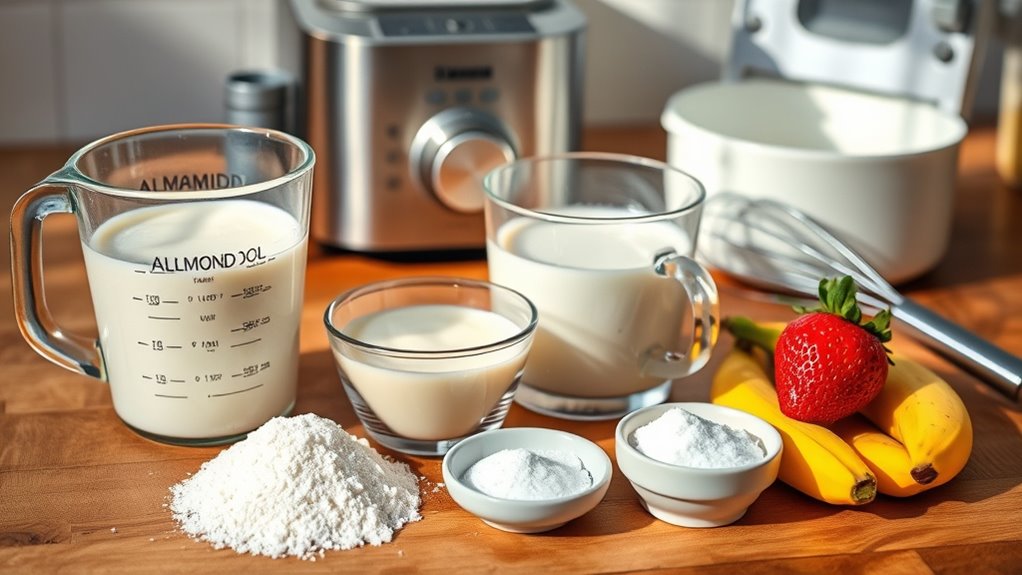
Ingredients:
- 2 cups unsweetened almond milk (or any milk of choice)
- 1 cup heavy cream
- 1/2 cup erythritol or another preferred low-calorie sweetener
- 1 teaspoon vanilla extract
- 1/2 teaspoon sea salt
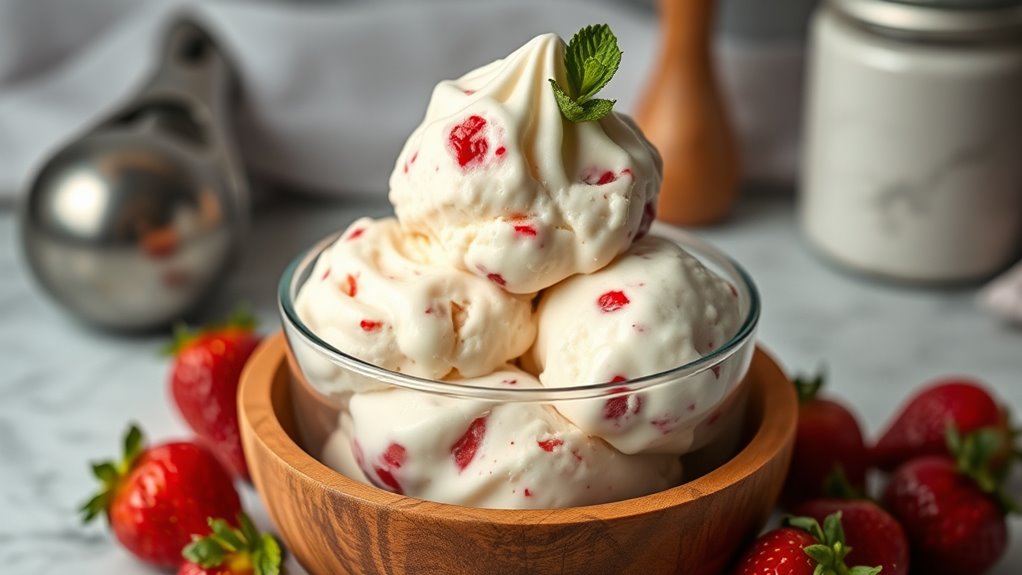
- Optional: 1 cup pureed fruit (like strawberries or bananas) for flavor
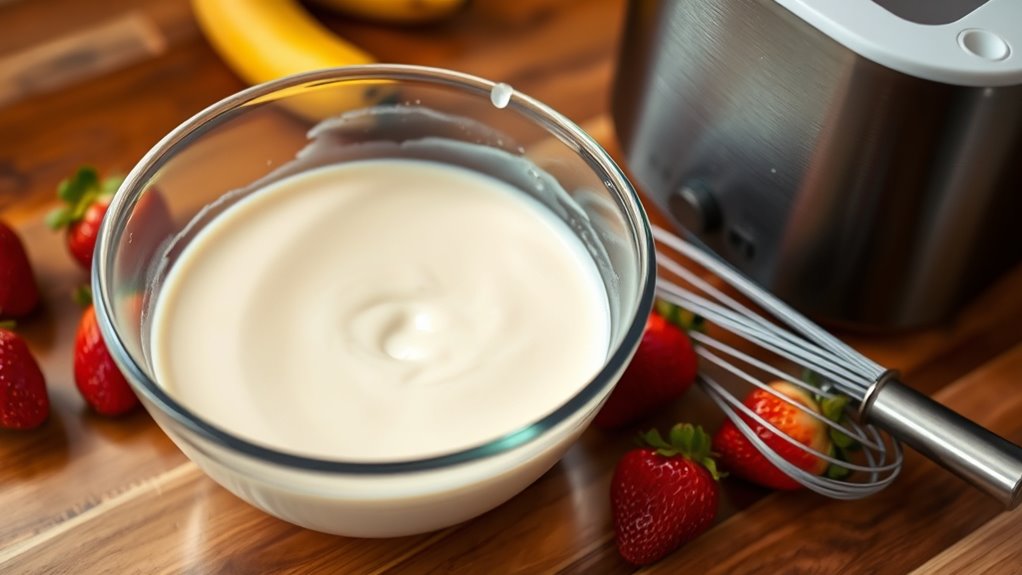
To prepare the low-sugar ice cream, start by combining the almond milk, heavy cream, erythritol, vanilla extract, and sea salt in a mixing bowl. Whisk the ingredients together until the sweetener is completely dissolved.
If you’re adding pureed fruit for flavor, mix it in at this stage. Once well combined, pour the mixture into your ice cream maker and churn according to the manufacturer’s instructions, typically for about 20-30 minutes, until it reaches a soft-serve consistency.
Transfer the ice cream to a container and freeze for at least 2 hours to firm it up before serving.
When making this low-sugar ice cream, feel free to experiment with different flavors and sweeteners to find your perfect combination. If you prefer a firmer texture, let the ice cream freeze longer, but be aware that homemade ice cream can be harder than store-bought once frozen solid.
To make serving easier, let it sit at room temperature for a few minutes before scooping. Enjoy your healthy homemade treat!
Cooking Steps
Now that you’ve got your ingredients ready, it’s time to start cooking.
You’ll mix the sweeteners with cream, then chill the mixture before churning.
Follow these steps, and you’ll be on your way to enjoying delicious low-sugar ice cream!
Step 1. Gather Ingredients and Tools
Before you plunge into making your low-sugar ice cream, it’s crucial to gather all the necessary ingredients and tools. You’ll need a few key components: unsweetened almond milk or coconut milk, your choice of low-calorie sweetener, vanilla extract, and any mix-ins like fruit or nuts. Make certain to have a pinch of salt on hand to enhance the flavors.
For tools, grab a mixing bowl, a whisk or electric mixer, and an ice cream maker. If you don’t have an ice cream maker, a shallow dish will work for manual stirring. Don’t forget measuring cups and spoons to guarantee you get the right amounts. With everything ready, you’re all set to create a delicious treat that’s low in sugar!
Step 2. Mix Sweeteners With Cream

As you prepare to mix the sweeteners with cream, start by pouring your chosen unsweetened almond or coconut milk into a mixing bowl.
Next, add your preferred natural sweetener, like stevia, erythritol, or monk fruit. Whisk the mixture thoroughly until the sweetener dissolves completely, ensuring there are no gritty bits left.
If you’re using any additional flavorings, like vanilla extract or cocoa powder, now’s the time to add them in. Continue whisking until everything’s well combined.
You want a smooth, creamy consistency that boasts a delightful sweetness without the sugar overload.
Once you’ve achieved that, you’re ready to move on to the next step in your ice cream-making adventure. Enjoy the process!
Step 3. Chill Mixture Before Churning
To achieve the best texture for your ice cream, chilling the mixture is essential.
After you’ve mixed your sweeteners with cream, transfer the mixture to a covered container. Place it in the refrigerator for at least 2 hours, or ideally overnight. This step allows flavors to meld and guarantees a smoother consistency.
As the mixture cools, it’ll also help prevent ice crystals from forming during the churning process. Make sure the mixture is thoroughly chilled before you take it out to churn.
If you’re short on time, a quick chill in the freezer for about 30 minutes can work, but be careful not to let it freeze solid.
Once it’s chilled, you’re ready to churn!
Step 4. Churn Until Smooth and Creamy
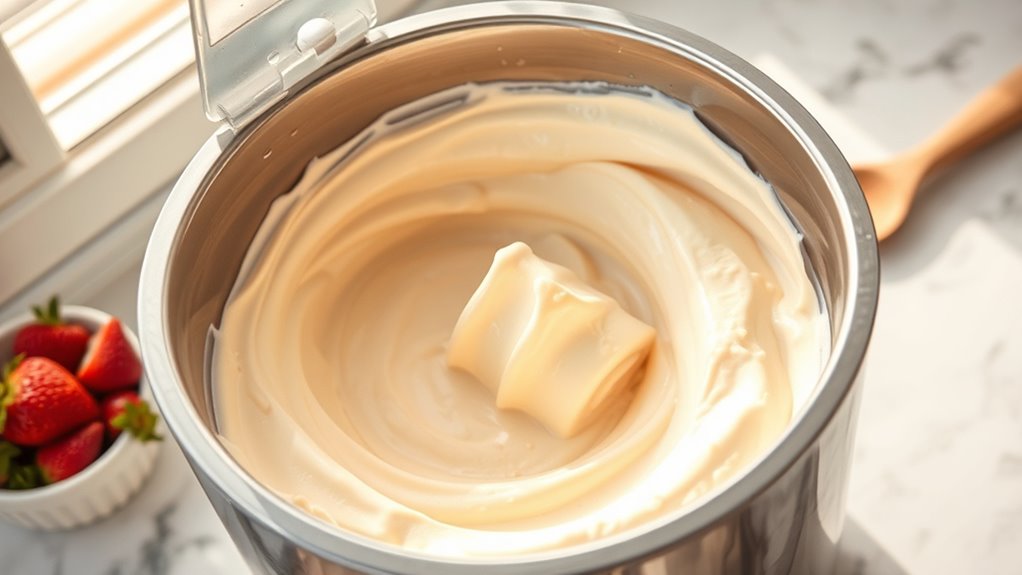
Once your mixture is thoroughly chilled, it’s time to churn it until it reaches a smooth and creamy texture.
If you’re using an ice cream maker, pour the mixture into the machine and turn it on. Let it churn according to the manufacturer’s instructions, usually around 20 to 30 minutes. Keep an eye on the texture; you want it to thicken and become velvety.
If you’re churning by hand, pour the mixture into a large bowl and stir vigorously with a whisk or spatula. You may need to stop occasionally to scrape the sides and guarantee even mixing.
Once it’s creamy and slightly increased in volume, you know you’re ready for the next step in your ice cream adventure.
Step 5. Freeze Until Firm
Now that your mixture is churned to perfection, it’s time to transfer it to a freezer-safe container.
Use a spatula to scoop every last bit into the container, spreading it evenly. Make sure to leave some space at the top, as the ice cream will expand as it freezes.
Cover the container tightly with a lid or plastic wrap to prevent ice crystals from forming. Place it in the freezer and let it chill for at least 4 to 6 hours, or until firm.
For best results, check occasionally. Once it’s set, you can scoop it out and enjoy your delicious low-sugar ice cream!
Remember to let it sit at room temperature for a few minutes before serving for easier scooping.
Final Thoughts
As you explore the world of low-sugar ice cream, you’ll discover that healthier treats can still satisfy your sweet tooth. By using natural sweeteners, you can enjoy delicious flavors without the guilt.
Experimenting with different ingredients and textures allows you to create your unique spin on classic recipes. You’ll find that low-sugar ice cream can be just as creamy and delightful as traditional versions.
Experiment with ingredients and textures to craft your own creamy, delightful low-sugar ice cream creations.
Plus, it’s a fun way to incorporate healthier choices into your diet. So, whether you’re enjoying a scoop on a hot day or serving it at a gathering, this guilt-free dessert will impress your friends and family.
Immerse yourself in this delightful world, and enjoy every spoonful of your homemade creation!
Frequently Asked Questions
Can I Substitute Different Natural Sweeteners in the Recipe?
Absolutely, you can substitute different natural sweeteners in your recipe! Each sweetener has its unique flavor and sweetness level, so you might need to adjust the quantity.
For example, if you’re using honey instead of agave, start with a little less since honey is sweeter.
Just keep in mind how each sweetener behaves with respect to texture and moisture.
Experimenting can lead to delicious discoveries, so don’t hesitate to try different combinations!
How Does Low-Sugar Ice Cream Compare to Regular Ice Cream in Taste?
Oh sure, nothing says “party” like a scoop of low-sugar ice cream!
You’ll find it’s a bit like a polite guest at an extravagant feast—trying to fit in but lacking that rich, creamy decadence you crave.
Sure, it’s lighter, but you might miss the full flavor punch of regular ice cream.
If you’re after guilt-free indulgence, it’s a decent compromise, but don’t expect fireworks on your taste buds!
Are There Any Dairy-Free Options for This Ice Cream Recipe?
Absolutely, there are plenty of dairy-free options for your ice cream recipe!
You can use coconut milk, almond milk, or cashew milk as a base. These alternatives not only provide a creamy texture but also add unique flavors.
Just make sure to choose unsweetened versions if you want to control the sweetness.
With some natural sweeteners and a few mix-ins, you’ll create a delicious dairy-free treat that everyone can enjoy!
How Long Does Low-Sugar Ice Cream Last in the Freezer?
Think of your low-sugar ice cream as a treasure chest in the freezer.
It’ll stay fresh for about two to four weeks, but the longer it sits, the more it might lose its creamy texture and flavor.
To keep it at its best, seal it tightly in an airtight container.
That way, you can enjoy every spoonful like it’s a delightful scoop of summer, whenever you crave a sweet treat!
Can I Use This Recipe for Making Ice Pops Instead?
Absolutely, you can use this recipe to make ice pops!
Just pour the mixture into ice pop molds instead of an ice cream maker. Freeze them for several hours until solid, and you’ve got a delightful treat.
You might want to adjust the freezing time depending on your molds, but it’s an easy shift. Enjoy experimenting with flavors, and don’t forget to let them sit out for a minute before popping them out!