Hemp milk ice cream is a delicious and nutritious dairy-free dessert you can easily make at home. Just blend 2 cups of hemp milk with 1/2 cup of maple syrup, 1 tablespoon of vanilla extract, and a pinch of salt. For extra creaminess, add 1/4 cup of coconut cream. Chill the mixture in a freezer-safe container, stirring every 30 minutes. Serve it soft-serve style or store it for later. Discover more tips for customizing your ice cream experience!
Key Takeaways
- Combine 2 cups of hemp milk, 1/2 cup of sweetener, and 1 tablespoon of vanilla extract in a mixing bowl.
- Blend hulled hemp seeds with filtered water for a smooth base before adding sweetener.
- Chill the mixture in a freezer-safe container, stirring every 30 minutes for texture.
- Optionally, add 1/4 cup of coconut cream for creaminess and enhance flavors with cocoa powder.
- Serve immediately for a soft-serve texture or store in an airtight container for later enjoyment.
History
Although hemp has been cultivated for thousands of years, its use in food products like hemp milk ice cream is relatively modern. Historically, ancient cultures utilized hemp for its fibers and seeds, celebrating its versatility.
However, the shift towards incorporating hemp into food began in the late 20th century as nutritionists recognized its health benefits. You’ll find that hemp seeds are rich in protein, omega fatty acids, and essential nutrients, which led to their popularity in various health foods.
As dietary preferences evolved, so did the demand for alternative dairy products, paving the way for hemp milk. This innovative use of hemp reflects a growing trend towards plant-based eating, appealing to health-conscious consumers seeking delicious and nutritious options.
Recipe
Hemp milk ice cream is a delicious, dairy-free alternative that not only satisfies your sweet tooth but also packs a nutritional punch. Made from hemp seeds, this creamy treat is rich in omega fatty acids, protein, and essential vitamins.
Whether you’re lactose intolerant, vegan, or simply looking to try something new, this hemp milk ice cream recipe will tantalize your taste buds and leave you feeling great.
Creating your own hemp milk ice cream at home is a simple process that requires minimal ingredients and equipment. With just a few steps, you can whip up a luscious dessert that’s perfect for warm days or as a delightful after-dinner treat.
This recipe allows for customization, so feel free to add your favorite mix-ins like chocolate chips, fruits, or nuts to make it uniquely yours.
Ingredients:
- 2 cups of hemp milk
- 1/2 cup of maple syrup or agave nectar
- 1 tablespoon of vanilla extract
- 1/4 cup of coconut cream (optional for creaminess)
- A pinch of salt
For the cooking instructions, combine the hemp milk, maple syrup, vanilla extract, coconut cream, and salt in a blender. Blend until smooth and thoroughly mixed.
Pour the mixture into an ice cream maker and churn according to the manufacturer’s instructions until it reaches a soft-serve consistency. If you don’t have an ice cream maker, you can pour the mixture into a shallow dish and freeze it, stirring every 30 minutes for about 3-4 hours until it reaches the desired texture.
When making hemp milk ice cream, keep in mind that the texture may vary slightly depending on how long you churn it or how frequently you stir it if you’re using a shallow dish.
For an even creamier result, consider adding more coconut cream or experimenting with other flavorings such as cocoa powder or fruit purees. Additionally, storing the ice cream in an airtight container can help maintain its freshness and prevent ice crystals from forming.
Enjoy your homemade treat!
Cooking Steps
Now that you’ve gathered your ingredients, it’s time to get cooking!
Start by blending the hemp seeds and water to create a smooth base.
Once you’ve got that down, you’ll add your sweetener and chill the mixture for a delightful treat.
Step 1. Blend Hemp Seeds and Water

To create a creamy and nutritious base for your hemp milk ice cream, start by blending hemp seeds and water together.
Measure out one cup of hulled hemp seeds and two to three cups of filtered water, depending on how thick you want your milk.
Pour the hemp seeds into your blender, adding the water next. Blend on high speed for about 30 to 60 seconds, or until the mixture is smooth and creamy.
You might notice a slight froth forming during blending; this is normal!
Once blended, you can strain the mixture through a nut milk bag or cheesecloth to remove any pulp if you prefer a smoother texture.
Now you’re ready for the next step in making your delicious ice cream!
Step 2. Add Sweetener to Mixture

With your smooth hemp milk ready, it’s time to enhance the flavor by adding sweetener to the mixture. You can choose from various options like maple syrup, agave nectar, or honey, depending on your preference.
Start by adding a couple of tablespoons of your chosen sweetener to the hemp milk. Stir well to guarantee it dissolves evenly throughout the mixture.
Taste it, and if you want it sweeter, gradually add more sweetener until you reach your desired level of sweetness. Remember, you can always add more, but you can’t take it out!
Mixing in a pinch of salt can also help balance the flavors, making your ice cream even more delicious.
Now, you’re one step closer to your creamy treat!
Step 3. Chill Mixture in Freezer

Transfer the sweetened hemp milk mixture into a shallow, freezer-safe container. This shape helps it freeze evenly and quickly.
Place the container in the freezer, making certain it’s flat and stable. You’ll want to check on it every 30 minutes during the first couple of hours.
Using a fork or spatula, stir the mixture vigorously to break up any ice crystals that form. This process will guarantee a smooth, creamy texture once it’s fully frozen.
Continue this stirring routine for about 2 to 3 hours, or until the mixture reaches a soft-serve consistency. After that, you can let it freeze undisturbed until it’s firm, usually about 4 to 6 hours more.
Enjoy the anticipation of your delicious hemp milk ice cream!
Step 4. Stir in Flavor Additives

After your mixture reaches that perfect soft-serve consistency, it’s time to add your favorite flavors.
This is where you can get creative! Consider stirring in ingredients like vanilla extract, cocoa powder, or fresh fruit purees to enhance the taste.
If you’re feeling adventurous, try adding a swirl of nut butter or a hint of cinnamon for a unique twist.
Make sure to fold these flavor additives gently into the mixture, ensuring an even distribution without deflating the creaminess.
Taste your creation and adjust the sweetness if necessary, adding maple syrup or agave nectar if desired.
Once you’re satisfied with the flavor, it’s ready for the next step.
Enjoy the process, and let your imagination guide you!
Step 5. Serve and Enjoy Immediately
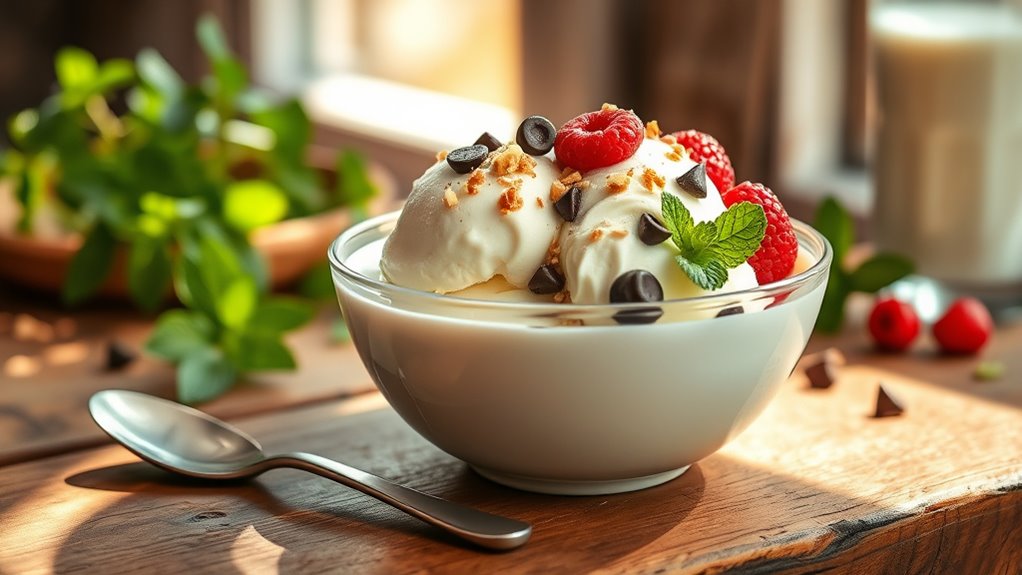
As soon as your hemp milk ice cream reaches that delightful soft-serve texture, you won’t want to wait any longer to dig in.
Grab a spoon or scoop it into bowls for a treat that’s both creamy and invigorating. If you want to elevate the experience, consider topping it with fresh fruit, nuts, or a drizzle of chocolate syrup. The flavors will explode with every bite!
Enjoy it right away while it’s at its peak texture. If you’re not ready to serve it immediately, transfer the ice cream to an airtight container and place it in the freezer.
Just remember, the longer it sits, the firmer it’ll become, so savor that soft-serve goodness while it lasts!
Final Thoughts
While experimenting with hemp milk ice cream, you’ve likely discovered a delicious and nutritious alternative to traditional ice cream. This creamy treat not only satisfies your sweet tooth but also packs a punch with plant-based protein, healthy fats, and essential nutrients.
You can easily customize flavors to suit your taste, making it a versatile dessert option for any occasion. Plus, it’s dairy-free, making it suitable for those with lactose intolerance or dietary restrictions.
As you enjoy your homemade creation, remember that the joy of this recipe lies in its simplicity and the health benefits it offers. So go ahead, share your hemp milk ice cream with friends and family, and feel good about indulging in a guilt-free dessert!
Frequently Asked Questions
Is Hemp Milk Ice Cream Vegan-Friendly?
Yes, hemp milk ice cream is vegan-friendly!
Since it’s made primarily from hemp seeds and plant-based ingredients, you won’t find any animal products in it. This makes it a great option for those following a vegan lifestyle.
Plus, hemp milk itself is packed with nutrients, so you’re not just enjoying a tasty treat, but also benefiting your health.
Can I Use Sweetened Hemp Milk for This Recipe?
Sure, you can use sweetened hemp milk in your recipe!
Imagine the rich, creamy flavor it’ll bring to your dish. Sweetened hemp milk adds a delightful sweetness, enhancing the overall taste.
Just keep in mind that it might change the final flavor profile a bit, so adjust any additional sweeteners accordingly.
If you enjoy a hint of sweetness, go ahead and give it a try; you might just love the results!
How Long Does Hemp Milk Ice Cream Last in the Freezer?
Hemp milk ice cream can last in the freezer for about two to three months if stored properly.
Make sure you keep it in an airtight container to prevent freezer burn.
You’ll notice that the texture might change slightly after a while, but it should still taste good.
When you’re ready to enjoy it, just let it sit out for a few minutes before scooping to get that perfect creaminess.
What Are the Health Benefits of Hemp Milk?
Imagine your body as a garden, thriving with nutrients. Hemp milk acts as the nourishing rain, rich in omega-3 and omega-6 fatty acids that support heart health.
It’s packed with protein, essential for building strong muscles, and contains vitamins like B12, promoting energy.
You’ll find it’s low in calories and dairy-free, making it a perfect companion for your wellness journey.
Embrace the benefits, and watch your garden flourish!
Can I Add Mix-Ins Like Chocolate Chips or Fruit?
Absolutely, you can add mix-ins like chocolate chips or fruit to your ice cream!
Just make sure to fold them in gently after you’ve blended your base. This way, you’ll evenly distribute the flavors without compromising the texture.
If you’re using fresh fruit, consider chopping it into smaller pieces for easy mixing.
Experiment with different combinations to find your perfect flavor balance and enjoy your delicious creation!