If your ice cream maker is dirty, now’s the time to clean it thoroughly. Unplug the machine, disassemble all removable parts like the paddle, bowl, and lid, and wash them with warm water and mild detergent. Sanitize to eliminate bacteria and mold, then dry everything completely before reassembling. Don’t forget to wipe down the exterior and power cord. Keep your machine in tip-top shape—continue for detailed steps to clean it properly.
Key Takeaways
- Disassemble all removable parts like paddles, bowls, and lids for thorough cleaning after each use.
- Wash parts with warm water and a gentle sponge, then rinse thoroughly to remove soap residues.
- Dry all components completely with a clean towel or air dry to prevent mold and bacterial growth.
- Sanitize parts using food-safe solutions or diluted vinegar, especially in crevices and hard-to-reach areas.
- Reassemble your ice cream maker only after all parts are fully dry to ensure hygiene and optimal performance.

Palksky Ice Cream Maker Cleaning Kit for Ninja Swirl Creami, Ice Cream Machine Brush Set, 6 PCS
COMPLETE KIT: 6-piece specialized cleaning brush set designed specifically for Ninja Swirl Creami ice cream maker components and…
As an affiliate, we earn on qualifying purchases.
As an affiliate, we earn on qualifying purchases.
Gather Your Cleaning Supplies

Have you gathered all the necessary cleaning supplies? Before you start, it’s important to contemplate safety precautions—wear gloves and work in a well-ventilated area. Make sure you have mild dish soap, soft sponges or brushes, and clean towels. You might also want some vinegar or baking soda for deeper cleaning. Knowing the cleaning frequency helps determine what supplies you’ll need; regular cleaning after each use keeps buildup minimal, while deep cleaning less often requires more thorough supplies. Double-check that all your tools are clean and in good condition. Having your supplies ready before you begin to consider a smooth process, prevents delays, and keeps safety at the forefront. Proper preparation makes cleaning easier and more effective. Additionally, understanding industry transformations related to cleaning technologies can help you choose more efficient tools. Staying informed about innovative cleaning solutions can further enhance your maintenance routine. Considering advanced cleaning methods can also improve the effectiveness and efficiency of your cleaning process.

Replacement Ice Cream Maker Parts for Kitchenaid Mixer Ice Cream Maker Attachment – Drive Assembly Replacement for Kitchenaid Ice Cream Maker Rack
-Fit for Kitchenaid Mixer Ice Cream Maker Attachment first and second generation, perfect attachment and replacement for your…
As an affiliate, we earn on qualifying purchases.
As an affiliate, we earn on qualifying purchases.
Unplug and Disassemble Your Machine

Before cleaning, make sure to unplug your ice cream maker to stay safe. Carefully remove all removable parts, handling them gently to avoid damage. Once disassembled, you’re ready to start the cleaning process.
Power Down Safely
To guarantee safety during cleaning, you should unplug the ice cream maker and disassemble any removable parts. This assures power down safety and prevents accidental operation during maintenance. Always disconnect the appliance before handling internal components or cleaning. Use the following table to check what to unplug and disassemble:
| Step | Action | Notes |
|---|---|---|
| Unplug the machine | Remove power cord | Prevent electric shock |
| Disassemble removable parts | Take off paddles, bowls | Prepare for cleaning |
| Confirm power is off | Test with switch or button | Avoid accidental startup |
Additionally, inspecting craft and textiles tools and components can help ensure all parts are properly cleaned and maintained. Regularly inspecting kitchen appliances components helps maintain optimal performance and safety.
Remove Parts Carefully
Ensuring safety during cleaning starts with unplugging your ice cream maker and carefully disassembling its removable parts. Gently remove all components, such as the dasher, bowl, and lid, taking care not to damage any parts. As you disassemble, inspect each piece for damage or cracks that could affect performance or safety. When removing stubborn residue, avoid forcing parts apart, which might cause breakage. Use a soft brush or cloth to loosen any stuck debris. Pay close attention to tight spots where residue tends to build up. Carefully handle each component to prevent damage, especially if you plan to soak or scrub them later. Proper, cautious removal ensures thorough cleaning and helps extend the lifespan of your machine. Incorporating aromatic cleaning with essential oils can also enhance the freshness and sanitation of your appliance. For example, adding a few drops of lavender or eucalyptus oil to your cleaning routine can provide antimicrobial benefits and a calming aroma. Additionally, understanding angel numbers can provide spiritual guidance and reassurance during your cleaning routine, helping you stay focused and positive. Remember that regular maintenance not only keeps your ice cream maker hygienic but also contributes to its overall performance and longevity.
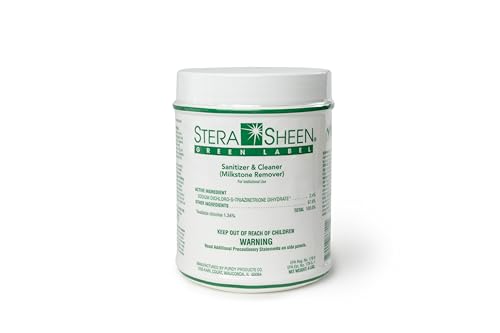
Stera Sheen 4lb Green Label Ice Machine & Ice Maker Cleaner + Sanitizer – Milkstone Remover & Descaler for Scotsman, Soft Serve Equipment, Food-Contact Surface – Restaurant-Grade (1 Pack)
ALL-IN-ONE CLEAN CYCLE: Cuts steps by cleaning, sanitizing, and descaling in one process—removes milkstone and mineral scale, working…
As an affiliate, we earn on qualifying purchases.
As an affiliate, we earn on qualifying purchases.
Remove and Clean the Removable Parts

Removing and cleaning the removable parts of your ice cream maker is a crucial step to keep it functioning properly and prevent any buildup of residue. After each use, carefully take out the paddle, bowl, and lid, ensuring you handle them gently. Proper storage of these parts, once cleaned, helps prevent dust and dirt from accumulating. Regularly cleaning and drying these components is essential for routine maintenance, reducing the risk of mold or bacteria growth. Additionally, using hygienic practices during cleaning ensures the safety and longevity of your appliance. Incorporating proper storage methods can further prevent contamination and damage. By keeping removable parts spotless and stored correctly, you extend your ice cream maker’s lifespan and ensure every batch is fresh and safe. Always follow the manufacturer’s instructions for cleaning and storing to maintain peak performance and hygiene. Proper care today prevents bigger issues tomorrow. Incorporating automated cleaning features when available can further simplify maintenance routines. Remember, routine maintenance is key to preserving the quality and efficiency of your ice cream maker over time. Also, choosing appropriate cleaning agents helps avoid damage to sensitive components while ensuring thorough sanitation.
Palksky Ice Cream Maker Cleaning Kit for Ninja Swirl Creami, Ice Cream Machine Brush Set, 6 PCS
COMPLETE KIT: 6-piece specialized cleaning brush set designed specifically for Ninja Swirl Creami ice cream maker components and…
As an affiliate, we earn on qualifying purchases.
As an affiliate, we earn on qualifying purchases.
Wash the Bowl, Paddle, and Lid Thoroughly

After each use, it’s important to wash the bowl, paddle, and lid thoroughly to prevent residue buildup and bacteria growth. Proper bowl maintenance ensures your ice cream stays fresh and safe to eat. Start by inspecting the paddle for any stuck-on bits or damage, as this can affect performance and cleanliness. Wash each part with warm water and a gentle sponge, making sure to reach all crevices. Avoid using harsh abrasives that could damage surfaces. Rinse well to remove any soap residue and dry completely to prevent mold. Keeping these parts clean and inspecting the paddle regularly helps maintain ideal operation and hygiene. Additionally, consider material durability to ensure long-lasting cleanliness and performance. Using appropriate cleaning products can also help preserve the integrity of your ice cream maker parts. Remember, thorough washing after every use is key to a safe, delicious ice cream experience. Regular maintenance according to manufacturer guidelines can further prolong the lifespan of your appliance and keep it functioning optimally. Proper cleaning not only prevents bacterial growth but also helps maintain the appliance’s efficiency over time. Ensuring that you follow all recommended cleaning procedures can help avoid issues related to digital literacy or improper handling that some users might experience.
Use a Mild Detergent for Scrubbing

When scrubbing your ice cream maker, opt for a gentle cleaning agent to avoid damaging the surfaces. Harsh chemicals can leave residues or cause corrosion, so steer clear of them. Be sure to rinse thoroughly after scrubbing to remove any soap and keep your machine clean and safe to use. Additionally, regularly monitoring your appliance for bacterial growth can help prevent contamination and ensure safety. Incorporating insights from celebrity lifestyle trends, such as maintaining clean and stylish kitchen appliances, can also motivate consistent cleaning routines. Remember that improper cleaning can sometimes lead to family photoshoot fails, as overlooked residues might cause odors or mold issues. Using a mild detergent specifically designed for kitchen appliances can enhance cleaning effectiveness without risking damage. For optimal results, consider storing your textile line tools properly to avoid cross-contamination or damage over time.
Choose Gentle Cleaning Agents
Choosing the right cleaning agents is essential to protect your ice cream maker’s delicate parts. When selecting cleaning products, opt for gentle cleaning options that won’t cause damage. Use a mild detergent or natural solutions like vinegar diluted with water, which effectively remove residues without harsh chemicals. Avoid aggressive cleaners that can degrade seals, plastics, or metal components. Always read labels to ensure the product is safe for your machine’s materials. Gentle cleaning not only preserves the longevity of your ice cream maker but also ensures your ice cream remains free from chemical residues. Remember, less is more—stick to mild, natural solutions for effective cleaning that keeps your machine safe and hygienic.
Avoid Harsh Chemicals
To effectively clean your ice cream maker without risking damage, it’s important to avoid harsh chemical cleaners. These strong chemicals can corrode parts or leave residues that affect your next batch. Instead, opt for chemical alternatives like mild dish soap or natural cleaning methods. A gentle detergent is sufficient for scrubbing away residue without causing harm. Using harsh chemicals isn’t necessary and can compromise your machine’s longevity. Natural cleaning methods, such as a mixture of vinegar and water, can also disinfect effectively without risking chemical buildup. Always choose cleaning agents that are safe for food-contact surfaces. By sticking to gentle, natural options, you protect your ice cream maker’s integrity and ensure it stays clean and safe for every delicious batch.
Rinse Thoroughly After Scrubbing
After scrubbing your ice cream maker with a gentle detergent, it’s important to rinse away any remaining soap residue. This step guarantees complete dirt removal and residue elimination, preventing flavor contamination or mold growth. Use warm water to thoroughly rinse all surfaces, paying close attention to corners and crevices. To make it easier, follow this simple guide:
| Step | Action |
|---|---|
| 1 | Rinse with warm water |
| 2 | Use a clean cloth to wipe |
| 3 | Check for leftover residue |
| 4 | Repeat if necessary |
This process ensures your ice cream maker is spotless and ready for its next use. Proper rinsing is key to maintaining hygiene and peak performance, so don’t skip this crucial step.
Rinse All Components Well

Once you’ve disassembled all the components, it’s important to rinse each part thoroughly with warm water. This step guarantees no residue from cleaning products or food remains on your kitchen essentials, which could affect taste or safety. Use gentle cleaning techniques to remove any soap or debris without damaging delicate parts. Pay close attention to crevices and hard-to-reach areas where grime can hide. Rinsing well helps prevent buildup that could interfere with your ice cream maker’s performance. Don’t rush this process—thorough rinsing is vital for maintaining hygiene and ensuring your machine functions at its best. Proper rinsing also makes subsequent sanitizing easier and more effective, keeping your ice cream maker clean and safe for every use.
Sanitize to Eliminate Bacteria and Mold

Proper rinsing sets the stage for effective sanitizing, which is essential to eliminate lingering bacteria and mold that can cause health issues or spoil your ice cream. Use a food-safe sanitizer or a diluted bleach solution to thoroughly disinfect all parts of your ice cream maker. Focus on crevices and hard-to-reach areas where bacteria and mold can hide. Sanitizing not only kills existing bacteria but also helps prevent mold growth, ensuring your machine stays safe and clean for future use. After sanitizing, let the parts air dry or dry them with a clean towel. Remember, bacteria elimination and mold prevention are vital steps to keep your ice cream fresh, safe, and delicious every time. Proper sanitization protects your health and extends your machine’s lifespan.
Dry All Parts Completely Before Reassembly

Make sure all parts are thoroughly dried before reassembling your ice cream maker. Wet components can lead to mold growth and bacterial spread, risking your health and appliance. Proper drying helps keep your machine running smoothly and extends its lifespan.
Prevents Mold Growth
To prevent mold from developing in your ice cream maker, it’s essential to dry all parts thoroughly before reassembling. Proper drying is key to mold prevention and maintaining good hygiene practices. Moisture leftover after cleaning creates a perfect environment for mold growth, which can spoil your ice cream and pose health risks. Follow these steps to ensure all components are dry:
- Wipe each part with a clean, dry cloth immediately after washing.
- Air-dry all pieces in a well-ventilated area.
- Pay special attention to crevices and seals where water can hide.
- Avoid reassembling until every part feels completely dry to the touch.
Stops Bacterial Spread
Since moisture can harbor bacteria, guaranteeing all parts are completely dry before reassembling your ice cream maker is essential to stopping bacterial spread. Wet surfaces create an ideal environment for bacteria to grow and multiply, risking contamination of future batches. By drying each component thoroughly, you reinforce good hygiene practices and reduce the chance of bacterial spread. Use a clean towel or air dry parts completely, paying close attention to crevices and hard-to-reach areas. Proper drying not only prevents bacteria from thriving but also helps maintain the cleanliness of your appliance. Incorporating this step into your cleaning routine ensures your ice cream maker stays hygienic and safe for every use, protecting your health and preserving the quality of your frozen treats.
Maintains Appliance Longevity
Ensuring all parts are completely dry before reassembling your ice cream maker is essential for maintaining its long-term performance. Moisture left inside can cause rust, mold, or damage, shortening the appliance’s lifespan. Incorporate this step into your regular cleaning schedule to prevent buildup and costly repairs. To do this effectively, follow these steps:
- Pat all components dry with a clean towel or air dry thoroughly.
- Avoid rushing—make sure even crevices are moisture-free.
- Store parts in a dry, ventilated area to prevent mold.
- Regularly inspect parts for signs of rust or damage during cleaning sessions.
This simple practice supports proper appliance maintenance, helping your ice cream maker stay in top shape longer.
Clean the Exterior and Power Cord

Cleaning the exterior and power cord of your ice cream maker is a simple but important step to keep it functioning properly. Exterior care involves wiping down the machine’s surface with a damp cloth to remove dust, fingerprints, and spills. Be sure to use a gentle cleaner if needed, avoiding abrasive materials that could scratch the surface. For power cord maintenance, unplug the appliance before cleaning. Use a damp cloth to wipe the cord gently, ensuring no dirt or residue builds up. Check for any signs of damage or fraying, and replace the cord if necessary. Keeping both the exterior and power cord clean prevents dirt accumulation and potential electrical issues, extending the lifespan of your ice cream maker and ensuring safe, efficient operation.
Reassemble and Store Properly

After you’ve thoroughly cleaned your ice cream maker, reassemble all the parts carefully, making sure each component fits securely. Proper reassembly guarantees your machine works efficiently and lasts longer. Follow these storage tips to keep it in top condition:
- Use disassembly techniques to take apart removable parts gently, avoiding damage.
- Dry each component completely to prevent mold or corrosion.
- Store the parts in a clean, dry place, preferably in a sealed container or bag.
- Keep the main unit covered to prevent dust accumulation and ensure quick setup next time.
Frequently Asked Questions
How Often Should I Clean My Ice Cream Maker?
You should clean your ice cream maker after every use to maintain proper ice cream hygiene and prevent bacteria buildup. Following a consistent cleaning schedule ensures your machine functions well and your treats stay safe. Don’t skip cleaning, especially if you switch flavors or leave leftovers. Regularly sanitizing parts also prolongs the lifespan of your ice cream maker. So, make cleaning a routine to enjoy fresh, delicious ice cream every time.
Can I Use Bleach to Sanitize My Machine?
You shouldn’t use bleach to sanitize your ice cream maker because it can jeopardize food safety and damage the machine. Instead, focus on proper cleaning frequency, like rinsing and washing after every use with warm, soapy water. Regular cleaning ensures your machine stays safe and hygienic, preventing bacteria buildup. For thorough sanitization, use food-safe disinfectants recommended by the manufacturer, and always rinse thoroughly before using again.
What if My Parts Are Dishwasher Safe?
Think of your dishwasher-safe parts as trusty sidekicks in your cleaning routine. If they’re labeled dishwasher safe, you can toss them in to save time and effort. Just make sure to follow the recommended cleaning frequency—regular cleaning keeps bacteria at bay and ensures your ice cream tastes fresh. Using your dishwasher appropriately is like giving your machine a spa day, keeping it hygienic and ready for delicious treats.
How Do I Prevent Mold Buildup Inside the Bowl?
To prevent mold buildup inside the bowl, you should focus on mold prevention through proper bowl maintenance. After each use, wash the bowl thoroughly with warm, soapy water and dry it completely to eliminate moisture that fosters mold. Store the bowl in a dry, well-ventilated area, and avoid leaving leftover ice cream inside for long periods. Regular cleaning and proper storage are key to keeping your ice cream maker mold-free.
Is It Necessary to Oil the Moving Parts After Cleaning?
You should lubricate the moving parts after cleaning to keep your ice cream maker running smoothly. Proper maintenance tips include using food-safe lubricants to prevent wear and tear. Lubricating components ensures easy operation and extends the lifespan of your machine. Always check your manufacturer’s instructions to see if oiling is recommended, and do it periodically for maximum performance. Regularly maintaining your ice cream maker keeps it in top shape for delicious treats.
Conclusion
Now that you’ve thoroughly cleaned your ice cream maker, isn’t it worth keeping it spotless for every delicious batch? Regular cleaning not only extends its lifespan but also ensures every scoop is fresh and safe. Don’t let dirt and bacteria spoil your treats—make cleaning a quick habit. After all, isn’t enjoying perfectly clean, homemade ice cream worth a little effort? Keep your machine in top shape and savor every creamy bite with confidence!