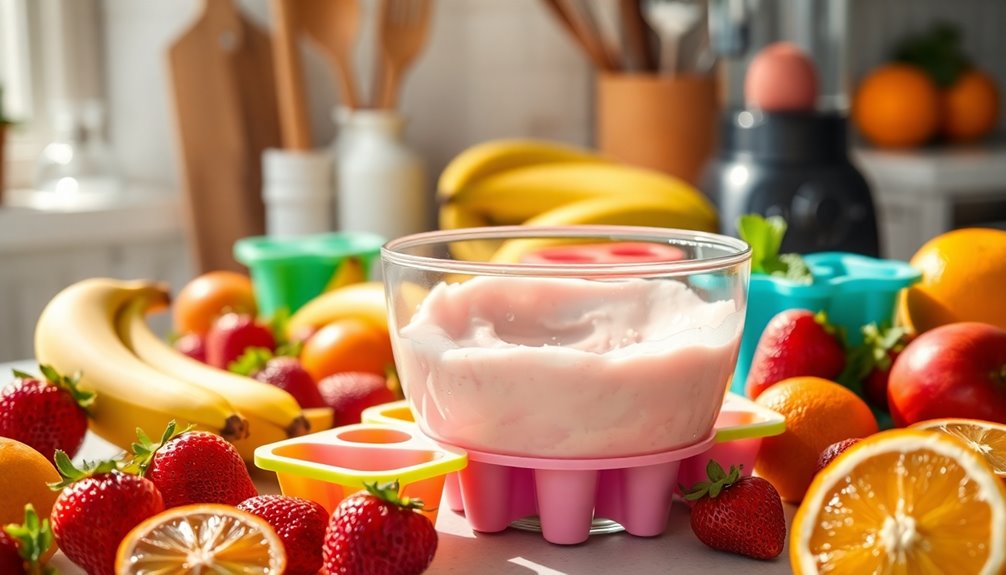

Making ice cream popsicles at home is a fun way to enjoy healthy treats! You can blend fresh fruits with Greek yogurt or dairy-free coconut yogurt for delicious flavors. Pour your mixtures into molds and freeze them for a rejuvenating snack. To release the pops easily, run the molds under warm water. Get creative by layering flavors or adding mix-ins like fruit chunks or herbs. There’s so much more to explore to make your popsicles unique!
Key Takeaways
- Use a base of Greek yogurt or coconut yogurt mixed with fresh fruit purees for creamy, flavorful popsicles without added sugars.
- Layer different fruit purees and yogurt in molds for visual appeal and variety in taste, freezing layers briefly before adding more.
- Fill molds to the indicated line, avoiding overfilling, and freeze for at least 4 hours or overnight for solid texture.
- Store popsicles in an airtight container in the freezer for up to 3-4 months, but consume within a month for best flavor.
- Experiment with creative additions like crushed cookies, herbs, or different molds to personalize your popsicle creations.
Healthy Summer Treats

When summer rolls around, you might crave something cool and revitalizing, and homemade popsicles are the perfect solution.
These healthy summer treats can easily be made using fresh fruit, Greek yogurt, and a touch of honey. By pureeing ripe, in-season fruits like mixed berries, peaches, or mangoes, you create a flavorful base that’s both nutritious and delicious. Whole foods are ideal for crafting these popsicles, as they provide essential nutrients without added sugars. Incorporating sugar-free options into your recipes can enhance the health benefits even further. Additionally, using fruits like cranberry juice may offer antioxidant benefits, adding to the nutritional value of your popsicles.
Create nutritious and delicious homemade popsicles using fresh fruit, Greek yogurt, and a hint of honey for a refreshing summer treat.
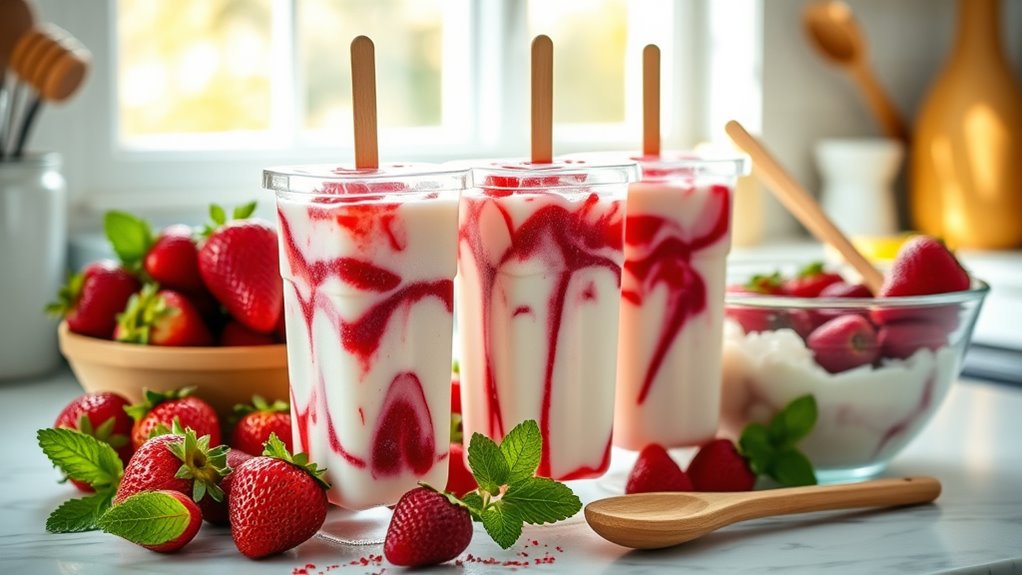
Layer this fruit puree with Greek yogurt in your popsicle molds for a creamy texture that kids will love. Not only do these popsicles taste amazing, but they also offer a healthier alternative to store-bought varieties loaded with sugar. Additionally, incorporating yogurt into your popsicles provides health benefits that promote gut health and add essential nutrients.
Best of all, you can store your homemade ice cream popsicles in the freezer for up to a month, ensuring a revitalizing treat is always on hand.
Favorite Flavor Combinations
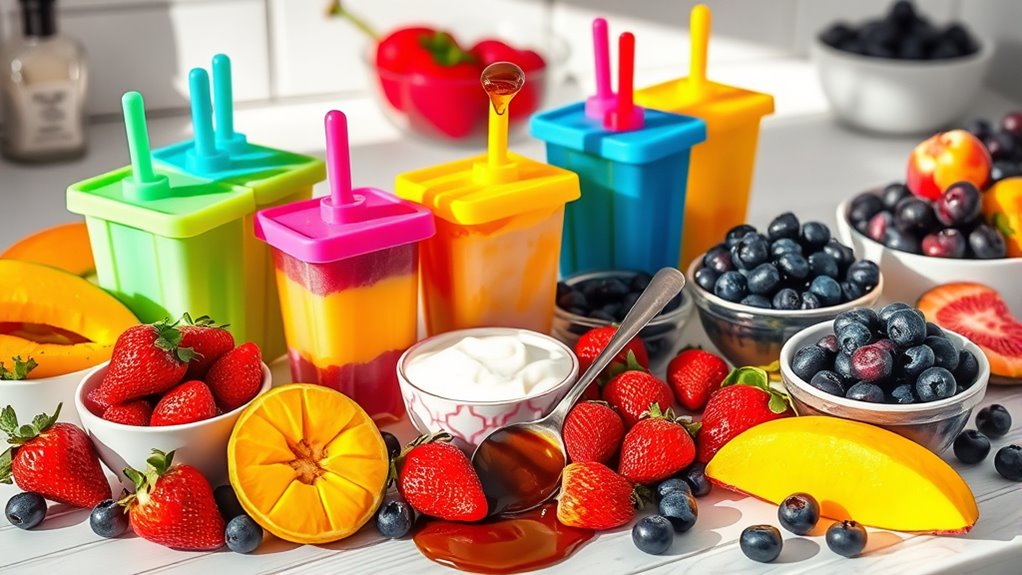
There are endless possibilities when it comes to flavor combinations for homemade ice cream popsicles. One of your favorite flavor combinations could be mixed berries blended with vanilla Greek yogurt and honey, resulting in a creamy and fruity delight. Additionally, incorporating herbal teas like chamomile into your recipes can provide a unique twist and promote relaxation.
For a tropical twist, try combining pineapple or mango with coconut Greek yogurt and honey for a revitalizing treat.
If you love classic summer flavors, ripe peaches with vanilla Greek yogurt and honey create a sweet, creamy popsicle that’s hard to resist.
For something tangy, puree kiwi with either vanilla or coconut yogurt and a touch of honey.
Finally, cherry popsicles made with fresh cherries, vanilla Greek yogurt, and honey offer a delicious option, especially with added coconut water for texture. Additionally, incorporating cotton candy ice cream flavors can enhance the sweetness and make your popsicles a fun treat for all ages.
How to Get Homemade Popsicles Out of the Mold
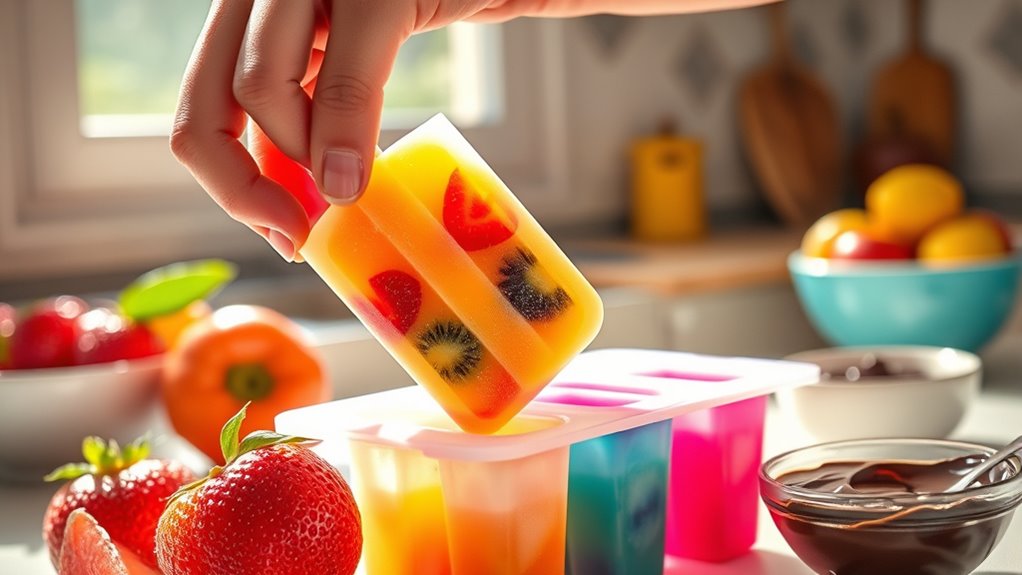
Getting your homemade popsicles out of the mold can sometimes be tricky. You can use warm water to help loosen them, but make sure not to overfill the molds before freezing to prevent sticking.
If they’re still stuck, try submerging the entire mold in warm water for a quick fix.
Warm Water Technique
To easily release your homemade popsicles from their molds, try running warm water over the outside for a few seconds. This helps loosen the popsicles without melting them.
If they’re still stuck, continue with warm water for a bit longer or submerge the popsicle mold in warm water for about 30 seconds. Just be cautious with the water temperature to avoid damaging your treats.
Consider using silicone molds for easier extraction; their flexibility allows for a smoother release.
Also, make sure you don’t overfill the molds, as excess pressure can make the popsicles stick.
With these tips, you’ll enjoy perfectly released popsicles every time!
Mold Filling Tips
When it comes to filling your popsicle molds, precision is key to ensuring an easy release later. Avoid overfilling the molds, as excess mixture can lead to difficulty during removal.
Once your popsicles are frozen, if they’re stuck, run the mold under warm water for a few seconds. Make sure the water is warm but not hot to prevent melting your popsicles. If they still won’t budge, try submerging the mold in warm water for about 30 seconds. This will help loosen them up.
Always use caution with temperature; too much heat can cause your popsicles to lose their shape. Opt for silicone molds, as they usually make removal easier than rigid options.
Enjoy your homemade treats!
Alternative Methods
Even with the right filling techniques, you might still face challenges getting those homemade popsicles out of their molds.
If your popsicle molds are proving stubborn, run them under warm water for a few seconds. This should help loosen your homemade popsicles. If they’re still stuck, keep running them under warm water for additional seconds until they release.
Alternatively, you can submerge the entire mold in warm water for about 30 seconds to make removal easier. Just be careful with the water temperature; you don’t want to melt your popsicles while trying to get them out.
Also, remember not to overfill your molds, which can complicate the extraction process and lead to frustration.
Enjoy your treats!
Tips for Success
To make your ice cream popsicles truly stand out, choose ripe, fresh fruits that pack a punch in flavor. Additionally, be mindful that some high-fat ice creams may raise LDL cholesterol levels, so consider using lower-fat options for a healthier treat. Don’t forget to use layering techniques for visual appeal and variety in taste, making each bite exciting. Finally, guarantee proper freezing methods to achieve the perfect texture and easy release from the molds. Additionally, consider incorporating unique ice cream flavors to enhance the overall taste experience.
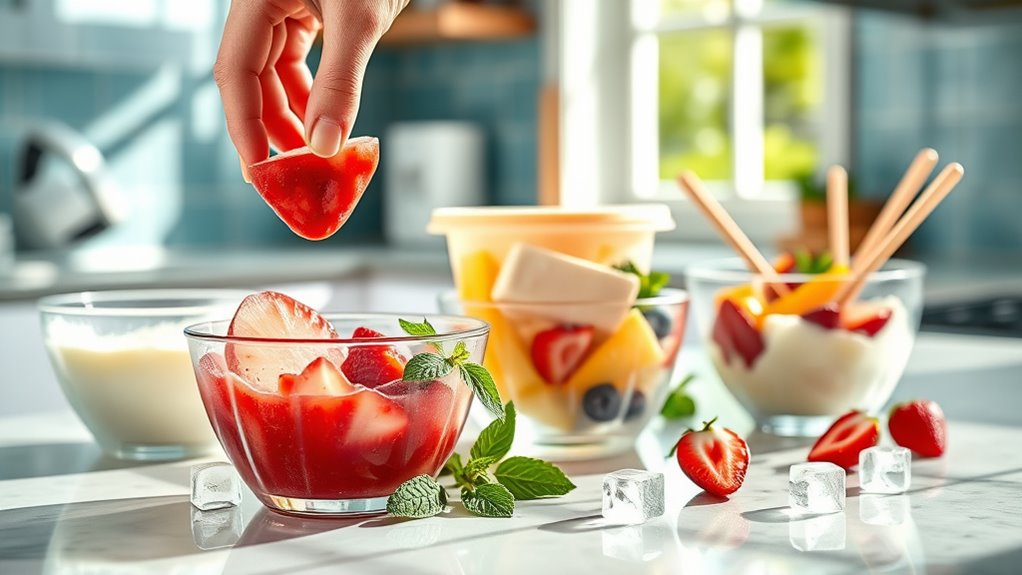
Choose Ripe, Fresh Fruits
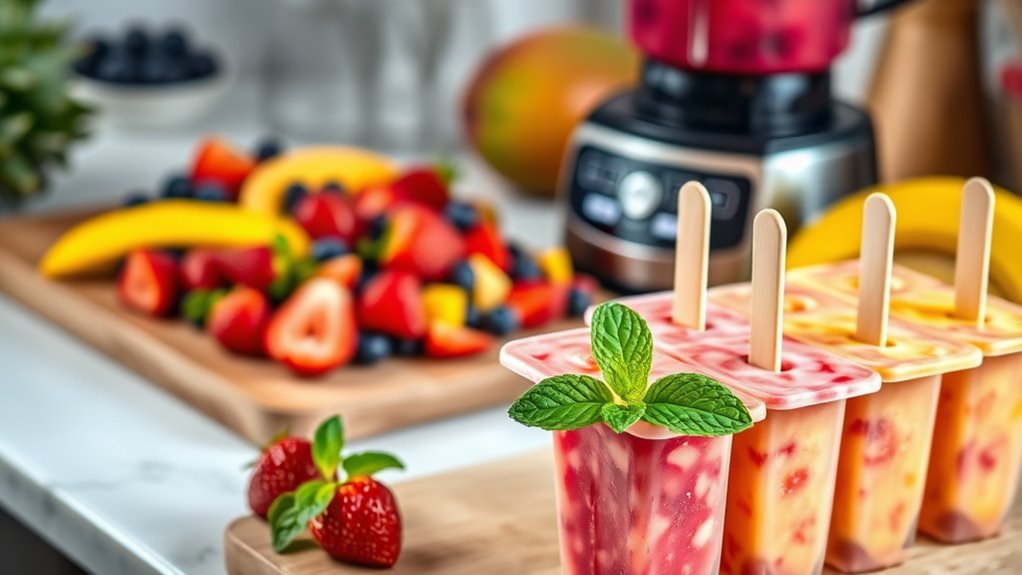
Choosing ripe, fresh fruits is essential for making delicious popsicles. When you select ripe fruits, like mixed berries, peaches, or mangoes, you guarantee ideal taste and juiciness in your popsicle recipes.
Look for fruits that boast vibrant colors and a fragrant aroma; these are signs of peak ripeness and sweetness. For the best texture, opt for fruits that feel slightly soft to the touch, as they blend smoothly into your mixture.
Steer clear of overripe or bruised fruits, since they can introduce off-flavors and ruin your popsicles. Don’t hesitate to experiment with different fresh fruits to create unique flavor combinations that will delight your taste buds and impress your friends!
Layering Techniques for Appeal
Once you’ve selected your ripe, fresh fruits, it’s time to think about how to layer them for maximum visual and taste appeal in your popsicles.
Using effective layering techniques, you can create frozen popsicles that are both delicious and visually appealing. Start by using a piping bag or spoon to carefully add alternating layers of pureed fruit and yogurt.
Choose contrasting colors—like vibrant berries with creamy yogurt—to make each layer pop. For the best flavor, opt for in-season fruits that are juicy and ripe.
To achieve distinct layers, freeze each layer for a short period before adding the next. This way, you’ll prevent blending and enhance the professional look of your homemade popsicles.
Proper Freezing Methods
When you’re ready to freeze your ice cream popsicles, it’s important to follow some key methods to guarantee they turn out perfectly. Start by using proper popsicle molds or DIY options like Dixie cups, filling them only to the indicated line to help them freeze evenly. Allow your popsicles to freeze for at least 4 hours or overnight for the best texture. When it’s time to remove popsicles, run the mold under warm water for a few seconds to loosen them up. Finally, store any extras in an airtight container to keep them fresh for up to 3-4 months.
| Step | Action | Purpose |
|---|---|---|
| Fill molds | To the indicated fill line | Prevent overflow |
| Freeze | At least 4 hours or overnight | Maintain solid texture |
| Remove popsicles | Run under warm water | Facilitate easy removal |
| Store | In an airtight container | Prevent freezer burn |
Recipe Adaptations
Although traditional ice cream popsicles are delicious, you can easily adapt recipes to suit your dietary preferences and flavor cravings.
For a dairy-free version, swap full-fat Greek yogurt and heavy cream with coconut yogurt and canned coconut cream. You can create a unique flavor by blending ripe avocado with mint extract instead of sticking to traditional fruit bases. Incorporating chia seeds in your popsicle mixture can enhance nutritional value by adding fiber and omega-3 fatty acids. These seeds are also known to promote bowel regularity, making them a great addition for digestive health. Additionally, chia seeds are high in omega-3 fatty acids, which can be beneficial for heart health.
Feel free to adjust sweeteners based on your needs—honey, agave syrup, or sugar-free options work well. To diversify flavors, experiment with fruits like raspberries or blueberries instead of strawberries.
Additionally, adding simple ingredients like MCT oil or xanthan gum can enhance the texture and creaminess, especially in recipes made with frozen fruits. Enjoy crafting your perfect popsicle!
Storage and Shelf Life
When it comes to storing your homemade ice cream popsicles, knowing how long they last is key.
You should aim to enjoy them within a month for the best taste, but they can hang out in the freezer for up to 3-4 months if sealed properly.
Keep an eye out for any signs of spoilage to guarantee you’re always treating yourself to a delicious treat.
Recommended Freezer Storage Duration
You can store homemade ice cream popsicles in the freezer for up to 3-4 months if you use an airtight container.
Proper storage is key to maintaining the flavor and texture of your popsicles, preventing freezer burn and iciness. To guarantee the best quality, freeze your popsicles completely before sealing them in the container.
It’s also a good idea to label the container with the date of preparation, helping you keep track of freshness. For peak taste, aim to consume your homemade popsicles within the first month.
This way, you’ll enjoy the delightful flavors and textures they offer, making every bite a revitalizing treat. Enjoy your delicious creations while they’re at their best!
Signs of Spoilage
To guarantee your homemade ice cream popsicles remain safe and enjoyable, keep an eye out for signs of spoilage.
If you notice any of the following, it’s best to discard any popsicles:
- An off or sour smell that indicates they’re no longer fresh.
- Discoloration, which may suggest that the flavor has degraded.
- Ice crystals on the surface, a clear sign of freezer burn.
- An unusual texture or taste, like excessive iciness or graininess.
Best Practices for Storage
Proper storage plays a significant role in prolonging the life of your homemade ice cream popsicles and preserving their delightful flavor.
To prevent freezer burn, always transfer fully frozen popsicles into an airtight container. If you’re using popsicle molds, avoid overfilling them; this will help you remove the pops easily and maintain their shape.
For those using plastic cups as molds, carefully cut away the cups after freezing to avoid damaging your popsicles.
While your homemade popsicles can last up to 3-4 months in the freezer, consuming them within one month will guarantee peak freshness.
With these best practices, you can enjoy your tasty treats longer without sacrificing quality.
Equipment Needed for Making Popsicles
Making ice cream popsicles at home requires just a few essential pieces of equipment. With the right tools, you can create delicious treats easily. Here’s what you’ll need:
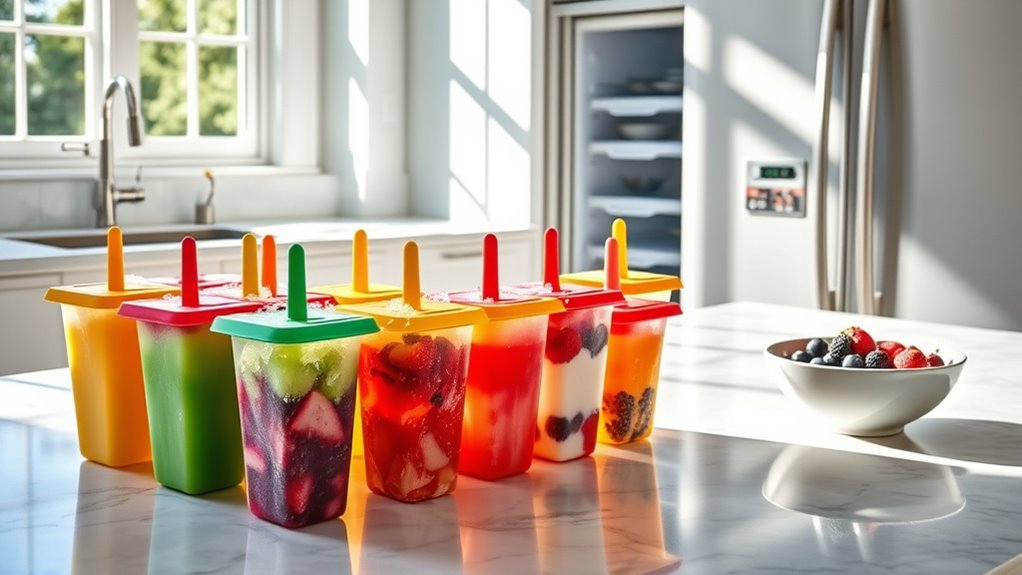
- Popsicle molds – Choose silicone, plastic, or even DIY options like muffin tins or Dixie cups for easy removal.
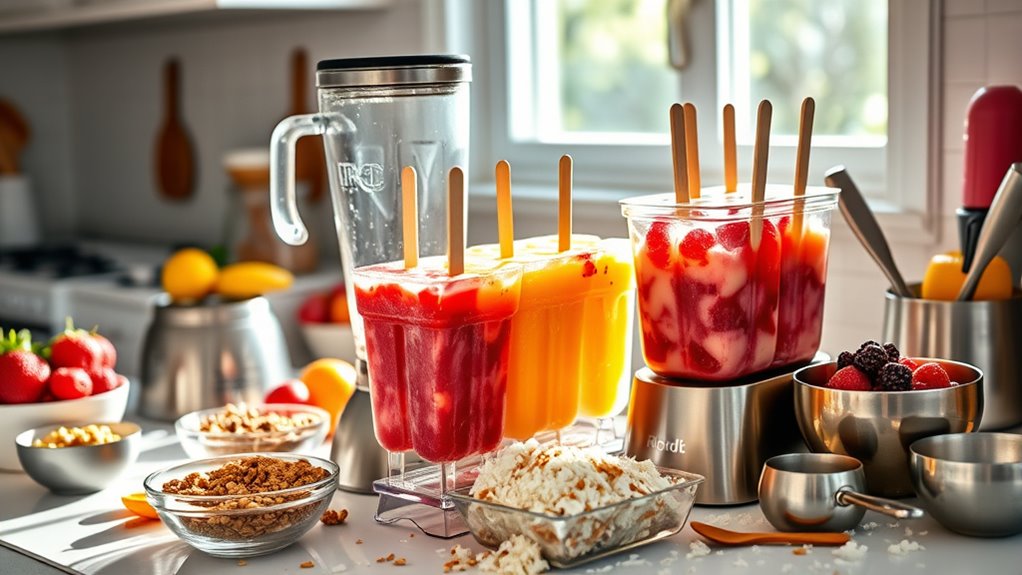
- Blender – A good blender or food processor guarantees a smooth mixture, perfect for blending fruits and yogurt.
- Popsicle sticks – These wooden sticks provide stability and are easy to handle; secure them in DIY molds with foil.
- Airtight container – Store your popsicles properly in an airtight container to maintain quality and extend shelf life up to 3-4 months.
Gather these items, and you’re ready to start making popsicles!
Creative Customizations

While you’re whipping up your homemade ice cream popsicles, don’t hesitate to get creative with customizations that can elevate your treats. Experiment with layering flavors like chocolate and vanilla for a stunning visual. Add crushed cookies, fruit chunks, or nuts for extra texture. You can also adjust sweetness levels using honey, maple syrup, or stevia to suit your taste. Consider making stuffed popsicles by adding hot fudge or fruit puree in the center for a delightful surprise. Don’t forget to use various molds, from Dixie cups to silicone trays, for unique shapes. Here’s a quick reference for your ideas:
| Customization Type | Examples | Benefits |
|---|---|---|
| Flavor Layering | Chocolate, Vanilla | Visually appealing |
| Mix-ins | Cookies, Nuts | Added texture |
| Sweetness Adjust | Honey, Stevia | Personalized taste |
| Stuffed Popsicles | Hot Fudge, Cake | Flavor burst |
| Unique Molds | Silicone, Dixie | Fun shapes |
Nutrition Information
Homemade ice cream popsicles offer a delicious and healthier alternative to store-bought treats, typically containing about 66 calories and 15 grams of carbohydrates per serving.
You can easily tailor the nutrition information to fit your dietary preferences by choosing the right ingredients. Here are some options to take into account:
- Full-fat Greek yogurt – for added protein.
- Heavy cream – provides healthy fats and creaminess.
- Natural sweeteners – like honey or maple syrup for sweetness without the guilt.
- Dairy-free alternatives – such as coconut milk for a vegan-friendly option.
More Frozen Treat Ideas

Frozen treats are a fantastic way to cool off on a hot day, and you can easily whip up a variety of popsicle flavors right in your kitchen.
For delicious popsicles made with health in mind, blend mixed berries, peaches, or mangoes with yogurt and honey. Additionally, consider using clean beauty products to create healthier popsicle options that align with your dietary goals. If you’re craving something indulgent, try raspberry lemon cheesecake popsicles by pureeing raspberries and mixing them with cream cheese.
For a quick treat, combine overripe bananas with Nutella for a simple two-ingredient popsicle. Experiment with Greek or coconut yogurt to achieve that creamy texture without iciness. Don’t forget to layer different flavors in your molds for visually stunning ombre or swirled popsicles—perfect frozen treat ideas for all ages!
Frequently Asked Questions
How to Make Popsicles Creamy and Not Icy?
To make your popsicles creamy and not icy, you’ll want to use full-fat Greek yogurt or heavy cream. Incorporating ripe, in-season fruits enhances flavor without needing extra sweeteners.
A touch of cornstarch can improve the texture, too. Don’t overfill your molds; leave some space for expansion.
Finally, blending in ingredients like avocado or coconut milk can add richness, making your popsicles smooth and enjoyable rather than icy. Enjoy your creamy creations!
What Ingredient Makes Popsicles Soft?
Imagine your popsicle as a soft cloud on a summer day. To keep your popsicles soft, using full-fat coconut milk or Greek yogurt is key; they create a creamy texture that prevents iciness.
Adding ripe fruits boosts natural sweetness and juiciness, while a splash of sweetened condensed milk enhances richness.
Don’t forget to avoid overfilling the molds—this guarantees even freezing and makes it easier to enjoy that delightful softness you crave!
How to Make Popsicles at Home?
To make popsicles at home, you’ll want to blend fresh fruit, yogurt, and a sweetener like honey until smooth.
Pour the mixture into molds, layering flavors for a fun twist. If you don’t have molds, use muffin tins and secure sticks with foil.
Freeze until solid, then run the molds under warm water for easy release.
Store your homemade popsicles in an airtight container in the freezer, ready for a revitalizing treat anytime!
What Stabilizers Are Used in Popsicles?
When you think about stabilizers in popsicles, you’ll often find ingredients like gelatin, agar-agar, or pectin, which help achieve a smooth texture by preventing ice crystal formation.
You might also come across cornstarch for creaminess and xanthan gum for added viscosity.
Many commercial brands use sodium alginate to improve texture and shelf-life.
These stabilizers work together to create a delightful popsicle experience, ensuring your treat remains enjoyable and consistent.
Conclusion
So, you thought making your own ice cream popsicles would be a hassle? Turns out, it’s a breeze! With just a few simple ingredients and some creativity, you can whip up delicious, healthy treats that’ll impress even the pickiest eaters. Who knew that beating the summer heat could be so rewarding? Now that you’re armed with tips and tricks, go ahead and release your inner popsicle artist—because nothing says summer like a homemade treat that’s almost too good to share!