Granola topping for ice cream adds a delicious crunch and enhances your dessert with nutritional benefits. It originated from the health food movements of the 1960s but found its way into the dessert world by the 1980s. Making your own granola is quick and lets you customize ingredients to suit your taste. Pair it with fruits, nuts, or chocolate for a satisfying treat. If you want to discover more exciting ways to enjoy it, keep exploring!
Key Takeaways
- Granola topping adds a crunchy texture and flavor contrast to creamy ice cream, enhancing the dessert experience.
- Homemade granola is customizable, allowing you to tailor ingredients to your taste and dietary needs.
- Store granola in an airtight container for freshness; it lasts up to two weeks at room temperature.
- Experiment with various flavor combinations, such as fruits, nuts, or chocolate, for unique ice cream toppings.
- Granola provides nutritional benefits, including fiber and healthy fats, making it a guilt-free indulgence when used in moderation.
History
Granola topping for ice cream has its roots in the health food movements of the 1960s and 1970s, when people began to seek out natural, wholesome ingredients.
As health-conscious trends grew, so did the popularity of granola, originally created as a nutritious breakfast option. You mightn’t realize that this crunchy blend of oats, nuts, and sweeteners found its way into dessert domains as consumers searched for healthier alternatives to traditional toppings.
By the 1980s, granola’s versatility allowed it to shift from breakfast bowls to ice cream sundaes.
In the 1980s, granola transitioned from a breakfast staple to a beloved ice cream topping, showcasing its culinary versatility.
Today, you enjoy this delightful fusion, combining the creamy sweetness of ice cream with the satisfying crunch of granola, reflecting a broader shift toward mindful eating that continues to influence culinary choices. This trend mirrors the rise of sustainable fashion, as consumers increasingly prioritize health and wellness in all aspects of their lifestyles.
Recipe
Granola topping for ice cream is a delightful way to elevate your favorite frozen treat. This crunchy, sweet topping adds texture and flavor, making every scoop even more enjoyable. Whether you prefer classic vanilla or a rich chocolate ice cream, this homemade granola will complement it perfectly. Plus, making your own granola allows you to customize the ingredients to suit your taste and dietary preferences. Incorporating low carb high protein options can make your granola even more nutritious. Additionally, this recipe is quick to prepare, similar to Egg Rollup and Dumpling Sauce, which is ideal for busy mornings.
Making granola is a simple process that requires minimal effort. The key is to achieve the right balance of sweetness and crunch while ensuring that the oats and nuts are perfectly toasted. This recipe combines oats, nuts, and a touch of honey or maple syrup for sweetness, resulting in a delicious topping that can also be enjoyed on yogurt, smoothies, or even by the handful as a snack.
Ingredients:
- 2 cups rolled oats
- 1 cup mixed nuts (such as almonds, walnuts, or pecans), chopped
- 1/2 cup honey or maple syrup
- 1/3 cup vegetable oil or melted coconut oil
- 1 teaspoon vanilla extract
- 1/2 teaspoon cinnamon
- 1/4 teaspoon salt
- Optional: 1/2 cup dried fruits (such as cranberries or raisins), chocolate chips, or seeds
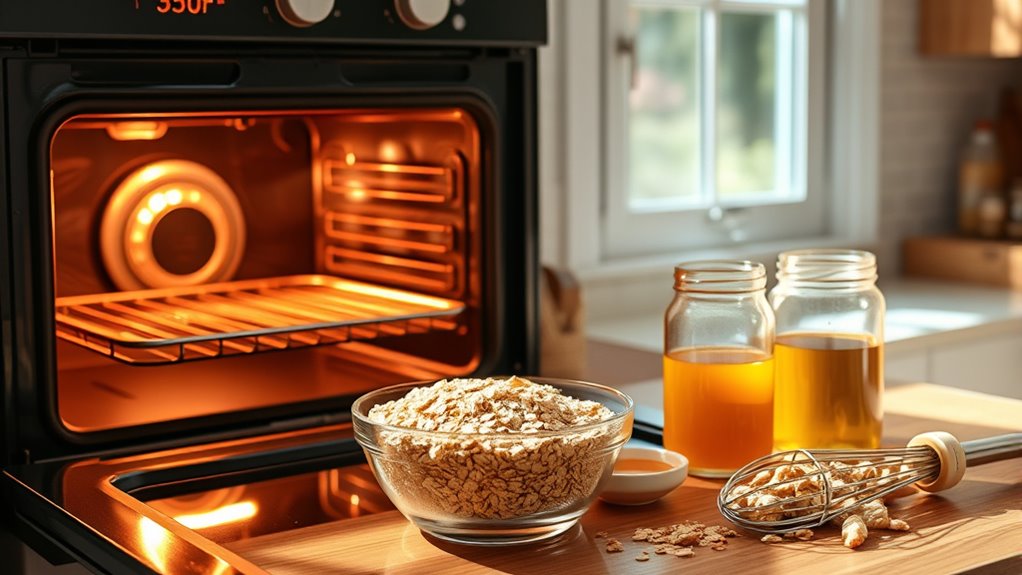
To prepare the granola, preheat your oven to 350°F (175°C) and line a baking sheet with parchment paper. In a large mixing bowl, combine the rolled oats, chopped nuts, cinnamon, and salt.
In a separate bowl, whisk together the honey or maple syrup, oil, and vanilla extract until well combined. Pour the wet mixture over the dry ingredients, stirring until everything is evenly coated.
Spread the mixture in a single layer on the prepared baking sheet and bake for about 20-25 minutes, stirring halfway through, until the granola is golden brown. Allow it to cool completely before adding any optional ingredients like dried fruits or chocolate chips.
When making granola, it’s important to keep an eye on it while baking, as it can go from perfectly golden to burnt quickly. Feel free to experiment with your favorite nuts and seeds to personalize the flavor. For added flavor, consider toasting the nuts beforehand or adding spices like nutmeg or ginger.
Additionally, this homemade granola can be a part of your daily skincare routine as a healthy snack option while you pamper your skin. Store the granola in an airtight container at room temperature for up to two weeks, so you can enjoy it on your ice cream or other treats whenever you wish!
Cooking Steps
To make your granola topping, you’ll start by preheating your oven to 350°F.
Next, mix together oats and nuts, then add your choice of sweetener and spices for flavor.
Once everything’s combined, you’ll bake it for 15 minutes before letting it cool and storing your delicious creation. Adding granola topping can enhance the texture and flavor of your desserts, similar to how chocolate ganache complements chocolate peanut butter bars.
Step 1. Preheat Oven to 350°F
Before you start preparing your delicious granola topping, you’ll want to preheat your oven to 350°F. This step is essential because it guarantees your granola will bake evenly and develop that perfect crunchy texture.
While the oven heats up, take a moment to gather your ingredients and tools. Make sure your baking sheet is ready, and consider lining it with parchment paper for easier cleanup.
It’s helpful to set a timer for about 5-10 minutes, as that’s usually how long it takes for the oven to reach the desired temperature. Once it’s preheated, you’ll be all set to move on to mixing your oats and nuts, creating that tasty blend that’ll elevate your ice cream experience.
Step 2. Mix Oats and Nuts

Gathering your oats and nuts is the next step in creating a delightful granola topping. Start by measuring out rolled oats; about three cups should do the trick.
Next, choose your favorite nuts—almonds, walnuts, or pecans all work well. Chop them roughly, aiming for about a cup.
In a large mixing bowl, combine the oats and chopped nuts. Stir them together until they’re evenly mixed, ensuring every bite will be crunchy and satisfying. Incorporating chia seeds into your granola mix can boost the nutritional value with added fiber and omega-3 fatty acids, making it a great choice for heart health. Additionally, using whole grains like oats can contribute to a lower risk of heart disease and promote overall wellness.
Once mixed, you’re ready to move on to the next step and add sweetener and spices.
Step 3. Add Sweetener and Spices

With your oats and nuts mixed together, it’s time to enhance the flavor by adding sweetener and spices. You can choose honey, maple syrup, or agave nectar for a touch of sweetness. Drizzle your preferred sweetener over the mixture, ensuring even coverage.
Next, it’s spice time! Sprinkle in cinnamon for warmth, and consider adding a pinch of salt to balance the sweetness. If you’re feeling adventurous, try nutmeg or vanilla extract to elevate the flavor profile. Additionally, incorporating probiotics from yogurt can create a deliciously balanced topping that complements your ice cream.
Mix everything thoroughly so each oat and nut gets coated with that delicious blend. This will create a tasty base that perfectly complements your ice cream. Your granola is shaping up to be a delightful topping!
Step 4. Bake for 15 Minutes

Now it’s time to bake your granola mixture to perfection. Preheat your oven to 350°F (175°C) and line a baking sheet with parchment paper.
Spread your granola mixture evenly on the sheet, making sure it’s not too thick. This allows for even baking and that delightful crunch.
Place it in the oven and set a timer for 15 minutes. Keep an eye on it, stirring halfway through to guarantee even browning. You’re looking for a golden color and a toasty aroma that fills your kitchen.
Once the timer goes off, carefully remove the baking sheet from the oven. Don’t forget to let it cool slightly before you enjoy the heavenly aroma of freshly baked granola.
Step 5. Cool and Store Granola

Once your granola has cooled for about 10 minutes, it’s time to break it into clusters and transfer it to an airtight container.
Use your hands or a spatula to gently separate the pieces, ensuring you keep some larger clusters intact for a delightful crunch. This step also helps prevent the granola from becoming too sticky.
Once you’ve stored the granola, seal the container tightly to keep it fresh. If you’re not using it right away, store it in a cool, dry place.
For longer storage, you can keep it in the refrigerator or freezer. Just remember to let it come to room temperature before using it again.
Enjoy your homemade granola as a delicious topping for ice cream!
Final Thoughts
As you explore the delightful world of granola toppings for ice cream, it’s clear that this combination can elevate your dessert experience. The crunchiness of granola adds a unique texture that perfectly contrasts the creaminess of ice cream.
Whether you prefer classic flavors or adventurous combinations, granola can enhance your treat in countless ways. You can customize your toppings to match your taste, incorporating fruits, nuts, or chocolate for added flavor.
Granola enhances ice cream with endless possibilities—mix in fruits, nuts, or chocolate to create your perfect treat!
Plus, granola’s nutritional benefits make it a guilt-free indulgence. So, don’t hesitate to experiment with different varieties and recipes.
Next time you scoop your favorite ice cream, sprinkle on some granola and enjoy a deliciously satisfying treat. You’ll find it’s a delightful twist that keeps you coming back for more!
Frequently Asked Questions
Can I Use Store-Bought Granola for Ice Cream Topping?
Absolutely, you can use store-bought granola for a topping! It’s convenient and saves you time, plus there are so many delicious varieties to choose from.
Just make sure to pick one that matches your taste preferences, whether you like it sweet, nutty, or fruity.
You’ll enjoy the crunch and added flavor it brings to your dessert. So go ahead, grab a bag, and elevate your ice cream experience!
Are There Gluten-Free Granola Options Available?
Yes, there are plenty of gluten-free granola options available!
When you’re shopping, just check the labels to ascertain they’re certified gluten-free. Many brands cater to gluten-sensitive consumers, offering delicious blends made with oats, nuts, and seeds.
You’ll find varieties with different flavors and textures, so you can pick one that suits your taste.
Don’t hesitate to try a few; you might discover a new favorite that fits your dietary needs perfectly!
How Long Can Granola Be Stored?
Granola can typically be stored for about six months if kept in an airtight container in a cool, dry place.
You should always check for any signs of spoilage, like off smells or changes in texture.
If you want to extend its shelf life, consider refrigerating or freezing it.
Just remember to let it come to room temperature before using.
Enjoy your granola fresh and flavorful by keeping it stored properly!
Can I Add Fruits to My Granola Topping?
Absolutely, you can add fruits to your granola topping! Fresh fruits like berries, bananas, or apples bring a burst of flavor and nutrition.
Dried fruits like raisins, cranberries, or apricots also work well, adding sweetness and chewiness.
Just remember to balance the moisture if you’re using fresh fruits, so your granola stays crunchy.
Experiment with different combinations to find your favorite mix, and enjoy the added health benefits!
What Ice Cream Flavors Pair Best With Granola?
When you’re choosing ice cream flavors to pair with granola, don’t worry if you think it’s a strange combination.
You’ll find that flavors like vanilla, chocolate, or even caramel complement the crunchy texture perfectly.
Fruit-flavored ice creams, like strawberry or raspberry, add a revitalizing contrast.
If you’re feeling adventurous, try pairing granola with coffee or mocha ice cream for a delightful twist.
Enjoy experimenting with different combinations to find your favorite!