
To make delicious peach ice cream at home, blend 4 ripe peaches with 1 cup of sugar. Chill the mixture, then combine it with 2 cups of heavy cream, 1 cup of whole milk, 1 teaspoon of vanilla extract, 1 tablespoon of lemon juice, and a pinch of salt. Pour this into an ice cream maker and churn until smooth. Freeze it for a few hours, and you’ll enjoy a creamy treat perfect for summer. There’s more to discover about perfecting your recipe!
Key Takeaways
- Use 4 ripe peaches, 1 cup sugar, 2 cups heavy cream, 1 cup whole milk, and vanilla extract for a flavorful base.
- Blend peeled and pitted peaches with sugar, then chill the mixture to enhance the flavors before combining with cream.
- Churn the chilled mixture in an ice cream maker until reaching a soft-serve consistency, following the manufacturer’s instructions.
- Transfer the churned ice cream to a freezer-safe container, smoothing the top, and freeze for several hours or overnight.
- Serve with fresh peach slices or as a delightful pairing with desserts like pie or cobbler for added enjoyment.
History
The history of peach ice cream is as sweet and rich as the dessert itself. You mightn’t know that its roots trace back to ancient civilizations, where frozen treats were made using crushed ice and fruits.
By the 17th century, the concept evolved in Italy and France, where ice cream became a delicacy among the elite. As peaches gained popularity in America, particularly in the South, they became a favorite flavor for ice cream.
By the 19th century, peach ice cream was a staple at summer gatherings and picnics, bringing joy to families and friends.
Today, it’s cherished for its creamy texture and fresh taste, connecting you to tradition while offering a delightful experience with every scoop.
Recipe
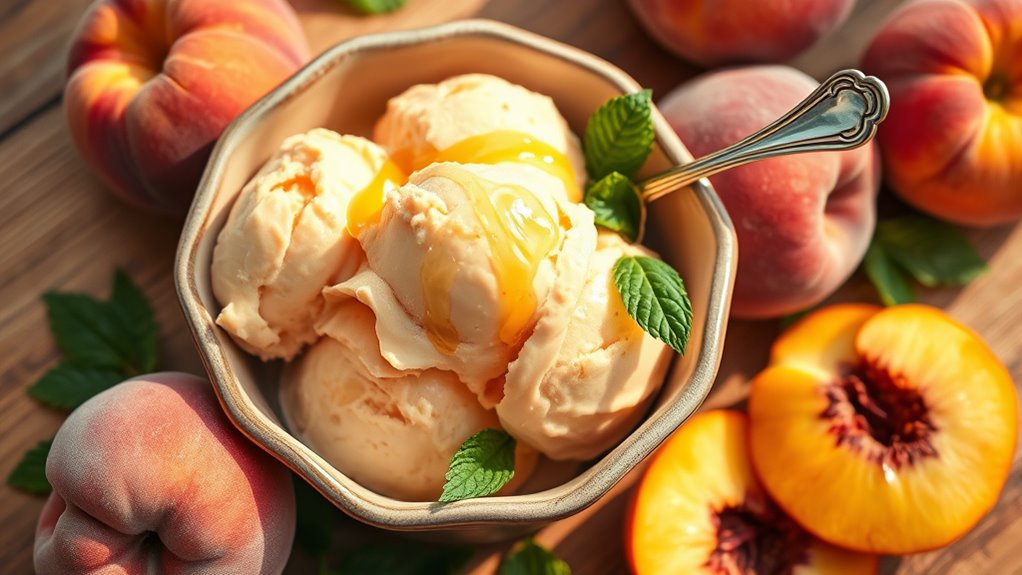
Nothing says summer quite like homemade peach ice cream. The creamy, dreamy texture combined with the sweet, juicy flavor of ripe peaches creates a revitalizing treat that’s perfect for hot days. Making peach ice cream at home not only allows you to control the ingredients but also lets you enjoy the vibrant taste of fresh fruits in a delightful frozen dessert.
Homemade peach ice cream captures the essence of summer with its creamy texture and juicy peach flavor, perfect for hot days.
With just a few simple steps, you can whip up this delicious treat that will have everyone asking for seconds.
This peach ice cream recipe is straightforward and can be made with or without an ice cream maker. Using fresh, ripe peaches will give you the best flavor, but you can also use frozen peaches if they’re out of season. The key is to blend the peaches to a smooth consistency while still leaving a few chunks for texture.
This ice cream is a fantastic way to celebrate summer fruits and can be served on its own or paired with a slice of pie or a warm cobbler.
Ingredients:
- 4 ripe peaches, peeled and pitted
- 1 cup granulated sugar
- 2 cups heavy cream
- 1 cup whole milk
- 1 teaspoon vanilla extract
- 1 tablespoon lemon juice
- Pinch of salt
Instructions:
Start by pureeing the peeled and pitted peaches in a blender until smooth. In a large mixing bowl, combine the peach puree with sugar, heavy cream, whole milk, vanilla extract, lemon juice, and a pinch of salt.
Stir the mixture until the sugar is fully dissolved. If you prefer a chunkier texture, reserve some peach pieces and fold them into the mixture.
Pour the mixture into an ice cream maker and churn according to the manufacturer’s instructions until it reaches a soft-serve consistency. If you don’t have an ice cream maker, pour the mixture into a shallow dish and freeze for about 4-6 hours, stirring every 30 minutes to break up any ice crystals until fully frozen.
Extra Tips:
For an extra burst of flavor, consider adding a splash of bourbon or a sprinkle of cinnamon to the mixture before churning.
If you want to make this recipe dairy-free, substitute coconut or almond milk for the heavy cream and whole milk. You can also try adding mix-ins, such as chopped nuts or chocolate chips, during the last few minutes of churning.
Enjoy your homemade peach ice cream within a week for the best flavor and texture!
Cooking Steps
To make your peach ice cream, you’ll start by preparing ripe peaches to guarantee maximum flavor.
Next, blend the peaches with sugar to create a sweet mixture.
After that, it’s time to chill the mixture in the refrigerator before churning it in your ice cream maker.
Step 1. Prepare Ripe Peaches
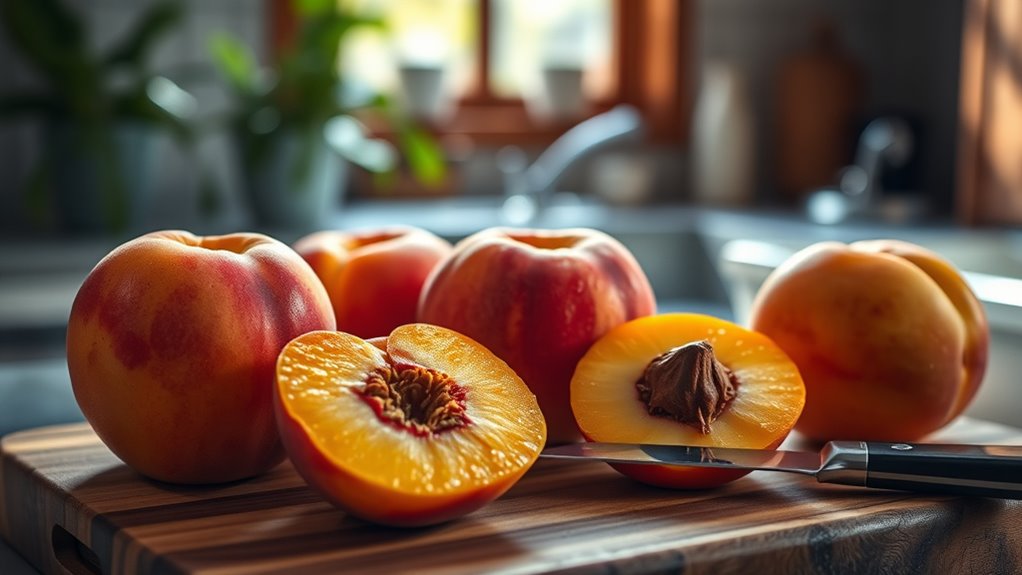
Start by selecting four to six ripe peaches, as their sweetness and juiciness are key to a delicious ice cream. Look for peaches that yield slightly to pressure and have a fragrant aroma.
Once you’ve chosen the best ones, wash them thoroughly under running water to remove any dirt or residues.
Next, slice each peach in half and remove the pit. If you’d like, you can peel the skin off, but it’s not necessary for this recipe.
After that, cut the peach halves into smaller chunks to make blending easier later on. As you prepare the peaches, keep an eye out for any bruised spots and trim them away.
Now you’re ready to move on to blending!
Step 2. Blend Peaches With Sugar
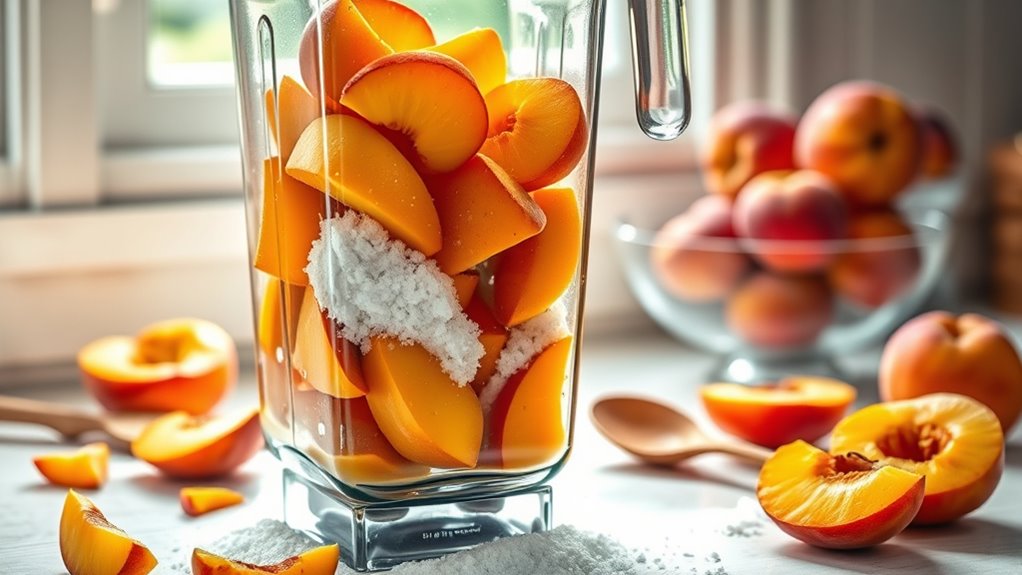
Once you’ve prepared your ripe peaches, it’s time to blend them with sugar to enhance their natural sweetness.
Start by cutting the peaches into smaller chunks to make blending easier. Place the peach pieces in your blender or food processor, and add the desired amount of sugar. A general rule is to use about one cup of sugar for every four cups of peaches, but feel free to adjust based on your taste preferences.
Blend the mixture until it’s smooth and creamy, ensuring no large peach chunks remain. You might want to taste it to check if you need more sugar.
Once you’re satisfied with the sweetness and texture, you’re ready to move on to the next step in your peach ice cream adventure!
Step 3. Chill Mixture in Refrigerator

After blending your peaches with sugar, it’s essential to chill the mixture in the refrigerator. This step helps the flavors meld beautifully while ensuring a smooth texture in your ice cream.
Pour the peach mixture into a suitable bowl or container, making sure it’s large enough to allow for some expansion. Cover it tightly with plastic wrap or a lid to prevent any unwanted odors from seeping in.
Let it chill for at least two hours, or until it’s thoroughly cold. The colder the mixture, the better the final product will be!
While you wait, you might want to prepare any additional mix-ins or toppings. Once it’s chilled, you’ll be ready to move on to the next step.
Step 4. Churn in Ice Cream Maker

With your peach mixture now chilled and ready to go, it’s time to churn it in the ice cream maker.
Pour the mixture into the machine’s bowl, making sure not to exceed its fill line. Turn on the ice cream maker and let it run according to the manufacturer’s instructions, typically around 20 to 30 minutes.
As it churns, the mixture will thicken and transform into a creamy texture. Keep an eye on it; you’ll know it’s ready when it has a soft-serve consistency and starts to pull away from the sides.
If you like, you can add some chopped peaches or a swirl of peach puree during the last few minutes of churning for extra flavor. Enjoy the process!
Step 5. Freeze Until Firm
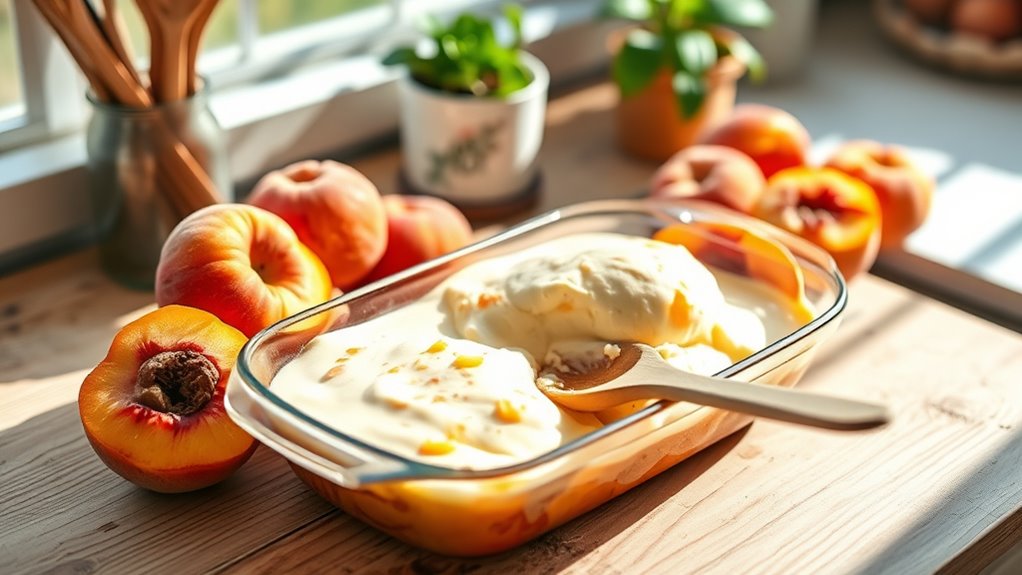
To achieve the perfect peach ice cream texture, you’ll need to freeze the churned mixture until it’s firm.
After you’ve finished churning, transfer the ice cream base to an airtight container. Smooth the top with a spatula to minimize air pockets, which can affect texture. Cover the container tightly with a lid or plastic wrap to prevent ice crystals from forming.
Place it in the freezer for at least four hours or overnight for best results. Check the ice cream after a few hours; it should be scoopable but firm. If it’s too hard, let it sit at room temperature for a few minutes before scooping.
Enjoy your delicious homemade peach ice cream!
Final Thoughts
As summer days heat up, making your own peach ice cream can be a delightful way to cool off and enjoy fresh flavors.
This recipe not only showcases the juicy sweetness of ripe peaches but also allows you to control the ingredients, ensuring a treat that’s both delicious and wholesome.
You’ll find each scoop bursting with flavor, perfect for gatherings or a quiet evening at home.
Don’t hesitate to get creative; try adding other fruits or toppings to personalize your ice cream.
Remember, the joy of making it from scratch is as rewarding as the taste itself.
So, grab those peaches, gather your loved ones, and savor the process.
You’ll be glad you did when you indulge in your homemade peach ice cream!
Frequently Asked Questions
Can I Use Frozen Peaches Instead of Fresh Ones?
Absolutely, you can use frozen peaches instead of fresh ones!
Just make sure to thaw them first and drain any excess liquid to avoid a watery texture. Frozen peaches often have a great flavor, and they’ll blend well in your recipe.
Keep in mind that using frozen fruit might slightly alter the consistency, but it’ll still taste delicious.
How Long Does Homemade Peach Ice Cream Last in the Freezer?
Did you know that homemade ice cream can last up to two months in the freezer?
However, for the best flavor and texture, you should aim to enjoy it within the first few weeks. Over time, ice crystals can form, affecting its creamy goodness.
Is It Possible to Make Peach Ice Cream Without an Ice Cream Maker?
Yes, you can definitely make peach ice cream without an ice cream maker!
Start by blending ripe peaches with sugar and cream until smooth.
Pour the mixture into a shallow dish and freeze it.
Every 30 minutes, stir it to break up ice crystals until it reaches a creamy consistency.
This method takes a bit more time, but you’ll enjoy a delicious homemade treat without any special equipment!
Enjoy your tasty creation!
What Are Some Popular Toppings for Peach Ice Cream?
When you’re enjoying peach ice cream, there are plenty of delicious toppings to contemplate.
You might sprinkle some crushed graham crackers for a crunchy texture, or drizzle warm caramel sauce for a sweet touch. Fresh berries, like blueberries or raspberries, can add a burst of flavor, while a dollop of whipped cream makes it extra creamy.
If you’re feeling adventurous, a sprinkle of cinnamon or nutmeg can elevate your dessert even more!
Can I Substitute Dairy for a Non-Dairy Alternative in This Recipe?
Did you know that about 30% of the population is lactose intolerant?
If you’re looking to substitute dairy for a non-dairy alternative, you absolutely can! Options like almond milk, coconut milk, or cashew cream work great.
Just make sure that your substitute has a creamy texture to maintain the recipe’s consistency.
Experimenting with flavors can also add a unique twist to your dish. Enjoy creating a delicious dairy-free version!