
Making ice cream with kids is safe, easy, and fun with simple recipes like no-churn ice cream in a bag, frozen yogurt pops, and homemade banana ice cream. You can customize flavors for allergies and dietary needs while involving children in mixing, shaking, and decorating. Use kid-friendly tools and quick freezing techniques to keep it simple. Keep exploring these creative ideas, and you’ll find even more ways to enjoy icy treats together.
Key Takeaways
- Use simple, no-churn methods like bag shaking to make homemade ice cream safe and engaging for kids.
- Incorporate healthy, customizable ingredients such as fruit, yogurt, and dairy-free options for allergy-friendly treats.
- Create fun treats like ice cream cones and sandwiches with kid-friendly toppings to boost participation and enjoyment.
- Utilize safe, high-quality appliances and sound techniques to enhance the ice cream-making experience.
- Incorporate colorful, nutritious options like smoothie bowls and frozen pops to encourage healthy snacking habits.
No-Churn Ice Cream in a Bag
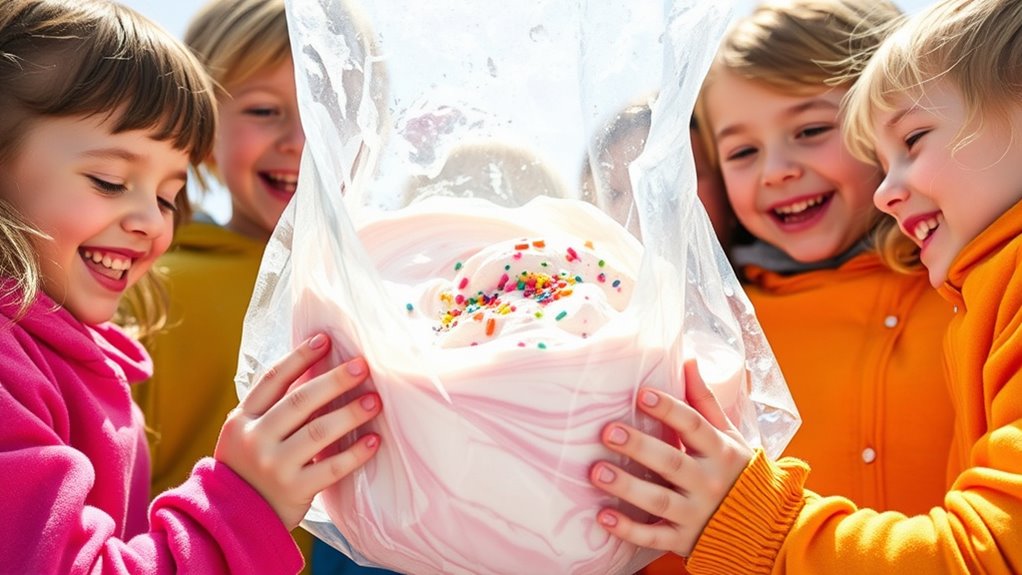
Making no-churn ice cream in a bag is a fun and simple way to enjoy homemade treats with kids. It’s perfect for a kids party because it’s interactive and quick. Plus, it’s easy to customize flavors, making it ideal for allergy considerations. You can control the ingredients, using dairy-free milk or allergy-friendly sweeteners, ensuring everyone can join in safely. All you need are resealable plastic bags—one large for the ice and salt mixture, and smaller ones for the ice cream base. Kids love shaking the bags to churn the mixture, making it a hands-on activity. Just be sure to check all ingredients for allergens beforehand. This method makes homemade ice cream accessible, safe, and a hit with kids at any gathering. Color temperature adjustments can also help ensure the ice cream looks appealing and appetizing.
Frozen Yogurt Pops

Frozen yogurt pops are a fun and healthy treat you can make with kids. You can choose simple ingredients like fruit and yogurt, making it easy to customize. Plus, freezing them is straightforward, so you’ll have delicious pops in no time. Always use safe storage practices to keep your treats fresh and prevent spoilage. Incorporating proper food safety measures ensures your frozen treats stay fresh and enjoyable longer.
Healthy Ingredient Options
If you’re looking for a healthier way to enjoy cold treats with kids, frozen yogurt pops are an excellent option. To make them even better, choose dairy alternatives like almond or coconut yogurt, which provide creamy textures without dairy. You can also use natural sweeteners such as honey, maple syrup, or agave to cut back on refined sugar. These options add just the right touch of sweetness while keeping the ingredients simple and wholesome. Incorporating nutrient-rich ingredients like fresh fruit or pureed veggies can boost the nutritional value of your pops. Using well-drained soil for growing ingredients or choosing organic components can further enhance the health benefits of your homemade treats. By selecting healthy ingredients, you create delicious treats that satisfy sweet cravings and support your kids’ well-being. It’s an easy way to make frozen yogurt pops both tasty and nourishing.
Simple Freezing Techniques
Wondering how to easily create perfect frozen yogurt pops at home? The key is using simple freezing techniques like flash freezing. After pouring your yogurt mixture into popsicle molds, place them in the freezer. For quicker freezing, you can use the flash freezing method—placing the molds on a cold surface or in a blast freezer for a few minutes to speed up ice crystal formation. This prevents large ice crystals from forming, keeping your pops smooth and creamy. To further ensure a consistent texture, controlling temperature during freezing is essential. Additionally, understanding the legacy of explorers can inspire a sense of adventure even in everyday activities like making treats. Using the right air quality can also improve your overall environment while you enjoy your homemade snacks. Properly managing emotional support for yourself can help make the process more enjoyable and stress-free. Incorporating nutritional strategies such as maintaining proper macronutrient ratios can also help you achieve the best results. Once the mixture is solid, remove the molds and let them sit at room temperature for a minute before gently pulling out the pops. This quick freeze helps maintain a silky texture, making your frozen yogurt pops both delicious and visually appealing.
Homemade Banana Ice Cream

Start by choosing ripe bananas with plenty of brown spots for the sweetest flavor. Make sure to freeze the slices properly on a tray before blending to prevent clumping. When blending, go slow and add a splash of milk to achieve a smooth, creamy texture. For an even better experience, consider using a quality mats with extra cushioning to improve your comfort during preparation. Incorporating exfoliation benefits can help maintain the skin’s glow and smoothness.
Selecting Ripe Bananas
Choosing ripe bananas is essential for making flavorful homemade banana ice cream. The ripe banana texture is soft and creamy, making blending easier and resulting in a smoother ice cream. Look for banana ripeness indicators like yellow skin with brown spots—these signals indicate the fruit is sweet and at its peak flavor. Avoid bananas that are completely green or overly brown, as green bananas tend to be starchy and less sweet, while overly brown ones may be too soft and mushy. Selecting bananas at the right ripeness guarantees your ice cream has the perfect balance of sweetness and creaminess. When bananas display these ripeness indicators, you’ll get a richer, more flavorful treat that kids will love. Proper ripeness is also important to ensure your homemade ice cream has the right texture and flavor.
Freezing Properly Tips
Once you’ve selected perfectly ripened bananas, the next step is to freeze them properly to achieve smooth, scoopable homemade banana ice cream. Use airtight storage containers to prevent freezer burn and keep flavors fresh. For best results, cut bananas into small pieces and spread them evenly in your container. Make sure to label with the freezing duration—ideally 2 to 3 months—to maintain quality. Avoid overfreezing, which can make your ice cream icy rather than creamy. Before freezing, line your storage containers with parchment paper for easier removal later. Keep the bananas flat for quick freeze time and even consistency. Proper freezing ensures your homemade ice cream stays delicious, creamy, and ready whenever you’re craving a cool treat. Additionally, understanding electric bike costs can help plan for any accessories or maintenance needs that might enhance your homemade ice cream experience. Maintaining the right temperature and storage conditions is essential for freezer efficiency and overall quality. Leveraging innovative machine learning algorithms can also optimize your freezing process by predicting ideal storage times and conditions.
Blending for Creaminess
To achieve that irresistibly creamy texture in your homemade banana ice cream, blending plays a crucial role. Start by adding your frozen banana slices to the blender, and then pour in a splash of milk. Adjust the blender speed to medium-high to break down the fruit smoothly. As you blend, you might notice a frothy, milk frothing-like consistency forming—this is a good sign of proper blending. Keep blending until the mixture turns silky and thick, avoiding overmixing to prevent a runny texture. Using the right blender speed ensures you get a smooth, creamy result without lumps. If needed, pause to scrape down the sides of the blender. The goal is a uniform, soft-serve consistency that’s perfect for kids to enjoy. Additionally, choosing the right headphone connection can help you listen to music or watch videos comfortably while preparing your treats. Incorporating sound healing science techniques, such as calming music, can also enhance your cooking experience by making it more relaxing and enjoyable. Remember, selecting appliances with energy-efficient features can help you save on electricity while making delicious treats. Moreover, using a high-quality blender with powerful motor can significantly reduce blending time and improve the creaminess.
Fruit & Yogurt Smoothie Bowls

Fruit and yogurt smoothie bowls are a colorful and nutritious way to enjoy a cold treat with kids. They’re versatile, fun to make, and perfect for incorporating fresh fruit and healthy toppings. You can create fruit art by arranging sliced fruits into smiley faces or flowers, making the bowl visually appealing and exciting for kids. Add a variety of smoothie bowl toppings like granola, coconut flakes, chia seeds, or mini chocolate chips to boost flavor and texture. These bowls encourage creativity and healthy eating habits, turning snack time into a playful experience. Kids love customizing their bowls, which makes them more likely to enjoy nutritious ingredients. Using fresh, ripe fruit ensures the best flavor and texture for your smoothie bowls. Incorporating proper skin preparation before making these treats can help ensure your skin stays healthy while enjoying outdoor activities. Additionally, choosing quality ingredients can enhance both the taste and nutritional value of your smoothie bowls, making them even more enjoyable. To maximize freshness, it’s important to be mindful of expiration of juice or spoilage signs in ingredients used in your toppings or dressings, ensuring a safe and delicious snack. By blending vibrant fruit and topping options, you turn a simple snack into a delightful, guilt-free indulgence.
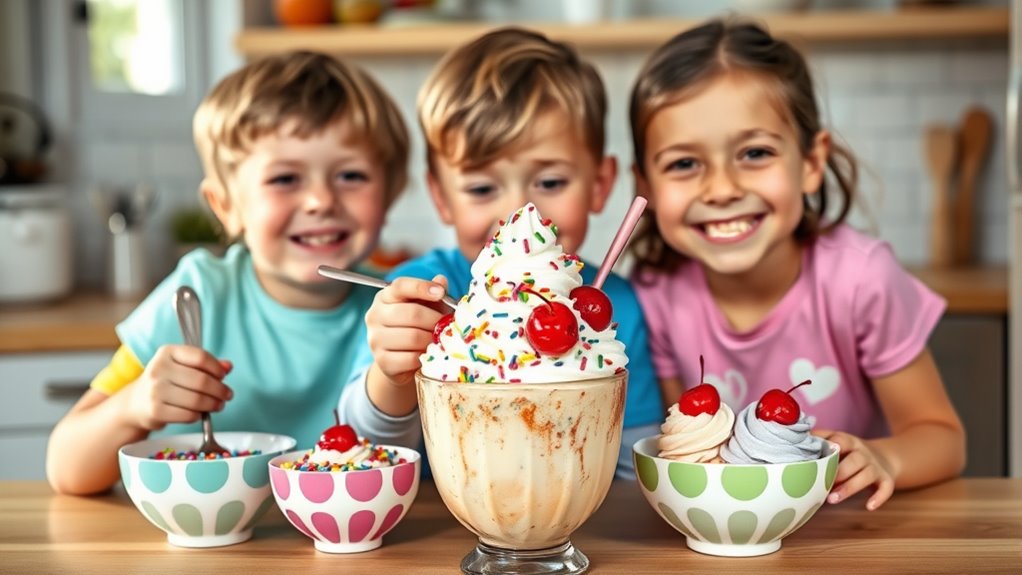
Ice Cream Cones With Toppings

Ice cream cones with toppings are a fun and interactive treat that kids love to customize. You can offer a variety of options, including dairy-free choices and allergy-friendly toppings, ensuring everyone can join the fun. Imagine a colorful display:
| Toppings | Dairy-Free Options | Allergy-Friendly Choices |
|---|---|---|
| Sprinkles | Coconut flakes | Sunflower seeds |
| Chocolate chips | Dairy-free chocolate | Fruit pieces |
| Caramel sauce | Maple syrup | Crushed pretzels |
| Nuts (if safe) | Seed butters | Cereal pieces |
| Fruit bits | Applesauce drizzles | Marshmallow bits |
Fill the cones with your favorite ice cream, then let kids add toppings for a personalized, safe, and delicious experience.
Creamy Milkshake Creations

Creamy milkshake creations are a fantastic way to beat the heat and indulge your sweet tooth. You can customize them with dairy alternatives like almond or oat milk for a dairy-free option. Experiment with flavor infusion by adding fresh fruits, chocolate, or even a splash of vanilla. To make your shake extra special, consider these ideas:
- Mix vibrant berries or ripe bananas for a natural sweetness
- Incorporate a swirl of caramel or chocolate syrup for richness
- Top with whipped cream and sprinkles for fun
- Use dairy-free toppings to keep it safe and inclusive
These simple tweaks allow you to craft delicious, personalized milkshakes that kids will love and feel good about. Get creative and enjoy the cool, creamy fun together!
Ice Cream Sandwiches With Cookies

Making ice cream sandwiches with cookies is a fun and easy way to enjoy a cool treat anytime. First, choose your favorite cookie flavor, like chocolate chip, sugar, or snickerdoodle, to match your taste. To assemble, let the ice cream soften slightly for easier handling. Place a scoop of ice cream on the flat side of one cookie, then gently press another cookie on top to create a sandwich. For a cleaner look, you can trim the edges or roll the sides in sprinkles or crushed cookies. The sandwich assembly process is simple, and you can customize each one with different cookie flavors or add toppings for extra fun. These treats are perfect for kids to make and enjoy together!
Frequently Asked Questions
Can These Recipes Be Made Allergen-Free for Kids With Allergies?
You can definitely make these recipes allergen-free for kids with allergies. Use dairy alternatives like coconut milk or almond milk to substitute dairy, and choose nut-free options to avoid nuts. Always check labels for hidden allergens, and consider ingredient swaps that suit specific allergies. By customizing with safe ingredients, you ensure everyone can enjoy the fun, delicious ice cream safely and comfortably.
What Are Some Healthy Ingredient Substitutions for Added Nutrition?
They say, “You are what you eat,” so choosing nutrient-rich ingredients makes a big difference. To boost your healthy snack options, swap out refined sugars with mashed bananas or dates, add Greek yogurt for protein, or mix in pureed vegetables like carrots or sweet potatoes. These healthy ingredient substitutions not only enhance flavor but also provide essential nutrients, helping you create delicious, nourishing treats for your kids.
How Long Can Homemade Ice Creams Be Stored Safely in the Freezer?
You can typically store homemade ice cream in the freezer for up to 2-4 weeks. Proper freezer storage is key to maintaining its quality and safety. Keep it in an airtight container to prevent freezer burn and flavor transfer. After this period, the ice cream’s shelf life decreases, and it may develop ice crystals or off-flavors. Always check for signs of spoilage before serving.
Are There Any Age Restrictions for Children Participating in the Recipes?
Ever wondered if there are age restrictions for kids helping in the kitchen? You should consider age-appropriate tasks and always provide parental supervision. Young children can mix ingredients or add toppings, but tasks involving hot appliances or sharp tools are best for older kids. By tailoring activities to their age and closely supervising, you guarantee safety while making the experience fun and educational. Isn’t safety the top priority?
What Safety Tips Should Parents Follow When Kids Handle Kitchen Tools?
When kids handle kitchen tools, it’s crucial to follow supervision guidelines closely. Always supervise them to prevent accidents and teach proper tool safety, like how to hold knives or use graters carefully. Keep sharp objects out of reach when not in use, and make certain kids understand the importance of paying attention. By staying vigilant, you help create a safe environment, making cooking fun and educational without risking injuries.
Conclusion
Now that you’ve uncovered these delightful, kid-friendly ice cream recipes, you’re all set to create sweet memories together. Imagine the joy on your little one’s face as you whip up treats that are both safe and super fun. These simple recipes make it easy to turn ordinary days into special occasions. So, grab your ingredients and let your imagination run wild—your next unforgettable family moment is just a scoop away!

Isabella leads the editorial vision of “Icecream Hater” with a commitment to excellence and authenticity. With a background in journalism and a discerning palate, she ensures that all content meets our high standards. Isabella’s passion for ice cream is matched only by her dedication to delivering honest, engaging, and insightful content to our readers. She oversees all editorial operations, guiding the team in creating content that informs, inspires, and delights.