Making authentic Italian gelato at home is easier than you think! Start with fresh ingredients like milk, cream, sugar, and egg yolks. Heat your milk mixture and temper the yolks, then chill it thoroughly. Pour the cooled mix into an ice cream maker and churn until it reaches a soft-serve consistency. Finally, freeze it for a few hours for the best texture. There’s so much more to explore in mastering flavors and techniques!
Key Takeaways
- Use high-quality, fresh ingredients like milk, cream, and ripe fruits for the best flavor and creaminess in your gelato.
- Chill your mixture in an ice bath to quickly lower the temperature before churning for optimal texture.
- Pour the cooled mixture into an ice cream maker and churn for 20-30 minutes until it reaches a soft-serve consistency.
- Transfer the gelato to an airtight container and freeze for at least four hours to achieve the perfect firmness.
- Experiment with different flavors and mix-ins to create personalized gelato tailored to your taste preferences.
History
When you think about gelato, you might picture sun-soaked Italian streets and bustling gelaterias.
The history of gelato dates back to ancient times, with roots in the frozen desserts enjoyed by the Romans and Egyptians. However, it wasn’t until the Renaissance that gelato truly began to evolve. In the 16th century, Italian chefs experimented with sugar and ice, creating a creamy delight that caught the attention of nobility.
By the late 19th century, gelato became widely popular, with the first gelateria opening in Sicily. Unlike traditional ice cream, gelato’s lower fat content and denser texture make it uniquely enjoyable.
This rich history adds depth to every scoop, connecting you to generations of Italian culinary tradition.
Recipe
Making Italian gelato at home is a delightful way to enjoy this creamy frozen treat that’s renowned for its rich flavor and smooth texture. Unlike traditional ice cream, gelato contains less air and fat, which allows the ingredients to shine through, resulting in a denser and more flavorful experience. With just a few simple ingredients, you can create your very own gelato that rivals any gelateria in Italy.
To start your gelato-making journey, you’ll need to gather your ingredients and decide on your favorite flavor. Classic flavors like chocolate, vanilla, or stracciatella are always popular choices, but feel free to experiment with fruits or nuts. The process is straightforward, and with a bit of patience, you can create a delicious treat that your friends and family will love.
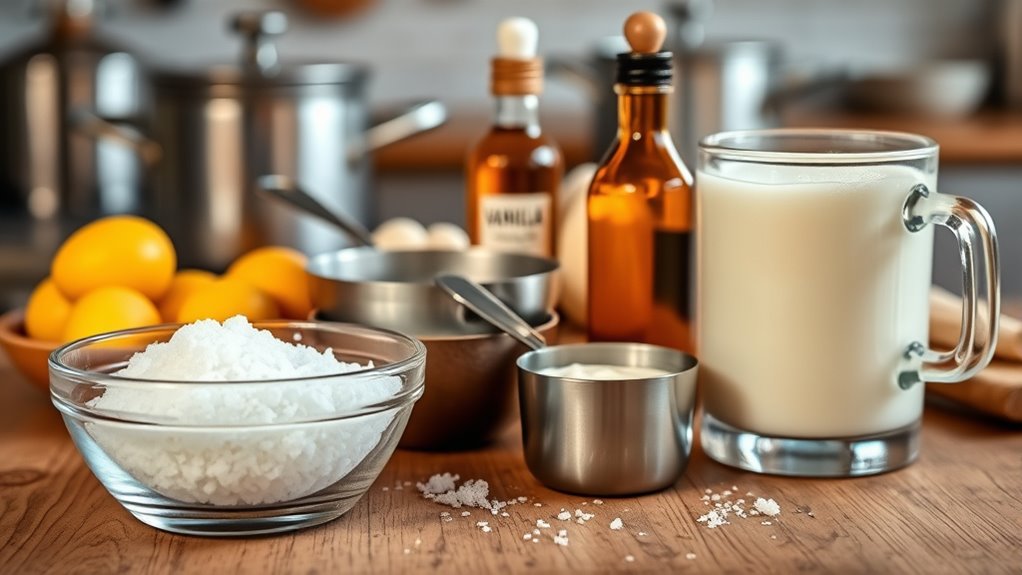
Ingredients:
- 2 cups whole milk
- 1 cup heavy cream
- 3/4 cup granulated sugar
- 1 teaspoon vanilla extract
- 4 large egg yolks
- Pinch of salt
In a medium saucepan, combine the milk, cream, and half of the sugar. Heat the mixture over medium heat until it’s warm but not boiling.
In a separate bowl, whisk together the egg yolks, remaining sugar, and salt until pale and slightly thickened. Gradually add the warm milk mixture to the egg yolks while whisking continuously to temper the eggs.
Once combined, return the mixture to the saucepan and cook over low heat, stirring constantly, until it thickens enough to coat the back of a spoon. Remove from heat and stir in the vanilla extract.
Let the mixture cool before refrigerating for at least 4 hours or overnight. Once chilled, churn the mixture in an ice cream maker according to the manufacturer’s instructions until it reaches a soft-serve consistency. Transfer to a container and freeze for a few hours to firm up before serving.
For the best results, use fresh, high-quality ingredients, particularly when it comes to your milk and cream. If you don’t have an ice cream maker, you can still make gelato by placing the mixture in a shallow dish and stirring it every 30 minutes as it freezes to break up the ice crystals. This will help achieve a creamy texture.
Additionally, consider customizing your gelato by adding mix-ins like chocolate chips or fruit puree during the last few minutes of churning for added flavor and texture. Enjoy your homemade gelato!
Cooking Steps
To make gelato that rivals your favorite gelateria, you’ll want to start with fresh ingredients.
Next, mix in your chosen flavorings to create a base that’s rich and delicious.
Once you’ve got that down, it’s time to chill the mixture and churn it to perfection.
Step 1. Choose Fresh Ingredients
Choosing fresh ingredients is essential for crafting the perfect Italian gelato, as they directly influence the flavor and creaminess of your treat.
Start by selecting high-quality milk and cream; look for whole, unprocessed options. Fresh fruits should be ripe and in-season, bursting with flavor. If you’re using nuts, make certain they’re unsalted and toasted for a richer taste.
Don’t forget about sugar; opt for fine granulated sugar to guarantee it dissolves smoothly. If you can find fresh eggs, they’ll enhance the gelato’s texture. Always check expiration dates and avoid anything that seems past its prime.
Step 2. Mix in Flavorings

Once you’ve prepared your base, it’s time to infuse it with flavorings that will elevate your gelato. Start by adding your chosen flavorings, whether it’s vanilla extract, cocoa powder, or fresh fruit puree.
Make certain to mix thoroughly to guarantee an even distribution. If you’re using fresh ingredients like fruits or nuts, consider puréeing them first for a smoother texture.
For stronger flavors, you might want to steep ingredients like herbs or spices in your base before straining them out. Taste as you go—this will help you achieve the perfect balance.
Step 3. Chill Mixture in Ice Bath

As you prepare to chill your mixture in an ice bath, it’s essential to guarantee that it cools down quickly and evenly.
Start by filling a large bowl with ice and cold water, ensuring there’s enough ice to maintain a low temperature. Carefully pour your heated mixture into a smaller bowl or container, then nestle it into the ice bath.
Stir the mixture occasionally to promote even cooling. Keep an eye on the temperature; you want it to reach around 40°F (4°C). This process usually takes about 15 to 20 minutes, so be patient.
Once it’s chilled, you’re ready to move on to the next step in crafting your delicious gelato!
Step 4. Churn in Ice Cream Maker

With your mixture now chilled to the perfect temperature, it’s time to churn it in the ice cream maker.
Pour the mixture into your machine, making certain not to overfill it. Turn on the ice cream maker and let it churn for about 20 to 30 minutes, or until it reaches a soft-serve consistency.
Keep an eye on it; the texture should become creamy and smooth. If your ice cream maker has a built-in timer, use it to guarantee you don’t over-churn.
Once it’s done, you’ll notice the gelato has increased in volume and become fluffy. This step is essential for incorporating air, giving your gelato that delightful texture.
Enjoy the process and savor the anticipation of your homemade treat!
Step 5. Freeze Until Firm

After churning, it’s essential to freeze your gelato until firm for the best texture.
Transfer the freshly churned gelato into an airtight container, smoothing the top with a spatula to eliminate air pockets. Cover it tightly with a lid or plastic wrap to prevent ice crystals from forming.
Place it in the freezer, ideally in the coldest part, and let it freeze for at least four hours. This step allows the flavors to meld and the texture to become creamy and scoopable.
If you want an ultra-smooth finish, stir the gelato every hour for the first few hours.
Once it reaches the desired firmness, it’s ready to enjoy! Just scoop, serve, and savor your homemade gelato.
Final Thoughts
While you may feel overwhelmed by the thought of making gelato at home, the process is both rewarding and fun. With just a few ingredients and some simple techniques, you can create a delicious treat that rivals any gelateria.
Experimenting with flavors like chocolate, pistachio, or fresh fruit allows you to personalize your gelato to your taste. Remember to be patient during the freezing process; it’s essential for achieving that creamy texture.
Don’t hesitate to make mistakes—each batch teaches you something new. Once you’ve mastered the basics, you’ll find endless possibilities.
Frequently Asked Questions
Can I Use Dairy Alternatives for Gelato?
Absolutely, you can use dairy alternatives for gelato!
Imagine creating the creamiest, dreamiest dessert ever, all while skipping the dairy. Almond milk, coconut cream, or oat milk can transform into velvety masterpieces that’ll make your taste buds dance with joy.
You’ve got the power to whip up delightful flavors without the moo! Just remember to adjust your sweeteners and thickeners, and you’ll be savoring every spoonful of your luscious, dairy-free gelato bliss.
How Can I Store Homemade Gelato?
To store homemade gelato, you should use an airtight container to prevent ice crystals from forming.
Fill the container, leaving just a little space at the top for expansion. Cover the surface with plastic wrap before sealing the lid to maintain freshness.
It’s best to freeze your gelato at a consistent temperature.
When you’re ready to enjoy it again, let it sit at room temperature for a few minutes to soften before scooping.
What Machine Do I Need for Gelato?
When you’re dreaming of creamy, rich gelato swirling like a sunset, you’ll need a quality gelato maker to bring that vision to life.
Look for a machine with a compressor; it churns and freezes in one go. If you’re on a budget, a bowl-style maker can work, but you’ll need to pre-freeze the bowl.
Whichever you choose, make sure it fits your kitchen and your gelato dreams!
How Long Does Gelato Last in the Freezer?
Gelato typically lasts about one to two weeks in the freezer when stored properly.
To maintain its creamy texture, you should keep it in an airtight container, away from air exposure.
If you notice ice crystals forming, it’s a sign the gelato’s been in there too long.
For the best flavor and texture, aim to enjoy it within the first week after making it.
Can I Add Alcohol to My Gelato?
Absolutely, you can add alcohol to your gelato! Just remember, a little goes a long way.
Alcohol not only enhances flavor but also affects texture, preventing your treat from freezing too hard. Aim for about a tablespoon for every cup of base.
Experimenting with options like rum or liqueurs can create a delightful, distinctive dessert.

Giulia is the creative force behind our content strategy. With a knack for storytelling and a deep understanding of what our readers want, she plans and develops the content that keeps “Icecream Hater” fresh and exciting. Giulia works closely with the editorial team to ensure that every article, recipe, and review aligns with our mission and vision. She aims to inspire our readers to explore, create, and enjoy ice cream in new and innovative ways.