
Homemade oat milk ice cream is a creamy, vegan treat you can easily make yourself. Start with unsweetened oat milk and blend it with raw cashews, maple syrup, and vanilla extract for sweetness and flavor. Use an ice cream maker for the best texture, or freeze in a container with regular stirring. Don’t forget to experiment with delicious mix-ins like chocolate chips or fruits to elevate your ice cream experience. There’s so much more you can discover!
Key Takeaways
- Use unsweetened oat milk, raw cashews, and natural sweeteners for a creamy, dairy-free base.
- Churn the mixture in an ice cream maker for the best texture, or stir regularly if using a freezer-safe container.
- Enhance flavors with vanilla extract, cocoa powder, or pureed fruits, and add crunch with cookies or nuts.
- Store in airtight containers to prevent freezer burn; consume within three months for optimal freshness.
- Experiment with seasonal ingredients and share your creations for feedback and new ideas.
Ingredients for Oat Milk Ice Cream

Making delicious oat milk ice cream starts with the right ingredients. Begin with unsweetened oat milk as your base; it offers a neutral flavor that allows other ingredients to shine.
Blend in raw cashews for a creamy texture without dairy. For sweetness, consider natural sweeteners like maple syrup or agave nectar. A splash of vanilla extract can enhance the flavor, if you’d like. Adding chia seeds can also boost the nutritional profile, offering benefits such as omega-3 fatty acids.
To achieve an ultra-creamy consistency, you might include stabilizers such as rolled oats or pectin-rich fruits. If you’re feeling adventurous, explore different types of oat milk, like barista-style or homemade versions, for added richness. Additionally, this recipe is ice cream machine-free, making it accessible for everyone.
With these basic ingredients, you’re well on your way to crafting a delightful homemade treat!
Essential Equipment and Methods
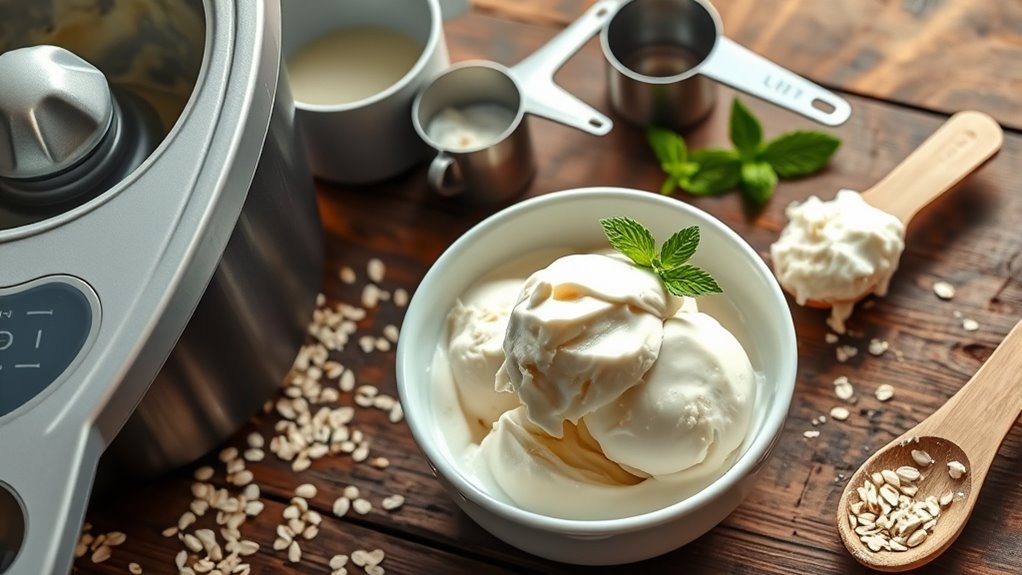
To create the perfect oat milk ice cream, having the right equipment and methods can make all the difference.
An ice cream maker is ideal for achieving a smooth texture quickly, while a high-speed blender helps you blend cashews and oat milk into a creamy base. If you don’t have an ice cream maker, a freezer-safe container works well for freezing your mixture. Additionally, using oat milk’s creamy consistency can enhance the overall texture of your ice cream.
An ice cream maker ensures a quick, smooth texture, while a high-speed blender creates a creamy oat milk base.
You’ll also need a nut milk bag or strainer to guarantee clarity in your homemade oat milk.
For methods, churning with an ice cream maker speeds up the process, but regular stirring during freezing helps break down ice crystals for creaminess. You can also blend in cashews to enhance that rich texture.
Step-by-Step Instructions

Before diving into the step-by-step instructions for your homemade oat milk ice cream, gather all your ingredients and equipment to streamline the process.
Start with high-quality, unsweetened oat milk as your base. Blend it with natural sweeteners like maple syrup until smooth. Chill the mixture for best results before churning it according to your ice cream maker’s instructions. Aim for a thick consistency, similar to soft serve. Rich & Creamy ice cream will appeal even to non-vegan friends, making it a perfect treat for everyone.
Remember to add any mix-ins during the last few minutes of churning. Once done, transfer the ice cream to an airtight container and freeze for 3-4 hours.
For serving, let it soften at room temperature for about 10 minutes before enjoying your creamy treat!
Flavor Variations and Customizations

Once you’ve mastered the basics of making oat milk ice cream, it’s time to get creative with flavors and customizations.
Try a classic vanilla-maple by mixing pure maple syrup with vanilla extract. For chocolate lovers, add cocoa powder or dark chocolate for richness.
Elevate your oat milk ice cream with classic vanilla-maple or indulge in rich chocolate by mixing in cocoa or dark chocolate.
If you crave fruity flavors, swirl in pureed fruits like strawberries or raspberries. Spice things up with cinnamon or nutmeg, or add a revitalizing twist with peppermint extract.
Don’t forget crunchy mix-ins like chopped nuts or cookie crumbs for texture. Sweeten your treat with options like agave nectar or date syrup. Incorporating oat milk as the primary base allows for a creamy experience without excessive fat.
For a smoother consistency, consider adding a splash of vodka or bourbon, but feel free to skip it for a non-alcoholic version.
Vegan Considerations for Ice Cream

While exploring vegan ice cream, you’ll find that the right ingredients play an essential role in achieving delicious results. Popular bases like soy, almond, and coconut milk offer unique textures and flavors. Coconut milk, with its high-fat content, creates a rich creaminess, while oat milk adds a neutral taste that blends well with other ingredients. Additionally, the current market offers extensive dairy-free options for consumers, reflecting the growing demand for innovative alternatives. Chia seeds, known for their digestive health benefits, can be incorporated into your ice cream for added nutrition.
However, making vegan ice cream comes with challenges, such as the need for plant-based emulsifiers and stabilizers to maintain texture. Don’t forget about fat content; using coconut oil or nut butters can enhance creaminess. Balancing sugar types is also vital to manage freezing point depression.
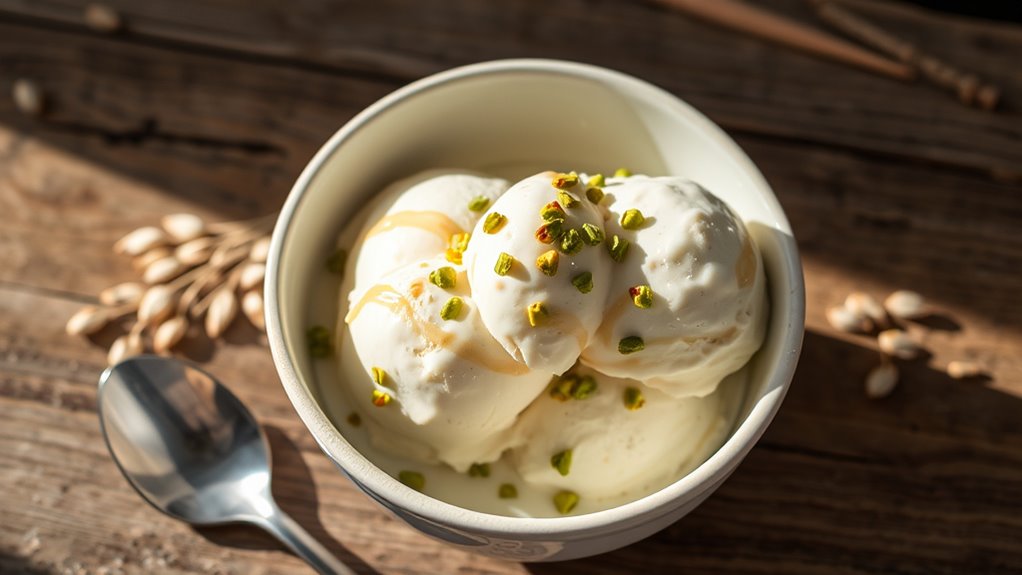
Nutritional Benefits of Oat Milk Ice Cream

Oat milk ice cream offers several nutritional benefits that make it an appealing choice for health-conscious consumers.
It generally has fewer calories than traditional ice cream, though be mindful of added sugars. While it contains less protein than dairy or soy-based options, it still provides around 5 grams of fat per cup, contributing to its creamy texture. Additionally, oat milk ice cream is higher in fiber, promoting digestive health, which is beneficial for digestive health as it helps maintain regular bowel movements. It’s also lactose-free, making it suitable for those with intolerances. If you choose fortified oat milk, you’ll benefit from added calcium, vitamin D, and B vitamins. Fortified oat milk options also contain nutrients such as vitamin B12, which supports overall well-being. With gluten-free options available, it’s a versatile treat that can cater to various dietary needs.
Enjoy guilt-free indulgence!
Tips for Achieving a Creamy Texture

To achieve a creamy texture in your homemade oat milk ice cream, focus on the method you use for churning and freezing. An ice cream maker is your best friend here, as it efficiently churns the mixture, preventing large ice crystals from forming. Incorporating oat milk ice cream into your recipe provides a rich base that enhances the overall creaminess. Additionally, using a raw food diet can help you become acquainted with natural ingredients that contribute to the texture and flavor of your ice cream.
If you’re opting for a no-churn method, use a high-speed blender to fully incorporate ingredients, and blend the mixture during the freezing process to break down ice crystals. Incorporating cream-enhancing ingredients like almond butter or blended cashews can also elevate creaminess.
Additionally, using liquid sweeteners like maple syrup helps create a smoother texture. Remember to refrigerate your base before freezing to guarantee ideal churning conditions for that perfect creamy result!
Storage and Freezing Techniques

When you make homemade oat milk ice cream, proper storage and freezing techniques are essential to preserving its creamy texture and flavor. Use airtight containers to prevent freezer burn and maintain freshness. Verify these containers are freezer-safe, and press plastic wrap against the surface of the ice cream before sealing to further protect it. Label each container with the date and content for easy identification. Remember that oat milk ice cream can be frozen for months without freezer burn if stored correctly.
Freeze the mixture for about 45 minutes before stirring, and continue to stir every 30 to 45 minutes until it reaches the desired consistency—usually within 2 to 6 hours. Once done, let it harden completely before serving.
Remember to check for signs of freezer burn and consume within three months for the best quality.
Delicious Mix-Ins to Try
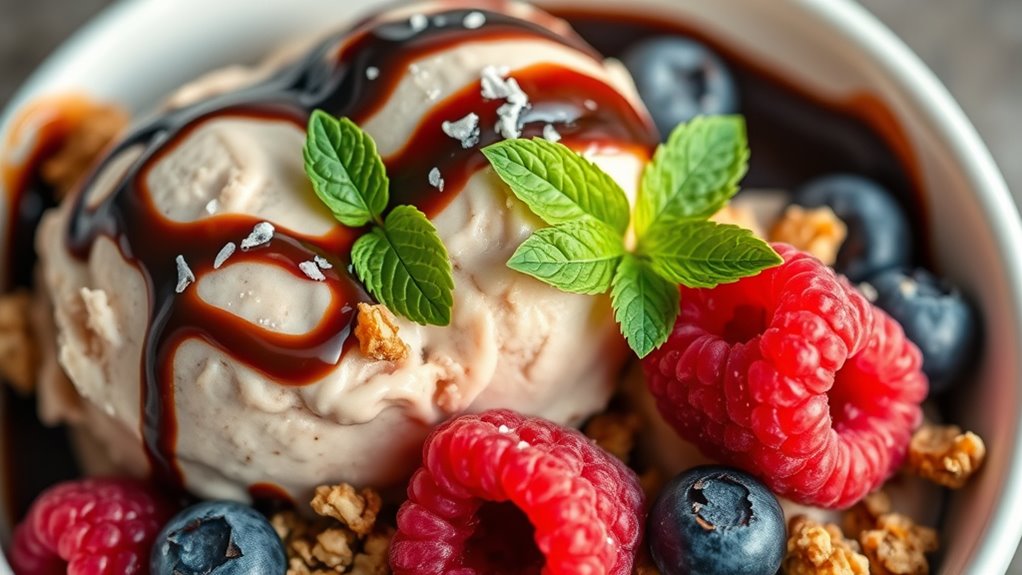
There are countless delicious mix-ins you can experiment with to elevate your homemade oat milk ice cream. For a classic touch, try vanilla extract or swirl in some strawberry puree for a fruity kick.
If you’re in the mood for something bold, add coffee extract for a mocha twist or peppermint extract for a revitalizing summer treat. Crumbled cookies, like chocolate chip or oatmeal raisin, bring a delightful crunch, while crushed waffle cones add a fun twist.
Don’t forget about chocolate—fold in chocolate chips or cocoa powder for rich flavor. For a nutty crunch, consider chopped walnuts or candied pecans. Incorporating global flavors into your mix-ins can truly enhance the experience.
Elevate your oat milk ice cream by folding in chocolate chips or cocoa powder, and add a delightful crunch with walnuts or candied pecans.
With these mix-ins, your oat milk ice cream will be anything but ordinary!
Frequently Asked Questions
Can I Use Other Plant-Based Milks Instead of Oat Milk?
You can use other plant-based milks instead of oat milk, but be aware of their limitations.
Almond milk tends to be watery and lacks creaminess, while soy milk has a strong flavor that might overpower your dish.
Coconut milk is rich but can dominate the taste.
Cashew milk is creamy yet subtle.
If you want a smooth texture, you may need to add thickeners or emulsifiers to achieve the desired consistency.
How Long Does Homemade Oat Milk Ice Cream Last in the Freezer?
When you store homemade ice cream in the freezer, it typically lasts for about three months before freezer burn becomes an issue.
To keep it fresh, use airtight containers and guarantee your freezer temperature stays at 0°F (-18°C) or lower.
Just remember, if you notice a change in texture or taste, it might be time to toss it.
For the best serving experience, let it soften a bit at room temperature first.
Can I Make This Ice Cream Without an Ice Cream Maker?
Absolutely, you can whip up this ice cream without an ice cream maker!
Think of it as a culinary adventure where you blend creativity and flavor. Just blend your chosen ingredients until smooth, then freeze them in a loaf pan.
To enhance the texture, chill the mixture before freezing. With some patience, you’ll have a delightful treat ready to scoop and enjoy.
What Is the Best Way to Soften the Ice Cream Before Serving?
To soften ice cream before serving, you should let it sit at room temperature for about 10 to 15 minutes.
This step’s essential because it helps achieve a creamy texture instead of a hard, icy one.
If you’re in a hurry, even 5 minutes can make a difference.
You might also use an ice cream machine to incorporate air, making it easier to scoop and enjoy later on.
Can I Use Frozen Fruit in My Oat Milk Ice Cream?
Yes, you can definitely use frozen fruit in your oat milk ice cream!
Frozen fruit adds natural sweetness and a delicious flavor variety, making your ice cream more enjoyable. Plus, it helps achieve a creamy texture, especially if you’re using a no-churn method.
You can blend it into your base or fold in chunks for added texture. By incorporating frozen fruit, you’re also boosting the nutritional value of your treat.
Conclusion
Making homemade oat milk ice cream is not just a fun and delicious activity; it’s also a healthier choice. Did you know that oat milk is lower in calories and fat compared to traditional dairy? By opting for this creamy vegan treat, you’re not only indulging your sweet tooth but also making a positive impact on your health. So, gather your ingredients and get creative with flavors—you’re in for a delightful, guilt-free dessert experience!

Mia is the connector for the “Ice Cream Hater” team, responsible for spreading the word about our brand and building relationships with our audience and partners. With a background in marketing and a passion for community engagement, Mia manages our outreach efforts, coordinates marketing campaigns, and develops strategies to expand our reach. She is passionate about bringing the joy of ice cream to as many people as possible and is always looking for new ways to share our content with the world.