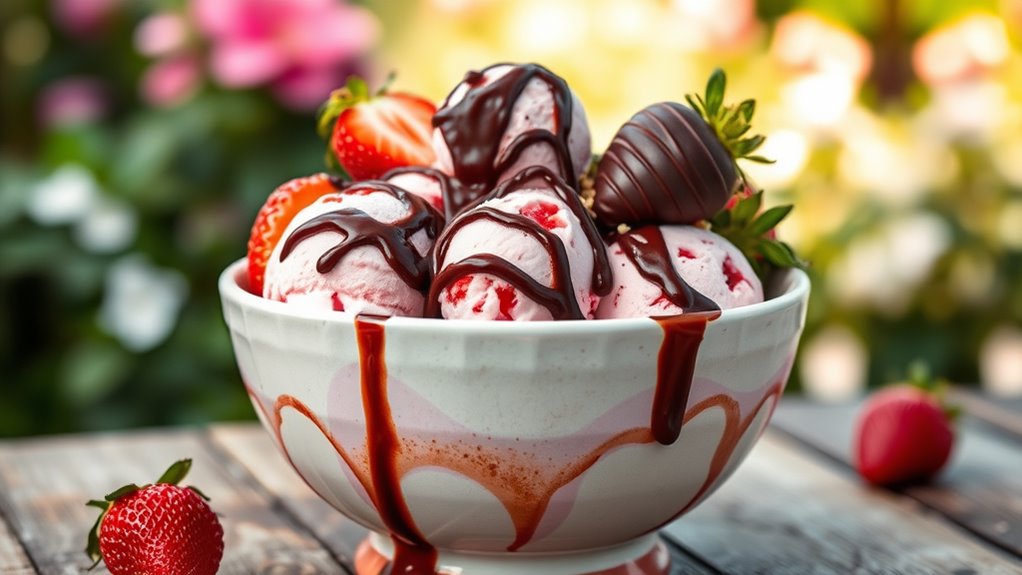

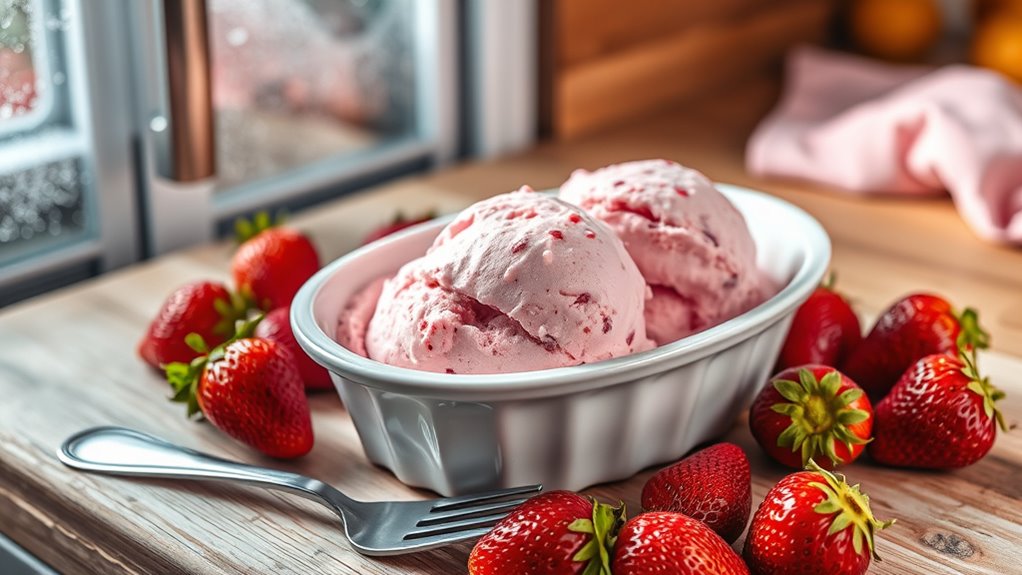
Chocolate Covered Strawberry Ice Cream is a delightful summer treat that combines fresh strawberries and rich chocolate for a revitalizing dessert. With its creamy texture and a perfect balance of sweet and tangy flavors, it’s sure to please everyone. You’ll love how easy it is to make at home, allowing you to customize it to your taste. Want to learn how to whip up this delicious treat and more ideas? There’s plenty more to discover!
Key Takeaways
- Chocolate Covered Strawberry Ice Cream blends fresh strawberries and rich chocolate for a delightful summer treat suitable for all ages.
- The recipe includes simple ingredients like strawberries, cream, milk, sugar, chocolate chips, and coconut oil, making it easy to prepare at home.
- To prepare, freeze sliced strawberries, melt chocolate, blend with other ingredients, and fold in whipped cream for a light texture.
- The ice cream features a creamy texture and a sweet-tangy balance, perfect for chocolate and fruit lovers alike.
- Ideal for summer gatherings, it can be customized with various toppings, enhancing its appeal for special occasions or casual enjoyment.
History
Chocolate covered strawberries have a rich history that dates back centuries, weaving together the stories of chocolate and strawberries themselves.
You might be surprised to learn that chocolate originated in ancient Mesoamerica, where the Aztecs and Mayans cherished it as a bitter drink. As chocolate made its way to Europe, it transformed into the sweet treat we recognize today.
Meanwhile, strawberries have been enjoyed since Roman times, revered for their flavor and medicinal properties. Combining these two delights took time, but by the 18th century, the pairing gained popularity in desserts.
As you indulge in chocolate covered strawberries, you’re tasting a fusion of cultures and traditions that have evolved, creating a beloved treat that continues to enchant people around the world.
Recipe
Indulge in the delightful combination of chocolate and strawberries with this Chocolate Covered Strawberry Ice Cream recipe. Perfect for a summer treat or a special dessert, this creamy ice cream captures the essence of fresh strawberries enveloped in rich chocolate. The sweetness of the strawberries pairs perfectly with the decadence of chocolate, making it a favorite for both kids and adults alike.
Plus, making your own ice cream allows you to control the ingredients and customize it to your taste preferences. To begin your ice cream adventure, gather your ingredients and equipment. You’ll need an ice cream maker for the best texture, but you can also make this without one by following a few extra steps. This recipe is simple enough for beginners but yields a gourmet dessert that will impress anyone who tries it.
Making your own ice cream lets you customize flavors and control ingredients, ensuring a delicious treat that everyone will love.
Let’s plunge into the ingredients and get started on this delicious frozen treat!
Ingredients:
- 2 cups fresh strawberries, hulled and sliced
- 1 cup granulated sugar
- 2 cups heavy cream
- 1 cup whole milk
- 1 teaspoon vanilla extract
- ½ cup semi-sweet chocolate chips
- 2 tablespoons coconut oil
Instructions:
In a medium saucepan, combine the sliced strawberries and half a cup of sugar, stirring gently to combine. Allow the mixture to sit for about 20 minutes until the strawberries release their juices.
In a separate bowl, whisk together the heavy cream, whole milk, the remaining half cup of sugar, and vanilla extract until smooth. Blend the strawberry mixture into the cream mixture until well combined. Pour this mixture into your ice cream maker and churn according to the manufacturer’s instructions.
Meanwhile, melt the chocolate chips and coconut oil together in a microwave or double boiler until smooth. Once the ice cream reaches a soft-serve consistency, drizzle the melted chocolate into the ice cream, gently folding it in to create a marbled effect.
Transfer the ice cream to a container and freeze for at least 4 hours until firm.
Extra Tips:
For an extra layer of flavor, consider adding a pinch of salt to the strawberry mixture to enhance the sweetness. If you don’t have an ice cream maker, pour the mixture into a shallow dish and freeze, stirring every 30 minutes for the first few hours to break up any ice crystals.
You can also customize this recipe by mixing in crushed graham crackers or nuts for added texture. Enjoy your homemade chocolate covered strawberry ice cream on a hot day or as a delightful dessert any time of year!
Cooking Steps
To make your chocolate covered strawberry ice cream, you’ll start by preparing the strawberries for freezing.
Next, melt the chocolate in the microwave and blend all the ingredients until smooth.
Finally, fold in the whipped cream and chill the mixture in the freezer for a delicious treat.
Step 1. Prepare Strawberries for Freezing
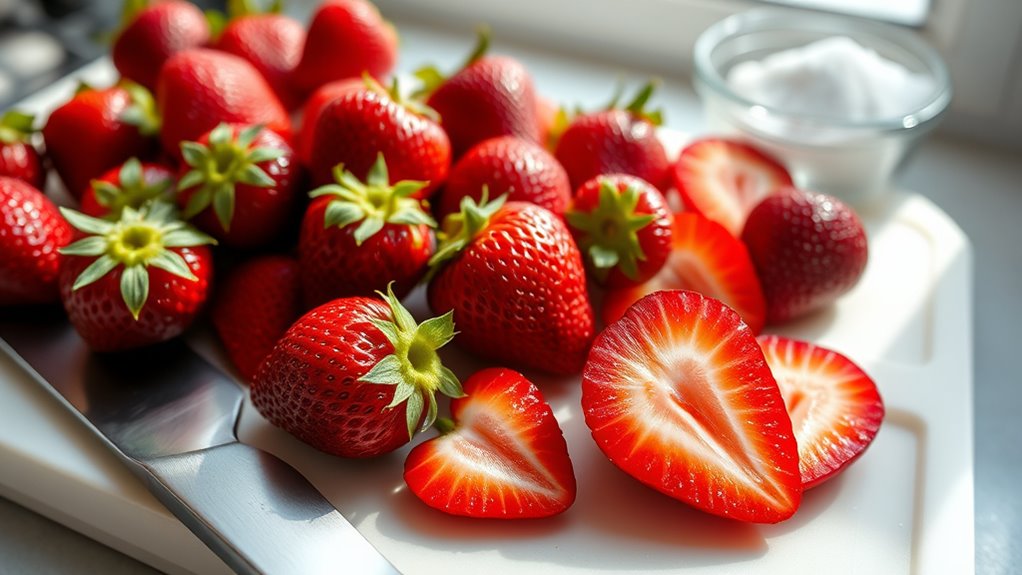
Before you freeze your strawberries, it’s essential to prepare them properly to guarantee they maintain their flavor and texture. Start by selecting ripe, firm strawberries and washing them under cool running water.
Remove the green stems and leaves, then gently pat the berries dry with a clean towel. This step helps prevent ice crystals from forming during freezing.
Next, you can slice the strawberries if you prefer smaller pieces for your ice cream. Spread them out in a single layer on a baking sheet lined with parchment paper, ensuring they don’t touch each other.
Freeze them for about two hours until solid. Once frozen, transfer the strawberries to an airtight container or freezer bag for longer storage, and you’re all set!
Step 2. Melt Chocolate in Microwave
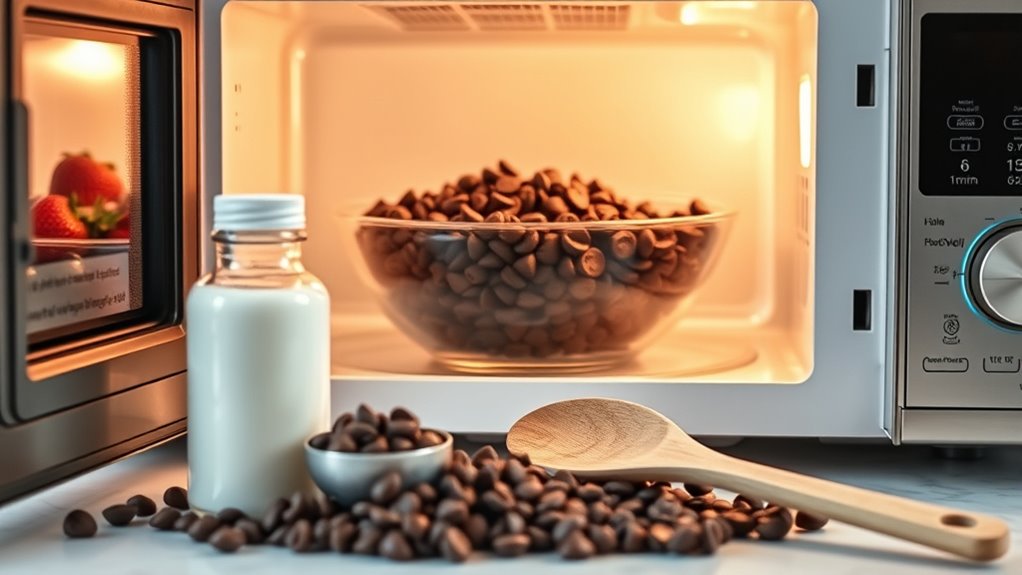
Melt chocolate in the microwave by breaking it into small, even pieces, which helps it heat uniformly.
Place the chocolate in a microwave-safe bowl, ensuring it’s not too full for easy stirring. Set your microwave to medium power to prevent burning.
Heat the chocolate in short bursts of 20-30 seconds, stirring between each interval. This helps distribute the heat and allows you to monitor the melting process.
Once the chocolate starts to soften, you can reduce the heating time to 10-15 seconds. Continue until the chocolate is mostly melted, then stir until smooth and glossy.
Be careful not to overheat, as chocolate can seize up quickly. Now you’re ready to coat those strawberries perfectly!
Step 3. Blend Ingredients Until Smooth
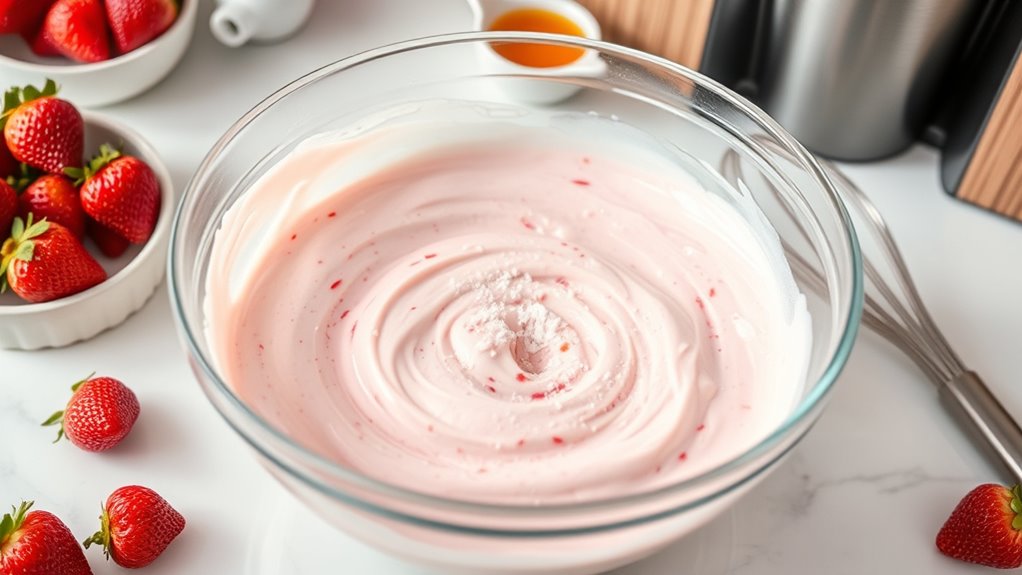
Blend the ingredients until smooth to create a creamy base for your ice cream.
Start by adding the melted chocolate, fresh strawberries, and any additional ingredients like milk or sugar into your blender.
Make certain the strawberries are hulled and cut into smaller pieces for easier blending.
Secure the lid tightly, then pulse the mixture until it’s fully combined and silky. You want to achieve a uniform consistency without any lumps.
If the mixture is too thick, you can add a splash of milk to help it along.
Once you’re satisfied with the texture, stop blending.
This step is essential, as a smooth base guarantees a delightful mouthfeel in your finished ice cream.
Get ready for the next steps!
Step 4. Fold in Whipped Cream

Now that you have a smooth and creamy base, it’s time to fold in the whipped cream.
Grab a large mixing bowl and add the whipped cream to your base. Using a rubber spatula, gently scoop from the bottom and fold the whipped cream over the mixture.
Be careful not to stir too vigorously; you want to maintain that light, airy texture. Continue folding until the whipped cream is evenly incorporated, and you can’t see any streaks.
This step is essential for achieving that luscious ice cream consistency. Once everything’s combined, take a moment to admire the fluffy, rich texture before moving on to the next step.
Your chocolate-covered strawberry ice cream is already looking irresistible!
Step 5. Chill Mixture in Freezer
After you’ve successfully folded in the whipped cream, it’s essential to chill the mixture in the freezer.
Pour the creamy concoction into an airtight container, ensuring it’s filled to about three-quarters full to allow for expansion as it freezes.
Smooth the top with a spatula for an even surface. Cover the container tightly to prevent ice crystals from forming.
Pop it in the freezer and let it chill for at least four hours, or until it’s firm enough to scoop.
While you wait, resist the urge to peek too often, as this can affect the freezing process.
Once it’s set, you’ll be rewarded with a delightful, creamy chocolate-covered strawberry ice cream ready to serve! Enjoy!
Final Thoughts
While you may have tried countless ice cream flavors, the combination of chocolate and strawberry in this delightful treat is sure to stand out.
This ice cream isn’t just a dessert; it’s an experience that brings joy with every scoop. The rich, creamy texture pairs perfectly with the sweet and tangy notes of strawberries, creating a mouthwatering balance.
You’ll appreciate how easy it’s to make at home, allowing you to customize the sweetness and chocolatey goodness to your liking.
Whether you’re enjoying it on a hot summer day or serving it at a gathering, it’s bound to impress.
Frequently Asked Questions
Can I Use Frozen Strawberries for This Ice Cream?
Absolutely, you can use frozen strawberries for your ice cream! They’ll add a delicious flavor and a creamy texture.
Just make sure to thaw them a bit before blending; this helps achieve a smoother consistency. If you want a stronger strawberry taste, consider blending them with a bit of sugar or sweetener.
Remember to adjust the sugar in your recipe, as frozen strawberries can sometimes be a little less sweet than fresh ones. Enjoy!
How Long Does Homemade Ice Cream Last in the Freezer?
Homemade ice cream can last about two to three weeks in the freezer if stored properly.
Make sure you keep it in an airtight container to prevent freezer burn and maintain its creamy texture.
However, the sooner you enjoy it, the better, as the flavor and texture may degrade over time.
Is There a Dairy-Free Option for This Recipe?
If you’re looking to whip up a dairy-free treat, you’ve hit the jackpot!
You can easily substitute traditional dairy with coconut milk or almond milk in your recipe. Just make sure to choose a rich, creamy version for that luscious texture.
You’re gonna want to add a dash of vanilla extract to enhance the flavor.
What Are Some Alternative Toppings for This Ice Cream?
If you’re looking for alternative toppings, you’ve got plenty of delicious options!
Consider chopped nuts for a crunchy texture, or shredded coconut for a tropical twist. Fresh fruit like blueberries or raspberries can add a burst of flavor, while granola gives a satisfying crunch.
Don’t forget about drizzling caramel or honey for extra sweetness. You can even sprinkle some crushed cookies or candy for a fun mix.
Get creative and enjoy your ice cream!
Can I Make This Ice Cream Without an Ice Cream Maker?
Did you know that over 70% of ice cream lovers enjoy homemade varieties?
You can definitely make ice cream without an ice cream maker! Simply whip heavy cream until soft peaks form, then fold in sweetened condensed milk and your flavorings.
Pour the mixture into a suitable container and freeze for about 4-6 hours. Stir it every hour for a creamier texture.
Enjoy your delicious homemade treat whenever you want!

Giulia is the creative force behind our content strategy. With a knack for storytelling and a deep understanding of what our readers want, she plans and develops the content that keeps “Icecream Hater” fresh and exciting. Giulia works closely with the editorial team to ensure that every article, recipe, and review aligns with our mission and vision. She aims to inspire our readers to explore, create, and enjoy ice cream in new and innovative ways.