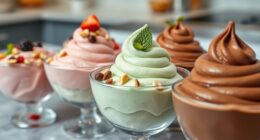
To make delicious blackberry ice cream, you’ll need fresh blackberries, heavy cream, whole milk, sugar, vanilla extract, salt, and lemon juice. Start by blending the blackberries with the cream mixture until smooth. Chill it for an hour, then churn it in an ice cream maker until it reaches a soft-serve consistency. Serve with extra blackberries on top for a revitalizing treat. There’s so much more to explore about this classic dessert and its delightful history.
Key Takeaways
- Gather ingredients: 2 cups fresh blackberries, 1 cup heavy cream, 1 cup whole milk, 3/4 cup sugar, vanilla extract, salt, and lemon juice.
- Rinse blackberries, blend with cream mixture until smooth, and adjust sweetness to taste.
- Chill the blended mixture in the refrigerator for about one hour before churning.
- Pour the chilled mixture into an ice cream maker and churn until it reaches a soft-serve consistency.
- Serve the blackberry ice cream with fresh blackberries and optional toppings for added flavor.
History
Blackberry ice cream has a rich history that dates back to the early days of ice cream making. You’ll find that blackberries, native to North America, were often used in early desserts.
As ice cream gained popularity in the 18th century, creative cooks began incorporating local fruits into their recipes. The combination of sweet blackberries and creamy ice cream quickly became a favorite.
In the 19th century, with the advent of ice cream machines, making blackberry ice cream became easier, allowing more households to enjoy this delightful treat.
As you explore its origins, you’ll appreciate how this luscious dessert reflects regional flavors and the evolution of ice cream-making techniques.
Today, blackberry ice cream remains a beloved classic, celebrating both history and taste.
Recipe
Blackberry ice cream is a delightful summer treat that captures the essence of fresh, juicy blackberries. With their sweet-tart flavor and vibrant color, blackberries make for an invigorating dessert that’s perfect for hot days. This homemade ice cream isn’t only easy to make but also a fantastic way to showcase seasonal berries. Whether you’re enjoying it on its own or pairing it with a slice of pie, this blackberry ice cream is sure to impress.
Indulge in the vibrant flavors of blackberry ice cream, a refreshing summer delight that’s perfect for any occasion.
To create this delicious dessert, you’ll need just a handful of ingredients, many of which you might already have in your kitchen. The process involves blending the blackberries with cream and sugar, then churning it to create a smooth, creamy texture. While it may take a bit of time to freeze, the wait will be well worth it when you take your first bite of this luscious treat.
Ingredients:
- 2 cups fresh blackberries
- 1 cup heavy cream
- 1 cup whole milk
- 3/4 cup granulated sugar
- 1 teaspoon vanilla extract
- Pinch of salt
- Juice of 1/2 lemon
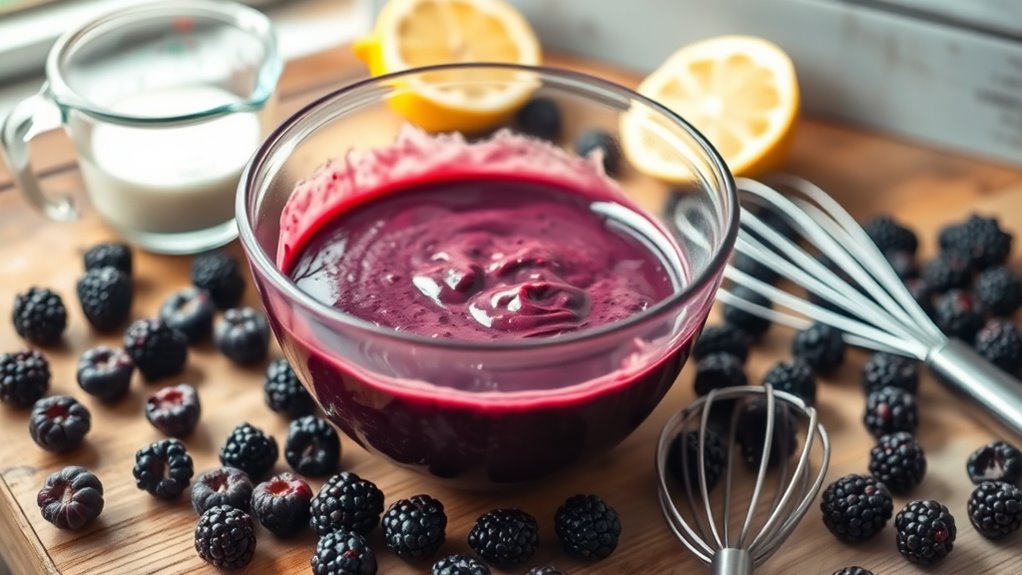
To make the blackberry ice cream, start by washing the blackberries thoroughly and placing them in a blender. Blend until smooth, then strain the mixture through a fine mesh sieve to remove the seeds, if desired.
In a mixing bowl, combine the blackberry puree with the heavy cream, whole milk, sugar, vanilla extract, salt, and lemon juice. Whisk until the sugar is dissolved and everything is well combined.
Pour the mixture into an ice cream maker and churn according to the manufacturer’s instructions until it reaches a soft-serve consistency. Transfer the ice cream to an airtight container and freeze for at least 4 hours or until firm.
When making blackberry ice cream, it’s important to use ripe blackberries for the best flavor. You can also experiment with the sweetness by adjusting the amount of sugar to your taste.
If you don’t have an ice cream maker, you can pour the mixture into a shallow dish and stir it every 30 minutes until it reaches the desired consistency. Enjoy your homemade blackberry ice cream within a week for the best taste and texture.
Cooking Steps
To make your blackberry ice cream, you’ll start by preparing the blackberries for blending.
Next, blend them with the cream mixture to create a smooth base.
After that, you’ll chill the mixture before freezing it in your ice cream maker.
Step 1. Prepare Blackberries for Blending

Before you start blending, it’s important to prepare the blackberries properly. First, rinse the blackberries under cold running water to remove any dirt or residue. Gently pat them dry with a clean kitchen towel or paper towel to avoid excess moisture.
Next, check for any spoiled or mushy berries, and discard them to guarantee a smooth texture in your ice cream. If you prefer a sweeter flavor, consider tossing the blackberries with a little sugar and letting them sit for about 10-15 minutes. This step enhances their natural sweetness and allows the juices to release.
Once you’ve prepared the blackberries, you’re ready to move on to blending, creating a delightful base for your blackberry ice cream.
Step 2. Blend With Cream Mixture

Combine the prepared blackberries with the cream mixture for a luscious ice cream base.
Pour the blackberries into a blender or food processor, and add your cream mixture. Blend on medium speed until the ingredients are well incorporated, creating a smooth and creamy texture.
If you prefer a chunkier ice cream, pulse the mixture a few times to retain some blackberry pieces.
Taste the blend and adjust sweetness if needed, adding a little sugar or honey to enhance the flavor.
Once you’re satisfied with the taste and consistency, transfer the mixture to an airtight container. Smooth the top with a spatula to minimize air exposure.
This step sets you up for deliciously creamy blackberry ice cream!
Step 3. Chill Mixture for One Hour
After you’ve blended the blackberries with the cream mixture, it’s important to chill the mixture for about one hour.
This step is essential for achieving the creamy texture you want in your ice cream. Pour the mixture into a bowl or container that’s easy to cover. Make sure it’s sealed tightly to prevent any unwanted flavors from seeping in.
Place it in the refrigerator and resist the urge to skip this step—chilling helps the flavors meld together beautifully. You can use this time to clean up your kitchen or prepare any toppings you’d like to serve with your ice cream later.
Once the hour’s up, you’ll be ready to take the next exciting step in your ice cream-making adventure!
Step 4. Freeze Mixture in Ice Cream Maker

Now it’s time to churn your chilled mixture in the ice cream maker.
Pour the blackberry mixture into the ice cream maker’s bowl, ensuring it’s not overfilled. Turn on the machine and let it churn according to the manufacturer’s instructions—usually about 20 to 30 minutes.
You’ll notice the mixture thickening and becoming creamy as it freezes. Keep an eye on the texture; it should resemble soft-serve ice cream when it’s ready.
If you want a firmer consistency, transfer the churned ice cream into an airtight container and freeze it for an additional 2 to 4 hours. This extra step helps it set perfectly for that delightful scoop later on.
Enjoy the anticipation of your homemade blackberry ice cream!
Step 5. Serve With Fresh Blackberries
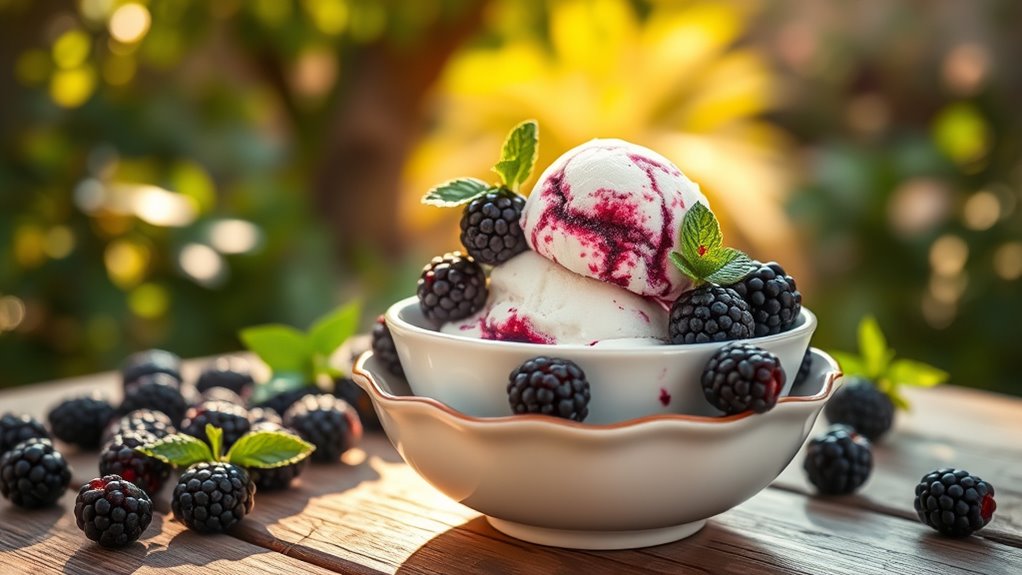
To elevate your blackberry ice cream experience, serve it with fresh blackberries for a burst of flavor and texture.
Start by washing a handful of ripe blackberries under cool water. Pat them dry gently with a paper towel.
Next, scoop generous portions of your homemade blackberry ice cream into bowls or cones. Arrange the fresh blackberries on top or alongside the ice cream to create an appealing contrast.
For an extra touch, drizzle a little honey or a sprinkle of sugar over the berries to enhance their sweetness. You can even add a few mint leaves for color and a revitalizing hint.
Enjoy this delightful combination as a perfect summer treat that’s sure to impress!
Final Thoughts
As you savor your homemade blackberry ice cream, it’s clear that this delightful treat is worth the effort.
You’ve transformed simple ingredients into a creamy masterpiece that bursts with flavor. Whether you enjoy it on a hot summer day or as a special dessert, each scoop brings a taste of indulgence.
Don’t forget to share it with friends and family; they’ll appreciate the time and love you put into making it.
Experimenting with different toppings or mix-ins can also elevate your creation to new heights.
Remember, the joy of this recipe lies not just in the final product but in the process itself.
Frequently Asked Questions
Can I Use Frozen Blackberries Instead of Fresh Ones?
Using frozen blackberries can be like diving into a rejuvenating pool on a hot summer day. They’re convenient and often just as tasty as fresh ones.
When you blend them into your mix, they’ll provide that delightful burst of flavor. Just remember, frozen fruit might release more liquid, so adjust your recipe accordingly.
How Long Does Homemade Blackberry Ice Cream Last in the Freezer?
Homemade blackberry ice cream typically lasts about two to three months in the freezer.
To keep it tasting fresh, store it in an airtight container to prevent freezer burn. You should also let it sit out for a few minutes before serving to make scooping easier.
If you notice any changes in texture or flavor, it might be time to toss it. Enjoy your treat while it’s at its best!
What Equipment Do I Need to Make Blackberry Ice Cream?
To make delicious ice cream, you’ll need a few key pieces of equipment. First, grab an ice cream maker; it’s essential for achieving that creamy texture.
You’ll also want a mixing bowl for combining your ingredients and a whisk for blending. A measuring cup and spoons will help you get the right amounts.
Finally, have some airtight containers ready for storing your homemade treat in the freezer. Enjoy your ice cream-making adventure!
Can I Substitute Other Fruits for Blackberries in This Recipe?
Sure, you can definitely substitute other fruits for blackberries in the recipe!
Think about using strawberries, raspberries, or blueberries for a different flavor. Just keep in mind that the sweetness and tartness may vary, so you might need to adjust the sugar accordingly.
Experimenting with fruits like peaches or mangoes can also yield delicious results.
Don’t hesitate to get creative and find your favorite combinations while making your ice cream!
Is This Blackberry Ice Cream Recipe Dairy-Free?
You’ll want to check the ingredients closely to determine if the recipe is dairy-free.
If it uses coconut milk, almond milk, or any non-dairy alternatives, then you’re in the clear!
However, if it includes heavy cream or milk, it won’t be dairy-free.
Always look for labels and double-check to verify you’re avoiding dairy if that’s your goal.
Substituting ingredients might also help you achieve a delicious dairy-free treat!