
You can make creamy ice cream at home without a machine by freezing your mixture and then whipping or stirring it regularly to break up ice crystals, creating a smooth texture. Use basic tools like a freezer-safe dish, a mixing bowl, and a handheld blender to blend and aerate the mixture. Keep freezing, stirring, or blending every 30-45 minutes until it reaches your desired consistency. Keep exploring for tips to perfect your homemade ice cream!
Key Takeaways
- Prepare a chilled base mixture of milk, cream, sugar, and flavorings, then pour into a freezer-safe container.
- Freeze the mixture for 3-4 hours, stirring or blending every 30-45 minutes to prevent ice crystals.
- Use a handheld blender during freezing to blend and incorporate air for a smooth, creamy texture.
- Add mix-ins like fruit, nuts, or flavor extracts during blending or after initial freezing for enhanced flavor.
- Keep the mixture cold and repeat stirring or blending to achieve fluffy, machine-like ice cream without special equipment.
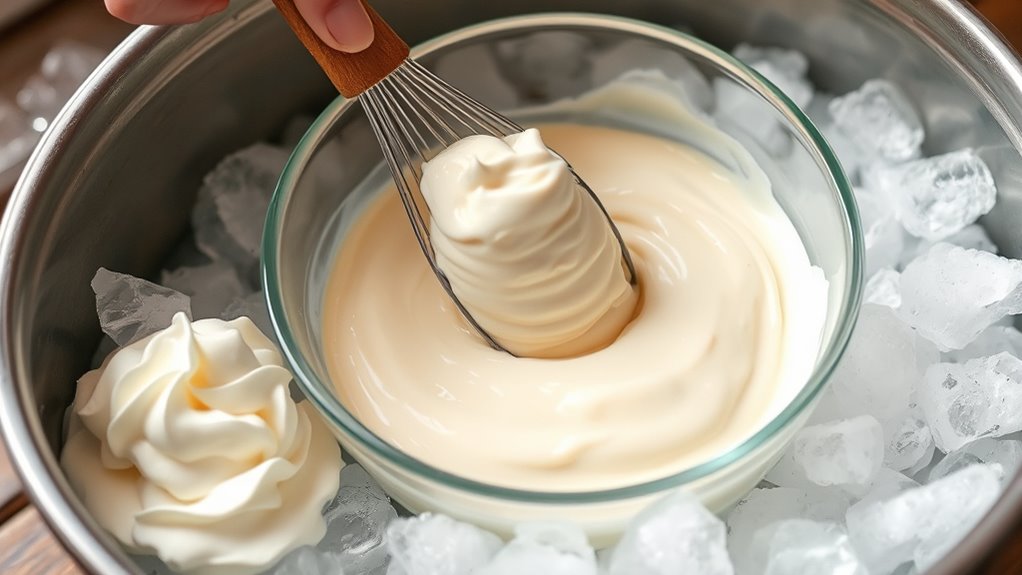
Making ice cream at home doesn’t require a fancy machine; with just a few simple ingredients and some basic techniques, you can create delicious, creamy treats anytime. One of the easiest methods is the freeze and whip approach, which relies on minimal equipment—just your freezer, a mixing bowl, and a handheld blender if you want to speed up the process. Handheld blenders are versatile tools that can help you achieve a smooth, even consistency by blending the mixture thoroughly once it’s partially frozen. Using them makes it easier to incorporate flavor variations, whether you’re adding fresh fruit, chocolate chips, or swirls of caramel. The key is to keep the mixture cold and to blend frequently during the freezing process to prevent ice crystals from forming, resulting in a creamier texture.
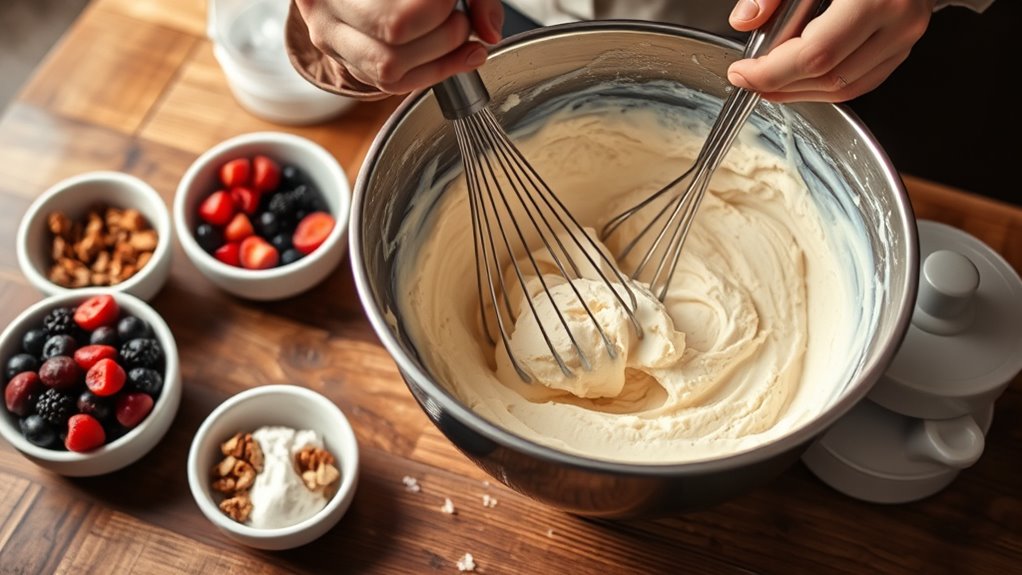
To start, you prepare your base—usually a mixture of milk, cream, sugar, and flavoring. After combining these ingredients, you chill the mixture in the refrigerator for at least an hour. Once chilled, pour it into a shallow dish or a freezer-safe container. Every 30 to 45 minutes, take the container out and give it a good stir or blend with your handheld blender. This step breaks up ice crystals and introduces air, making the ice cream fluffy and smooth. Repeat this process for 3-4 hours or until the mixture reaches your desired consistency. If you want to experiment with flavor variations, this is the perfect time to mix in chopped fruit, nuts, or flavor extracts—your handheld blender can help evenly distribute these additions, enhancing every spoonful. Incorporating biodiversity principles, such as using locally sourced ingredients, can also add an eco-friendly touch to your homemade treat.
The freeze and whip method is flexible, allowing you to customize your ice cream in countless ways. For example, if you prefer a richer taste, use full-fat cream; for a lighter option, swap some of the cream for milk. You can also make dairy-free versions using coconut milk or almond milk. When it comes to flavor variations, the possibilities are endless—think strawberries and vanilla, cookie dough with chunks of chocolate, or even a hint of mint. Just add these ingredients during the blending stage or fold them in after the initial freezing process. The simplicity of this method means you can enjoy homemade ice cream whenever the craving hits, with no special equipment required. Plus, it’s a fun activity to do with family or friends, allowing everyone to get creative with flavors and toppings.
Frequently Asked Questions
Can I Make Dairy-Free Ice Cream Using These Methods?
Yes, you can make dairy-free ice cream using freeze and whip methods. You just need to choose dairy-free alternatives like coconut milk, almond milk, or cashew cream, and incorporate vegan ingredient options such as agave syrup or maple syrup for sweetness. Blend your ingredients until smooth, then freeze and whip periodically to achieve a creamy texture. These methods work well with various vegan ingredients, giving you delicious dairy-free ice cream at home.
How Long Does It Take to Freeze Ice Cream Without a Machine?
Think of freezing your ice cream as planting a seed; it takes patience to grow. Usually, it takes about 4 to 6 hours to freeze ice cream without a machine, but sometimes longer depending on your freezer’s temperature. During this freezing time, small ice crystal formation occurs, gradually turning your mixture into a creamy treat. Stirring every 30 minutes helps prevent large ice crystals, making your ice cream smoother.
What Are Some Flavor Variations Suitable for These Techniques?
You can explore flavor variations like fruit-infused options such as berries, mango, or kiwi for a fresh twist. Chocolate variations work well too, using cocoa powder or melted chocolate mixed into your base. For added excitement, try swirls of caramel or fruit preserves. These techniques make it easy to customize your ice cream with vibrant, delicious flavors, giving you endless possibilities without needing a machine.
Is There a Way to Prevent Ice Crystals From Forming?
Think of ice crystals as tiny rebels that can ruin your creamy dreams. To prevent ice crystal formation, you should focus on ice crystal control by stirring your mixture frequently during freezing. Adding ingredients like alcohol, sugar, or stabilizers enhances texture, making it smoother and less prone to crystal growth. Proper sealing and quick freezing also help maintain consistency, ensuring your homemade ice cream stays velvety and delightful with every bite.
Can I Make Large Batches of Ice Cream With These Methods?
Yes, you can make large batches of ice cream using freeze and whip methods. Just make certain your batch size fits your container’s capacity and is easy to stir or whip regularly to prevent ice crystals. For storage tips, cover the ice cream tightly with plastic wrap or a lid to prevent freezer burn and maintain smooth texture. Stir every 30 minutes during freezing for best results with larger batches.
Conclusion
Now that you’ve mastered the freeze and whip method, think of your ice cream as a blank canvas, ready to be painted with your favorite flavors. Each stir is like adding a splash of color, transforming simple ingredients into a delightful masterpiece. No machine needed—just your creativity and patience. As you enjoy your homemade treat, remember that sometimes the sweetest things are those made with a little effort and a lot of love, symbolizing your own sweet journey.